

How to Use Needle Nose Pliers for Electrical Work: Quick Answer
Needle nose pliers are essential electrical tools for gripping, bending, and cutting small wires with precision. Hold the pliers with a firm grip, position your fingers on the handles for control, and use the tapered jaws to access tight spaces. These versatile tools excel at stripping insulation, forming wire loops, and manipulating components in confined areas. Proper technique prevents wire damage and ensures safe, professional results. Always wear safety glasses and work on de-energized circuits to prevent electrical hazards.

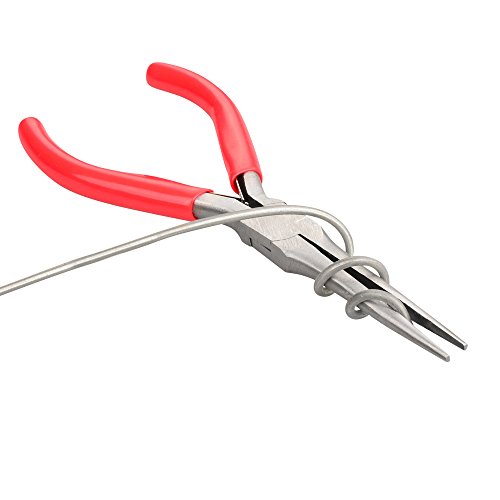
ZUZUAN Long Needle Nose Pliers-6''&8'', with Wire Cutter, 2pcs
- 【High Quality Material】 The nose pliers body is made of high quality carbon steel, and the handle is made of TPR material in accordance with environmental protection standards; 6 inch needle-nose pliers force saving spring design, easy to use effortless; The nose pliers are well made, the jaws are neat, the handle is comfortable and non-slip; The blade is sharp and durable, with stronger shear force and longer service life
- 【Strong Cutting Force】The cutting edge hardness of HRC60-62, shear hardness of HRC48-49, can easily cut single strand; The end of the nose pliers is neat, closed well, the head of the pliers is thick, and it is not easy to misposition and deformation when using
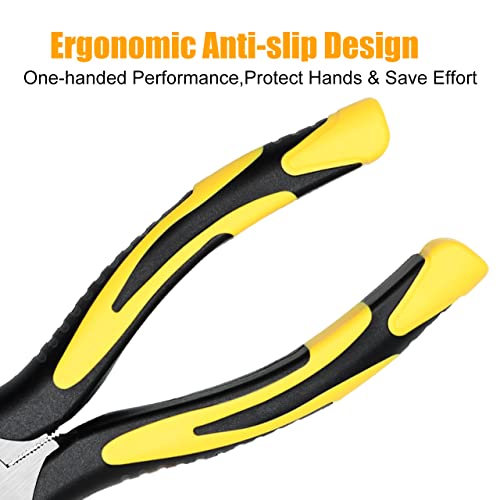
- 【Non-slip Grip】Handle grip is made of TPR material and ergonomic non-slip design, which can effectively relieve the fatigue of hand work. Oil resistant and non-slip design allows you to easily operate with one hand
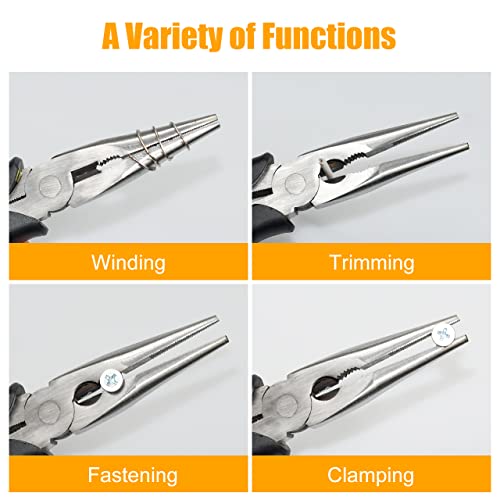
- 【Labor-saving Design】The needle-nose pliers are designed on the principle of lever. The length of the pliers wall is larger than the pliers head, so it saves more energy when using. Lengthen clamp head design, easy to use in narrow space; It has the functions of fastening, clamping, winding, cutting and stripping
- 【Widely Use】Can cut steel wire, copper wire, iron wire and other common metals, strong bite force, can easily reverse effectively fixed or loose screws and nuts
- Please note: Only the 6-inch sharp nose pliers have springs



As an Amazon Associate we earn from qualifying purchases. Product prices and availability are accurate as of the date/time indicated.
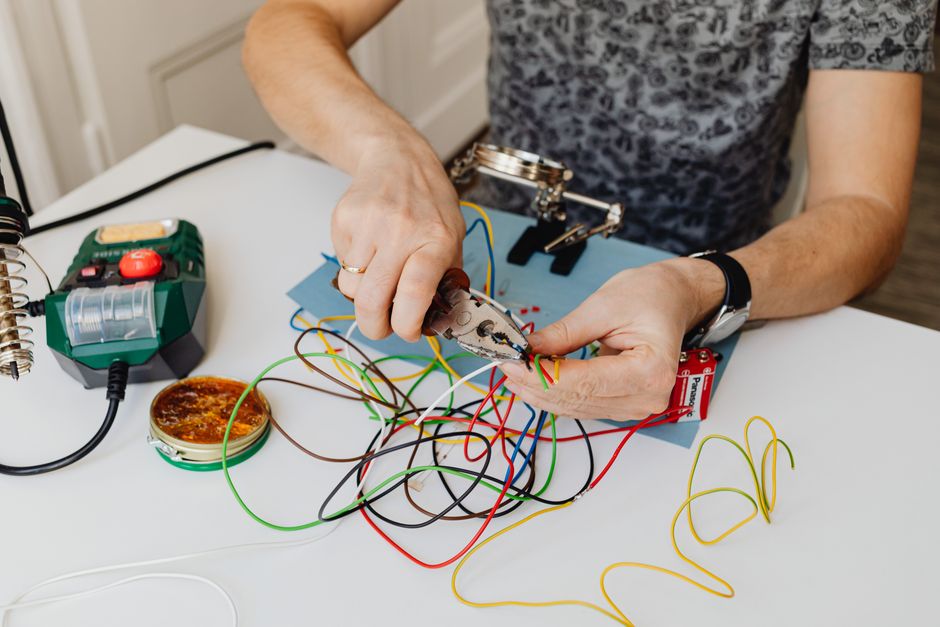
Electricians and DIY enthusiasts rely on needle nose pliers for detailed work that larger tools cannot accomplish. The long, narrow jaws allow access to cramped spaces behind walls and inside electrical boxes. Quality matters—invest in ergonomic models with insulated handles for safety and comfort during extended use. Understanding proper technique transforms this simple tool into a powerful asset for any electrical project.
Key Takeaway: Needle nose pliers are indispensable for precision electrical work, offering control and access that standard pliers cannot match.
What Are the Key Features of Needle Nose Pliers for Electrical Applications?
Needle nose pliers feature long, tapered jaws that taper to a fine point, enabling access to tight electrical spaces. The narrow design allows electricians to manipulate individual wires without disturbing adjacent components. Most electrical-grade models include cutting edges near the pivot point for trimming wires cleanly. Handle length typically ranges from 5 to 8 inches, providing leverage while maintaining control.
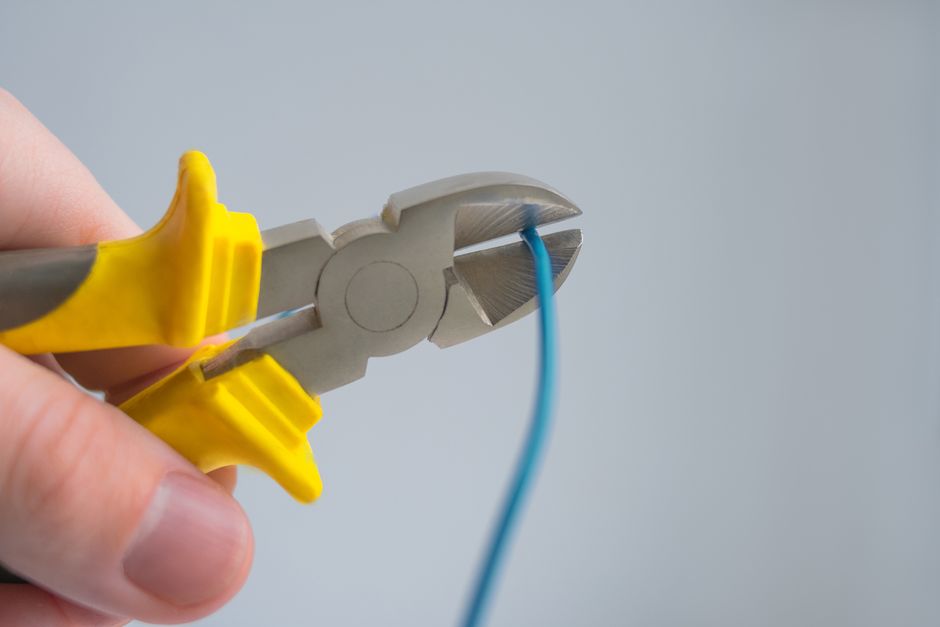
Quality electrical needle nose pliers offer several distinguishing characteristics:
- Insulated handles rated for electrical work, typically 1000V or higher.
- Hardened steel jaws that resist bending and maintain precision over time.
- Smooth, polished surfaces that prevent wire scratching and insulation damage.
- Comfortable grip design reducing hand fatigue during extended use.
- Built-in wire cutters for convenient trimming without switching tools.
Ergonomic design matters significantly in electrical work. Premium models feature cushioned handles that reduce strain during repetitive tasks. Look for pliers with smooth jaw surfaces—rough or serrated jaws can nick wire insulation, creating safety hazards.
Key Takeaway: Quality needle nose pliers combine precision jaws, insulated handles, and ergonomic design for safe electrical work.
How Do You Properly Grip and Control Needle Nose Pliers?
Proper grip technique is fundamental to effective electrical work with needle nose pliers. Position your thumb and index finger on the handles, allowing your remaining fingers to wrap naturally around the grip. Maintain a firm but relaxed hold—excessive tension causes hand fatigue and reduces control. Your wrist should remain straight to prevent strain during prolonged use.
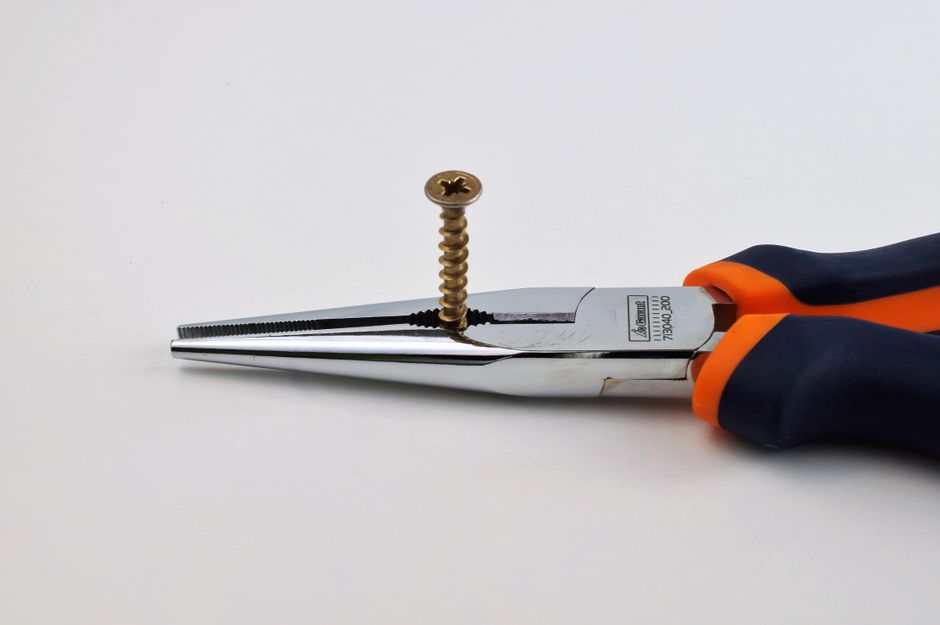
Grip Techniques for Different Tasks
Different electrical tasks require slightly adjusted grip positions. For wire bending, hold the pliers at a 45-degree angle to your body. This positioning provides mechanical advantage while maintaining visibility of the work area. When cutting wires, position the cutting edges perpendicular to the wire for clean, straight cuts.
Consider these grip variations:
- Precision grip: Use thumb and two fingers for delicate component manipulation.
- Power grip: Engage all fingers for cutting and heavy bending tasks.
- Pinch grip: Thumb and index finger only for accessing extremely tight spaces.
- Angled grip: Hold at 45 degrees for optimal wire bending and forming.
Hand position directly impacts accuracy and safety. Keep your hand stable by resting your pinky finger against the work surface when possible. This anchoring technique prevents slips that could damage wires or cause injury.
Key Takeaway: Proper grip technique combines firm control, ergonomic positioning, and hand stability for safe, accurate electrical work.
What Techniques Should You Use for Bending and Forming Wires?
Wire bending is one of the most common electrical applications for needle nose pliers. Creating loops for terminal connections requires precise, controlled movements. Start by positioning the wire perpendicular to the pliers’ jaws, approximately one-quarter inch from the tip. Apply steady pressure while rotating your wrist slowly to form a smooth, rounded loop.
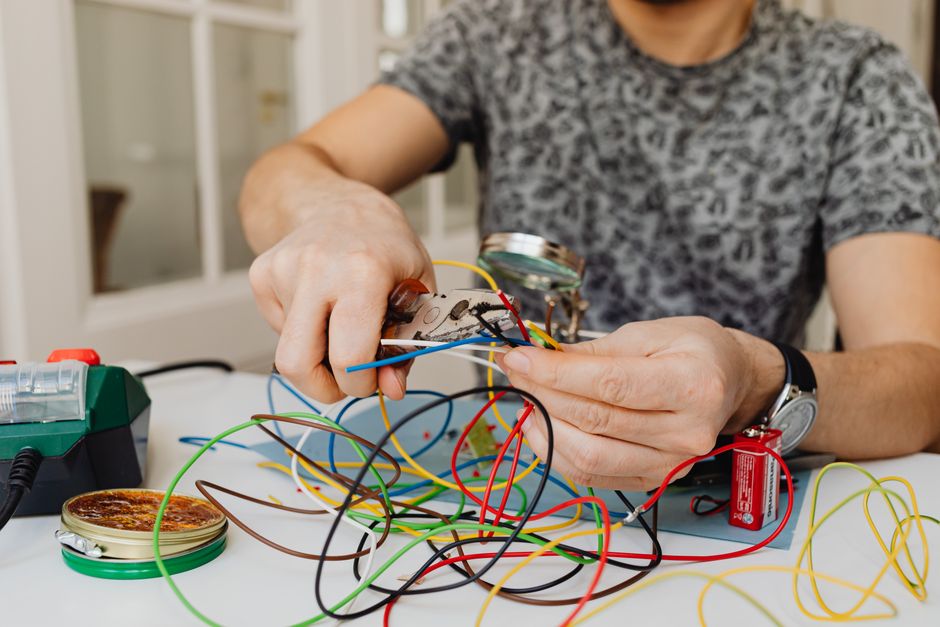
Step-by-Step Wire Loop Formation
Creating professional wire loops prevents connection failures and improves electrical safety. Follow these steps for consistent results:
- Insert the wire end into the pliers’ jaws at the correct depth.
- Rotate your wrist smoothly in a circular motion around the jaw.
- Maintain consistent pressure to create uniform loop diameter.
- Complete the loop until the wire end aligns with the starting point.
- Remove the pliers and verify the loop shape visually.
Loop size matters for proper electrical connections. Standard terminal loops should be approximately one-half inch in diameter. Oversized loops waste wire and create loose connections; undersized loops may not accommodate terminal screws properly. Practice on scrap wire until you develop consistent loop-forming skills.
Right-angle bends are equally important for routing wires through tight spaces. Position the wire at the desired angle, then apply steady pressure while rotating the pliers slightly. Avoid sharp, kinked bends that weaken wire and damage insulation.
Key Takeaway: Mastering wire bending techniques through controlled rotation and consistent pressure creates professional, reliable electrical connections.
How Do You Safely Strip and Manipulate Electrical Wire?
Wire stripping with needle nose pliers requires careful technique to avoid damaging the conductor underneath. Never use the cutting edges to score and pull insulation—this method frequently nicks copper wires. Instead, use dedicated wire strippers for this task, reserving needle nose pliers for repositioning and straightening stripped conductors.
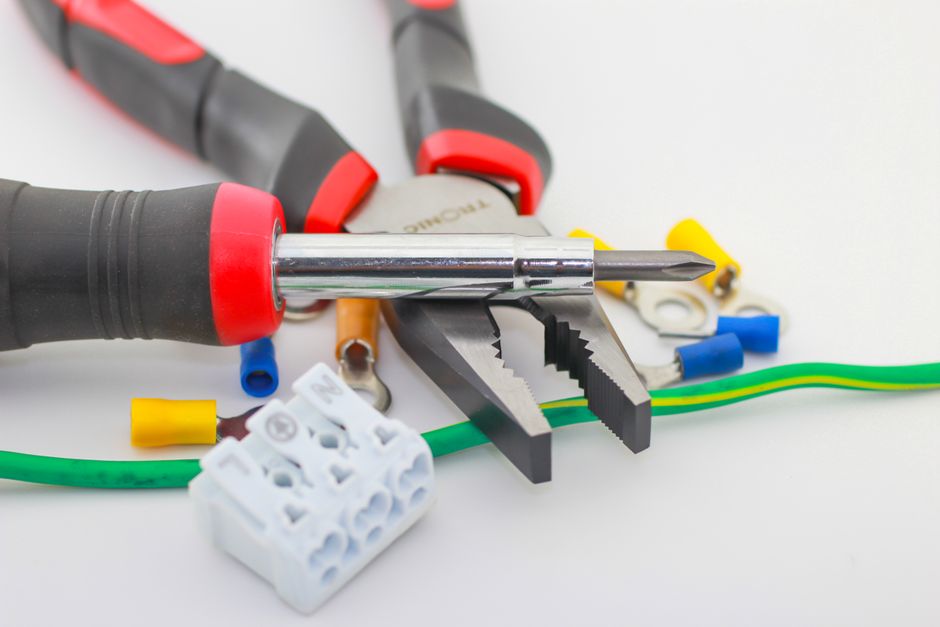
Safe Wire Handling Practices
Protecting wire integrity ensures electrical safety and connection reliability. These practices prevent common stripping and handling errors:
- Use wire strippers specifically designed for insulation removal, not pliers.
- Inspect stripped wires for nicks or cuts before connecting to terminals.
- Straighten bent conductors gently using steady, even pressure.
- Remove any loose insulation fragments before making connections.
- Avoid twisting wires excessively, which weakens the conductor.
When straightening kinked wires, work slowly and deliberately. Rapid, jerky movements can break conductors, particularly in smaller gauge wires. Position the pliers near the kink and apply gentle, steady pressure while rotating your wrist. Multiple light passes are preferable to one aggressive movement.
Needle nose pliers excel at separating twisted wire pairs without damaging insulation. Grasp each wire individually and gently pull apart while rotating slightly. This technique prevents accidental cuts and maintains conductor integrity.
Key Takeaway: Careful wire handling with needle nose pliers preserves conductor integrity and ensures safe, reliable electrical connections.
What Safety Precautions Are Essential When Using Needle Nose Pliers Electrically?
Electrical safety must always be your primary concern when working with live circuits or electrical components. Always de-energize circuits before beginning any electrical work using a proper circuit breaker or disconnect switch. Verify that circuits are truly de-energized using a non-contact voltage tester before touching any wires or components.
Critical Safety Requirements
These safety practices protect you from electrical hazards:
- Use only pliers with insulated handles rated for electrical work (1000V minimum).
- Wear safety glasses to protect eyes from wire fragments and insulation pieces.
- Test all circuits with a voltage tester before beginning work.
- Never work on live circuits unless absolutely necessary and properly trained.
- Keep your work area dry and free from water or moisture.
- Wear rubber-soled shoes to reduce electrical shock risk.
Handle insulation quality directly impacts your safety. Inspect handles before each use for cracks, worn spots, or damage. Compromised insulation provides no protection against electrical shock. Replace damaged pliers immediately rather than risk electrical injury.
Environmental conditions matter significantly in electrical work. Never work in wet conditions or with damp hands. Moisture dramatically reduces electrical resistance and increases shock risk. If your hands are sweaty, dry them thoroughly before handling electrical components.
Key Takeaway: Prioritizing electrical safety through proper de-energization, insulated tools, and careful technique prevents serious injury.
How Do You Choose High-Quality Needle Nose Pliers for Electrical Work?
Selecting quality needle nose pliers significantly impacts your electrical work success and safety. Professional-grade pliers cost more initially but provide superior precision, durability, and safety features. Look for reputable brands with established histories in electrical tool manufacturing. Reading customer reviews and checking professional recommendations helps identify reliable models.
Quality Indicators and Selection Criteria
These factors distinguish quality electrical pliers from inferior alternatives:
- Insulation rating of 1000V or higher for safe electrical work.
- Smooth, polished jaw surfaces that won’t damage wire insulation.
- Comfortable, cushioned handles designed for extended use.
- Hardened steel construction that resists bending and wear.
- Precision-ground jaws that maintain alignment and grip strength.
- Manufacturer warranty demonstrating confidence in product quality.
Test pliers before purchasing when possible. Check jaw alignment by looking through the gap—misaligned jaws reduce grip strength and precision. Examine handle comfort in your hand, ensuring the grip diameter matches your hand size. Quality pliers feel balanced and responsive, not clumsy or heavy.
Price alone doesn’t guarantee quality, but extremely cheap pliers almost certainly underperform. Expect to invest $15-40 in quality electrical needle nose pliers. This investment pays dividends through improved precision, safety, and longevity. Professional electricians often own multiple pairs for different specialized tasks.
Key Takeaway: Investing in quality, properly-rated needle nose pliers ensures safety, precision, and reliability for all electrical applications.
What Common Electrical Tasks Require Needle Nose Pliers?
Needle nose pliers are indispensable for numerous electrical tasks that demand precision and access to tight spaces. Creating terminal connections on switches, outlets, and light fixtures requires the fine control these pliers provide. Electricians use them constantly for wire manipulation in crowded electrical boxes where larger tools cannot fit.
Primary Electrical Applications
These common tasks demonstrate why needle nose pliers are essential electrical tools:
- Forming wire loops for screw terminal connections on switches and outlets.
- Bending wires at precise angles to fit into tight electrical box spaces.
- Straightening kinked or damaged wire conductors.
- Removing and repositioning individual wires in crowded junction boxes.
- Cutting wires to exact lengths in confined areas.
- Manipulating small components like wire nuts and terminal screws.
- Accessing wires behind existing components without disturbing connections.
Automotive electrical work frequently requires needle nose pliers for accessing tight engine compartment spaces. Marine electricians depend on them for salt-spray-resistant work in confined boat spaces. HVAC technicians use them for thermostat wire manipulation and connection. These versatile tools serve electricians across countless specializations.
Learning to use needle nose pliers efficiently saves significant time on electrical projects. Professionals keep multiple pairs in their toolkits—one for general work, one for delicate tasks, and backup pairs for emergencies. For related tool guidance, see our article on how to choose the right screwdriver for the job.
Key Takeaway: Needle nose pliers are essential for countless electrical tasks requiring precision, control, and access to confined spaces.
How Do You Maintain and Care for Needle Nose Pliers?
Proper maintenance extends needle nose pliers’ lifespan and preserves their precision and safety features. Clean pliers after each use, removing dirt, wire fragments, and insulation debris. Wipe handles with a dry cloth to prevent moisture accumulation. Store pliers in a dry location away from humidity, which corrodes steel and degrades insulation.
Maintenance and Storage Best Practices
These care practices keep your electrical pliers in optimal condition:
- Clean jaws with a soft brush or cloth after each use.
- Inspect handles regularly for cracks, wear, or insulation damage.
- Lubricate the pivot point occasionally with light machine oil.
- Store pliers in a toolbox or dedicated tool holder to prevent damage.
- Keep pliers separate from other metal tools to avoid jaw damage.
- Replace pliers immediately if insulation becomes damaged or worn.
The pivot point requires occasional attention to maintain smooth operation. A single drop of light machine oil applied to the pivot, followed by gentle opening and closing, restores smooth action. Avoid heavy oil or grease, which attracts dirt and reduces precision.
Inspect insulation regularly, especially on pliers used frequently. Small cracks in handles can expand rapidly, compromising electrical safety. At the first sign of insulation damage, retire the pliers and purchase replacements. The cost of replacement is trivial compared to electrical shock risk. For safe tool storage, review our guide on how to store power tools safely in a garage.
Key Takeaway: Regular cleaning, inspection, and proper storage preserve needle nose pliers’ precision, safety, and longevity.
What Advanced Techniques Improve Electrical Work Efficiency?
Experienced electricians develop advanced techniques that significantly improve work speed and quality. One-handed wire loop formation becomes possible with practice, freeing your other hand to position components. Developing muscle memory for consistent loop sizes eliminates the need for measuring tools. These skills develop through deliberate practice on scrap wire before applying techniques to live projects.
Efficiency-Boosting Techniques
Professional electricians employ these advanced methods:
- One-handed loop formation using thumb and wrist rotation for speed.
- Batch wire preparation, creating multiple loops before installation.
- Coordinated tool use, transitioning between pliers and screwdrivers seamlessly.
- Spatial planning, positioning components before final tightening.
- Double-checking connections before final torque application.
Developing consistent hand positions and movements reduces fatigue and improves accuracy. Many electricians develop personal techniques that work best with their hand size and grip strength. Experiment with different approaches on practice materials until you discover methods that feel natural and efficient.
Speed should never compromise accuracy or safety. Rushing electrical work causes mistakes that create fire hazards or equipment damage. Build speed gradually through repeated practice. Quality work performed efficiently is the professional standard.
Key Takeaway: Advanced techniques developed through deliberate practice improve electrical work efficiency while maintaining safety and quality standards.
How Can You Troubleshoot Common Needle Nose Pliers Issues?
Even quality pliers occasionally develop issues that affect performance. Jaw misalignment, reduced cutting effectiveness, and handle wear are common problems. Identifying and addressing these issues promptly prevents project delays and safety hazards. Most problems are preventable through proper use and maintenance.
Common Issues and Solutions
These troubleshooting steps address typical needle nose pliers problems:
- Misaligned jaws: Check alignment against light; replace if severely misaligned.
- Dull cutting edges: Sharpen with a fine whetstone or replace pliers.
- Stiff pivot: Apply light oil and work the joint gently until smooth.
- Cracked insulation: Replace pliers immediately for electrical safety.
- Loose handles: Tighten fasteners or replace if permanently loosened.
- Reduced grip strength: Verify jaw alignment and inspect for wear.
Prevention is far more effective than troubleshooting. Using pliers only for their intended purposes prevents most issues. Never use pliers as hammers or leverage tools, which bends jaws and damages handles. Respecting tool limitations ensures long service life and reliable performance.
When problems develop, assess whether repair or replacement is most cost-effective. Professional sharpening services can restore dull cutting edges affordably. However, misaligned jaws or damaged insulation typically warrant replacement for safety reasons.
Key Takeaway: Proper use and maintenance prevent most needle nose pliers issues; replace rather than repair when safety is compromised.
What Is the Conclusion on Using Needle Nose Pliers for Electrical Work?
Needle nose pliers are fundamental tools for any electrician or DIY enthusiast tackling electrical projects. Their precision, control, and access to tight spaces make them indispensable for wire manipulation, loop formation, and component positioning. Mastering proper grip techniques, wire handling, and safety practices transforms these simple tools into powerful assets for professional-quality electrical work.
Success with needle nose pliers depends on quality tool selection, proper technique development, and consistent safety practices. Invest in electrically-rated pliers with insulated handles and smooth jaws. Practice fundamental skills on scrap wire until movements become automatic. Always prioritize safety by de-energizing circuits and inspecting tools before use.
Whether you’re a professional electrician or homeowner tackling electrical projects, needle nose pliers deserve a prominent place in your toolkit. The techniques and practices described in this guide apply across residential, commercial, and industrial electrical applications. With proper training and experience, you’ll discover why electricians consider these humble tools absolutely essential for their craft.
Key Takeaway: Quality needle nose pliers, combined with proper technique and safety practices, enable professional electrical work across countless applications.
Recommended Products
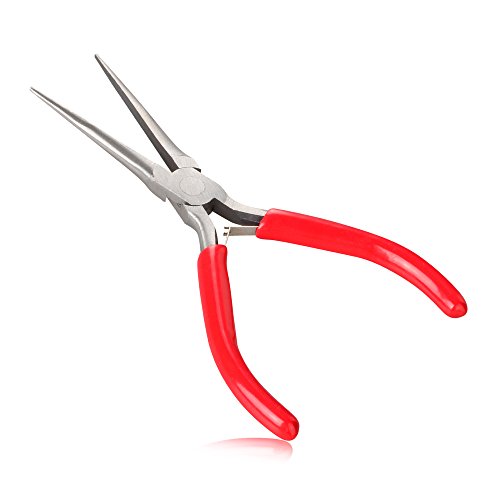
Dykes Needle Nose Pliers Extra Long Needle Nose Plier (6-Inch)
- 6-inch needle nose pliers with long tempered jaws for working in hard to reach areas, excellent for work in tight places.
- Tapered nose with fine tips for bending wire, jewelry making, computers maintenance, electronics repair, small object gripping ect.
- Great tool for general, hobby, or craft use, especially useful for jewelry craftsmen, artisans, electricians, and network engineers.
- Carbon steel construction for durability; Plastic-dipped handles for added comfort.
- Leaf Spring loaded design makes this long nose pliers easier to use and relieve fatigue.


As an Amazon Associate we earn from qualifying purchases. Product prices and availability are accurate as of the date/time indicated.

TOOLEAGUE 3Pcs Heavy Duty Pliers Set, 5 in 1 Pliers
- HIGH-QUALITY MATERIALS: The pliers tool set forged from high-quality chrome vanadium steel, the hardness is as high as HRC:58-62, the surface is hand-polished and polished. And the product is exquisitely crafted. It is an excellent multi-functional pliers toolset.
- 5 IN 1 FUNCTION: Pliers have multiple functions, such as easy winding, fast cutting, simple peeling, tight crimping, tightening, and unscrewing. One plier has 5 functions.Contains needle nose pliers, cutting pliers, wire stripper tool, It saves time and makes work more efficient.
- LABOR-SAVING DESIGN: The pliers kit are ergonomically designed, and the grips are made of PVC handles, which are comfortable to use. The eccentric and labor-saving design saves hand power when using and makes the operation more convenient.
- WIDE RANGE OF USES: The pliers tool set used in machinery, household appliances, automobiles, electricians, etc. It can cut 4mm copper wire, iron wire, and 2mm steel wire.
- PACKAGE CONTENT: A side cutting plier, a combination plier, a needle nose plier, and a storage bag for better storage and carrying.Polyvinyl Chloride (PVC)


As an Amazon Associate we earn from qualifying purchases. Product prices and availability are accurate as of the date/time indicated.
Frequently Asked Questions
Can I use regular needle nose pliers for electrical work?
Regular needle nose pliers lack electrical insulation and safety ratings, making them unsuitable for electrical work. Always use pliers specifically rated for electrical applications with 1000V or higher insulation. Regular pliers offer no protection against electrical shock and create serious safety hazards. Invest in properly-rated electrical pliers for any circuit work.
What size needle nose pliers work best for electrical tasks?
Six-inch needle nose pliers are ideal for most electrical work, offering excellent reach and control. Five-inch pliers work well for confined spaces, while eight-inch models provide additional reach for deep electrical boxes. Choose based on the typical spaces you’ll be working in. Many electricians keep multiple sizes for different applications.
How do I create a proper wire loop for terminal connections?
Insert the wire about one-quarter inch into the pliers’ jaws, then rotate your wrist smoothly in a circular motion. Maintain consistent pressure to create a uniform loop approximately one-half inch in diameter. Complete the rotation until the wire end aligns with the starting point. Practice on scrap wire until loops form consistently.
What should I do if my needle nose pliers’ insulation cracks?
Replace the pliers immediately. Cracked insulation compromises electrical safety and provides no protection against shock. Never attempt to repair insulation with tape or other materials—these fixes are temporary and unreliable. Purchase replacement pliers with proper electrical ratings.
Can needle nose pliers cut through thick electrical wire?
Most needle nose pliers cut wire up to 10 or 12 gauge effectively. Thicker wire requires dedicated wire cutters or bolt cutters. Check your pliers’ specifications for maximum cutting capacity. Using pliers beyond their rated capacity damages cutting edges and strains the tool.
How often should I replace needle nose pliers?
Quality electrical pliers last many years with proper care and maintenance. Replace them if insulation becomes damaged, jaws misalign significantly, or cutting edges become too dull to sharpen. Most electricians replace pliers every 3-5 years with heavy use, or longer with occasional DIY use.







Write Your Review
No reviews yet. Be the first to share your experience!