

How to Change a Blade in a Utility Knife? Quick Answer
Changing a utility knife blade takes just two minutes once you know the process. Most modern utility knives use a simple push-button or twist-release mechanism to access the blade cartridge. First, retract the blade fully into the handle. Then locate the release button or collar at the back of the knife. Press or twist it to open the cartridge, remove the old blade carefully by its spine, insert the new blade, and close the cartridge until it clicks. Always wear cut-resistant gloves and keep fingers away from the sharp edge during the entire process.

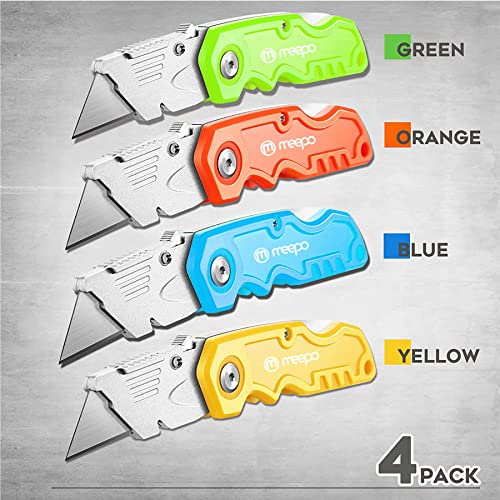
M MEEPO 4-Pack Box Cutter, Colorful Folding Utility Knife w/ 10 pcs Blades
- Ready for Heavy Duty Purpose - Our utility knife set are widely used by professional builders, DIYers, electricians and carpentry . It can easily cut though heavier materials like drywall, roofing shingles, flooring, sheet plastic, boxes, rope, wallpaper,cardboard and more
- Tough Tools that You can Trust - What's great about our utility knife set? The ergonomic handle will help assure you that it won't fly out of your hands. Easy blade change design means that you can change the blade more easier than normal box cutter, which needs a screwdriver to change out the blade. Different from normal bulky utility knives, the handle of our utility knives are all made of tough plastic. The lightweight feeling will makes you more comfortable when works in daily life
- Born for The Way You Work - As a heavy duty fixed blade utility knife set, the blade of our utility knife can be much more strength than normal retractable box cutter. With our utility knife, cutting works can be easy and fun
- Set of 4 Utility Knife - Comes with 4-piece utility knife ( Orange / Yellow / Green / Blue ) and extra 10-piece double edge razor blade. Buy once and benefit for life
- Ready for Heavy Duty Purpose - Our utility knife set are widely used by professional builders, DIYers, electricians and carpentry . It can easily cut though heavier materials like drywall, roofing shingles, flooring, sheet plastic, boxes, rope, wallpaper and more




As an Amazon Associate we earn from qualifying purchases. Product prices and availability are accurate as of the date/time indicated.

Utility knives are essential tools for construction workers, contractors, and DIY enthusiasts. A dull or damaged blade reduces cutting efficiency and increases safety risks. Understanding blade replacement ensures your knife performs optimally and keeps you working safely. Most utility knives accept standardized blade sizes, making replacements affordable and convenient. Proper maintenance extends your tool’s lifespan and prevents accidents on the job site.
What Types of Utility Knives Require Different Blade Changes?
Utility knives come in several designs, each with slightly different blade-changing mechanisms. Understanding your specific knife model prevents frustration and damage. The three main categories are snap-off knives, retractable knives, and fixed-blade knives. Each requires a unique approach to blade replacement.
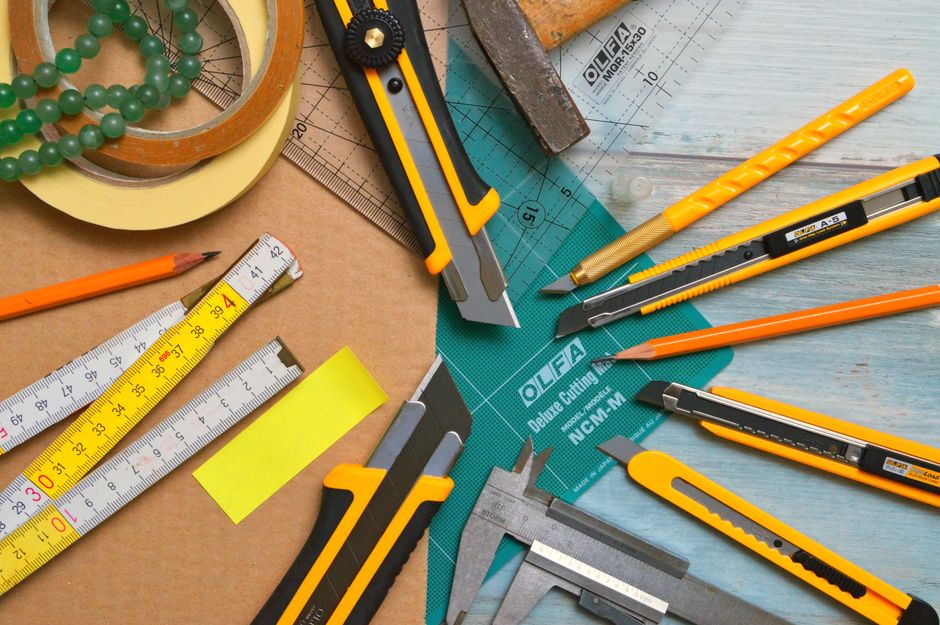
- Snap-off knives feature segmented blades that break off when dull.
- Retractable knives have sliding mechanisms that extend and retract the blade.
- Fixed-blade knives use a permanent blade secured with screws or bolts.
- Folding utility knives collapse the blade into the handle for safety.
Snap-Off Blade Knives
Snap-off utility knives are the simplest to maintain. These knives feature long blades divided into small segments. When the tip becomes dull, you simply snap off the used segment to expose a fresh edge. No tools required—just bend the blade gently until it breaks at the perforation line. Most snap-off knives hold 10-13 usable blade sections per cartridge.
To snap off a blade segment, retract the blade fully into the handle first. Locate the perforation line closest to the handle. Gently bend the blade upward or downward using the handle’s edge or a flat surface. The segment should break cleanly at the line. Dispose of the broken piece in a sharps container immediately.
Retractable Blade Knives
Retractable utility knives offer blade protection when not in use. These knives feature a sliding mechanism that extends the blade outward and retracts it back into the handle. Changing blades requires accessing the blade cartridge through a release button or collar. Most professional-grade retractable knives use this design.
Key Takeaway: Snap-off knives require no tools for maintenance, while retractable and fixed-blade models need simple mechanical adjustments.
How Do You Safely Remove and Install a Utility Knife Blade?
Safe blade handling is critical to prevent cuts and injuries. The removal and installation process requires focus and proper technique. Always work in a well-lit area with a clean, flat surface. Never rush the process, even if you’re experienced. Taking time prevents accidents that could sideline you from work.
Step-by-Step Removal Process
- Retract the blade completely into the handle.
- Locate the release button or twist collar on the knife’s body.
- Press the button or twist the collar counterclockwise to unlock the cartridge.
- Gently pull the cartridge away from the handle.
- Grip the old blade by its spine (the thick back edge), never the sharp sides.
- Slide the blade out of the cartridge slot.
- Place the old blade in a sharps container immediately.
Always grip the blade by its spine—the dull, thick back edge. Never touch the cutting edges with bare fingers. Wear cut-resistant gloves rated for blade contact if available. Position your body so the blade points away from your torso and face. Keep your other hand clear of the cartridge opening.
Step-by-Step Installation Process
- Hold the new blade by its spine with one hand.
- Align the blade’s slot with the cartridge’s guide rails.
- Slide the blade smoothly into the cartridge until it stops.
- Ensure the blade sits flat and centered in the cartridge.
- Reinsert the cartridge into the knife handle.
- Press or twist the release mechanism until it clicks firmly.
- Retract and extend the blade once to test the installation.
- Verify the blade doesn’t wobble or shift inside the cartridge.
Insert the new blade smoothly without forcing it. The blade should slide into the guide rails with minimal resistance. If resistance increases, stop and check alignment. Forcing a misaligned blade can damage the cartridge or the blade itself. Test the mechanism twice before returning to work to ensure everything functions properly.
Key Takeaway: Always grip blades by the spine, work deliberately, and verify proper installation before cutting.
What Safety Precautions Should You Take When Changing Utility Knife Blades?
Blade changes present significant cut hazards if proper precautions aren’t followed. Utility knife blades are among the sharpest tools in any workshop. They slice through skin and flesh with minimal resistance. Understanding and implementing safety measures protects you and your coworkers from serious injuries.
- Always wear cut-resistant gloves (Level 5 or higher recommended).
- Work in bright, well-lit conditions to see clearly.
- Keep a first aid kit nearby with sterile bandages and antibiotic ointment.
- Never leave a utility knife unattended with the blade extended.
- Store used blades in a sharps container, never loose in trash.
- Keep other people away from your work area during blade changes.
- Retract the blade fully before setting the knife down.
Personal Protective Equipment
Cut-resistant gloves are essential when handling utility knife blades. Look for gloves rated ANSI/ISEA Level 4 or Level 5 for blade protection. These gloves use specialized materials like Kevlar or polyethylene that resist sharp cuts. Thinner gloves allow better dexterity than thick leather alternatives. Always check that your gloves fit snugly without excess material that could catch on the blade.
Workspace Setup
Prepare your workspace before beginning any blade change. Use a clean, flat surface at comfortable working height. Remove clutter that could cause you to fumble or drop the blade. Ensure adequate lighting so you can see the cartridge mechanism clearly. Keep your work area organized with a designated sharps container within arm’s reach.
Key Takeaway: Proper protective equipment and workspace preparation are non-negotiable for safe blade changes.
How Do You Maintain Your Utility Knife for Longevity?
Regular maintenance extends your utility knife’s lifespan and keeps it performing reliably. A well-maintained knife stays sharp longer and operates smoothly. Simple cleaning and inspection routines prevent mechanical issues. Most maintenance tasks take just a few minutes and require no special tools.
Cleaning and Inspection
- Wipe the handle with a dry cloth after each use to remove dust and debris.
- Check the release mechanism monthly for smooth operation.
- Inspect the blade cartridge for cracks or wear.
- Clean the cartridge slot with a dry brush to remove metal shavings.
- Replace the blade immediately when it becomes dull or damaged.
- Lubricate the release mechanism with light machine oil if it sticks.
Dust and debris accumulate inside the cartridge over time. Use a small brush or compressed air to clean the internal mechanism monthly. Check that the blade extends and retracts smoothly without grinding sounds. Grinding indicates metal-to-metal contact that could damage the knife. Address this issue immediately by cleaning or lubricating the mechanism.
Blade Storage and Replacement Schedule
Store replacement blades in their original packaging in a dry location. Keep blades away from moisture, which causes rust and dulls edges. Many professionals replace blades weekly or biweekly depending on cutting volume. A sharp blade cuts cleanly and safely, while dull blades require excessive pressure and increase slip risks.
Monitor your cutting performance as a guide for blade replacement timing. If you notice increased resistance or rough cuts, change the blade immediately. Don’t wait until the blade becomes visibly damaged. A preventive approach maintains consistent cutting quality and reduces accidents.
Key Takeaway: Monthly inspections and prompt blade replacement maintain optimal knife performance and safety.
What Are Common Mistakes When Changing Utility Knife Blades?
Even experienced users make mistakes that compromise safety or knife function. Understanding common errors helps you avoid them. These mistakes range from minor inconveniences to serious injuries. Learning from others’ mistakes accelerates your skill development.
- Forcing the blade into a misaligned cartridge damages both blade and knife.
- Touching the sharp edges instead of the spine causes cuts.
- Leaving the blade extended when setting the knife down creates hazards.
- Disposing of blades in regular trash endangers sanitation workers.
- Using dull blades longer than necessary reduces cutting efficiency.
- Skipping the test extension step misses installation problems.
- Working in dim lighting increases the risk of accidents.
The most common mistake is forcing a blade that doesn’t slide smoothly. This damages the cartridge’s guide rails and can bend or break the blade. Always check alignment before applying pressure. If resistance increases, stop and investigate the problem. A properly installed blade slides in with minimal force.
Another frequent error is touching the sharp cutting edges with bare fingers. Even a light touch can cause deep cuts that require medical attention. Always grip blades by the spine exclusively. Make this a habit so your hands automatically avoid the dangerous edges.
Key Takeaway: Patience, proper grip technique, and attention to detail prevent most blade-changing mistakes.
How Does a Utility Knife Compare to Other Cutting Tools?
Utility knives serve different purposes than other cutting tools in your workshop. Understanding their unique advantages helps you choose the right tool for each task. Utility knives excel at precision cutting and detail work. They’re lighter and more maneuverable than power tools, making them ideal for intricate cuts.
For related tool guidance, check out our articles on choosing the right screwdriver for the job and using needle nose pliers for electrical work. These tools complement utility knives in any toolkit. Each tool has specific applications where it excels.
Utility Knives vs. Box Cutters
Box cutters are specialized utility knives designed specifically for opening cardboard. They feature shorter, wider blades optimized for cutting cardboard edges. Standard utility knives have longer, narrower blades suited for drywall, vinyl, and plastic. Box cutters are more compact but less versatile than full-size utility knives.
Utility Knives vs. Craft Knives
Craft knives (like X-Acto knives) use smaller blades for detailed, precision work. They’re ideal for model making, artwork, and fine detail cutting. Utility knives are heavier-duty tools for construction and general cutting tasks. Craft knives lack the power and durability for professional construction work.
Key Takeaway: Utility knives are versatile, durable tools that outperform specialized cutters for most construction and DIY tasks.
What Should You Know About Utility Knife Blade Types and Sizes?
Utility knife blades come in standardized sizes and materials. Understanding blade specifications ensures you purchase compatible replacements. Most professional-grade knives use the same blade format across brands. This standardization makes finding replacements convenient and affordable.
Standard Blade Dimensions
- Standard utility knife blades measure 18mm wide by 100mm long (most common).
- Heavy-duty blades are thicker and stronger for demanding applications.
- Ceramic blades resist dulling longer than steel but cost more.
- Snap-off blade segments are approximately 10mm thick.
- Blade thickness ranges from 0.4mm to 0.6mm depending on type.
The 18mm × 100mm blade is the industry standard for most utility knives. Check your knife’s documentation to confirm the correct blade size. Using the wrong size blade may not fit properly or could damage the cartridge. Always purchase replacement blades matching your knife’s specifications exactly.
Blade Material Options
Carbon steel blades are the most common and affordable option. They sharpen easily and work well for general cutting tasks. Stainless steel blades resist rust but dull faster than carbon steel. Ceramic blades last three times longer than steel but break if dropped. Choose blade material based on your cutting environment and budget.
Key Takeaway: Standard 18mm blades fit most utility knives; verify your knife’s specifications before purchasing replacements.
Recommended Products

WORKPRO Heavy Duty Retractable Utility Knife with 10 Blades
- Heavy-Duty Utility Knife : Aluminum alloy design with rust-free powder-coat makes the box cutter durable and lightweight (3.2 oz), passing the 1.5m drop test. SK5 razor blades through 1922 °F heat treatment are up to 64 HRC. For long-lasting, extremely durable cuts and slices on boxes, plastic packaging, and straps
- Retractable Blade & Easy Change : 3 adjustable position razor simply slides open for exact cuts. Blade easily retracts to lock safely within the metal frame when finished using. Razor blade replacement is easy with the quick-release button. Includes 10 extra double-use blades
- Great for General & Precision Cutting : Slice through cardboard, carpet, drywall, rope, vinyl, leather, flooring. Use for box cutter tool and exact cuts for arts & crafts or hobby. Makes a Great Gift for the practical people on your list!
- Human & Environment : Hand-friendly matting body and ergonomic design upgrade your user experience. Materials comply with environmental protection, the total content of three o-phenols less than 1000 ppm. 6.3" x 1.7" x 0.9" size fits safely in your back pocket!
- Trusted Quality : Manufactured by a globally recognized tool supplier, ensuring consistent performance and reliability


As an Amazon Associate we earn from qualifying purchases. Product prices and availability are accurate as of the date/time indicated.

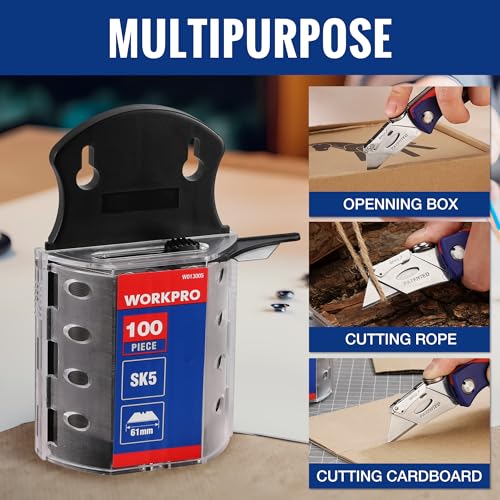
WORKPRO Utility Knife Blades, 100-Pack SK5 Steel Blades with Dispenser
- Notice: Be sure to watch our HOW-TO video before using it. It can help you slide the utility blade out quickly and easily
- Super Versatility: It is made entirely according to standard utility knife blades and fits most standard & fixed utility knives perfectly
- Affordable: Includes 100-pack replacement blades and they come in a well-built case for safe storage and disposal. Each blade is rigorously tested and we firmly believe this is a great deal
- Durability: WORKPRO utility knife blades are made from SK5 steel, which is of high quality and durability
- Sharp: The knife blades are highly sharp and cut through lots of materials easily and without hesitation. Ideal for cutting cardboard, leather, linoleum, rope, soft metal, etc




As an Amazon Associate we earn from qualifying purchases. Product prices and availability are accurate as of the date/time indicated.
Frequently Asked Questions
How often should you change a utility knife blade?
Blade replacement frequency depends on cutting volume and material type. Heavy users might change blades weekly, while light users change them monthly. Replace blades immediately when they become dull or damaged. A sharp blade cuts cleanly with minimal pressure. If you notice increased resistance or rough cuts, change the blade right away rather than waiting.
Can you sharpen a utility knife blade instead of replacing it?
Utility knife blades aren’t designed for sharpening and shouldn’t be resharpened. The blade geometry and hardness make sharpening impractical and unsafe. Replacement blades are affordable and readily available. Attempting to sharpen blades risks damaging the edge further or causing injury during the process.
What’s the safest way to dispose of used utility knife blades?
Place used blades in a designated sharps container designed for medical or industrial waste. Never dispose of blades in regular trash, recycling, or down drains. Sharps containers are available at hardware stores, medical supply shops, and many pharmacies. Some facilities offer free blade disposal programs for professionals.
Why does my utility knife blade keep slipping out of the cartridge?
A slipping blade usually indicates improper installation or a worn cartridge. Ensure the blade is fully inserted until it stops. Check that the release mechanism clicks firmly when closed. If the blade still slips, the cartridge may be damaged and require replacement. Inspect the cartridge for cracks or worn guide rails.
Are all utility knife blades interchangeable between brands?
Most standard utility knives accept the same 18mm blade format across brands. However, some specialty knives use proprietary blade designs. Check your knife’s manual or packaging before purchasing replacement blades. When in doubt, purchase blades from the same manufacturer as your knife.
How do you prevent the blade from extending too far in a retractable knife?
Most retractable knives have a depth adjustment mechanism that limits blade extension. Locate the adjustment collar or button on the handle. Twist or slide it to set the desired blade length. Start with minimal extension and adjust gradually as needed. Limiting extension reduces the risk of accidental deep cuts.
Conclusion: Why Mastering Utility Knife Blade Changes Matters
Changing a utility knife blade is a fundamental skill every DIYer and professional should master. This simple task takes just minutes once you understand the process. Proper technique ensures your knife performs reliably while keeping you safe from cuts. Regular blade maintenance extends your tool’s lifespan and prevents frustration on the job site.
The key to successful blade changes is preparation, patience, and attention to detail. Always wear cut-resistant gloves, work in bright light, and grip blades by the spine. Don’t force the blade into the cartridge—if resistance increases, stop and check alignment. Dispose of used blades safely in a sharps container, never in regular trash.
Your utility knife is only as effective as its blade. Keeping your blade sharp and properly installed ensures clean cuts and safe operation. With the knowledge from this guide, you’re ready to maintain your utility knife confidently. For more tool mastery, explore our guides on reading a tape measure in fractions and driving a nail without bending it.







Write Your Review
No reviews yet. Be the first to share your experience!