

You’ve just unboxed your first impact driver, and you’re staring at this compact powerhouse wondering where to even begin. Maybe you’ve watched videos online, or perhaps a friend mentioned how different it is from a regular drill. The truth is, learning how to use an impact driver for the first time doesn’t have to be intimidating. With the right guidance and a bit of practice, you’ll be driving fasteners like a seasoned pro in no time.
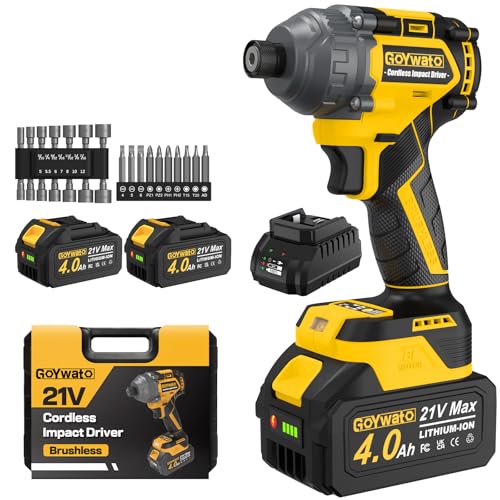
GoYwato 2655In-lbs 21V Brushless 1/4" Cordless Impact Driver Set Yellow
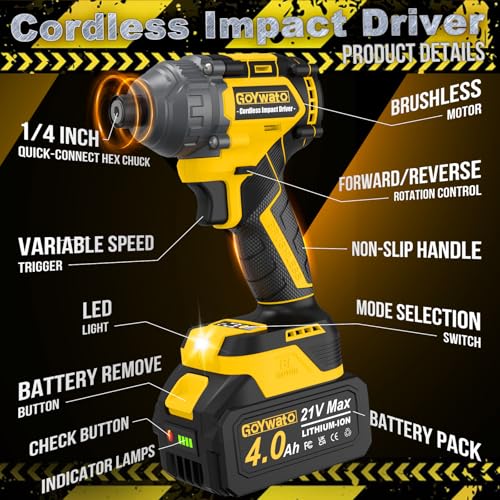
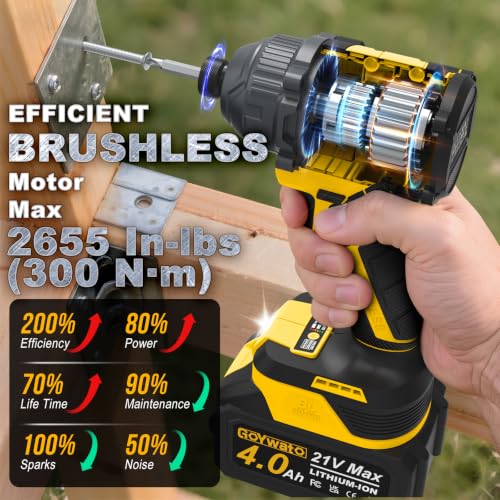
- Powerful Brushless Motor : GoYwato cordless 1/4 impact driver is equipped with a high-efficiency brushless motor that operates quietly, runs cooler, and has a longer lifespan. With a maximum torque of up to 2655 in-lbs (300 N·m), it is suitable for furniture assembly, frame building, tightening long-rusted screws, and many other applications, providing reliable power to easily handle various tightening tasks and improve work efficiency.
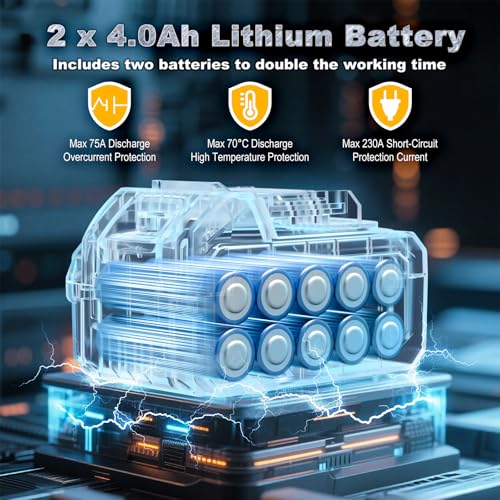
- 2 x 4.0Ah Batteries : GoYwato cordless impact driver set comes with 2 x 4.0Ah batteries and a charger. The two batteries can be used interchangeably, when one runs out of power, you can simply recharge it with the charger while continuing your work with the other. This allows for extended runtime and high efficiency without worrying about power supply issues. Moreover, our batteries are equipped with maximum 75A over-current discharge protection, a short-circuit protection current of up to 230A, and high-temperature discharge protection of up to 70°C. With these safety features, you can work with confidence and enjoy a smoother, seamless experience.
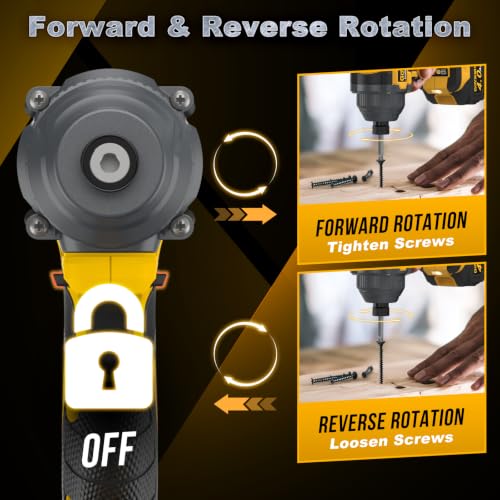
- Two-Way Mode & Reverse Automatic Stop : GoYwato cordless power impact drivers has two modes: forward and reverse. Forward mode is used for tightening, and reverse mode is used for disassembly. Low-speed and high-speed forward modes can be flexibly switched according to different working scenarios and needs. In reverse mode, pressing the "yellow button" switch on the gear display will activate the reverse automatic stop mode. Pulling the speed trigger will activate the braking stop device once the screw loosens, reducing speed and torque to prevent screws from flying out. Pressing the "yellow button" switch again will deactivate the reverse automatic stop mode.
- 1/4-Inch All-Metal Hex Chuck : GoYwato cordless brushless impact driver come with a 1/4-inch hex chuck, use steel ball fix design, drill bit has a relatively large groove area, therefore, when the drill bit is pulled outward, it is a loose drill bit, but it is only limited to being pulled to the position of the groove. When you need to remove the drill bit, simply pull the chuck to release the steel balls and remove it easily without needing to turn the chuck knob. Easily change screwdriver bits or sockets without any tools. Every design element is aimed at enhancing your user experience, making work smoother and more efficient.
- Ergonomic Design : GoYwato cordless impact drill features a built-in bright LED light that activates as soon as you pull the trigger, illuminating dimly lit work areas for clear visibility and safe operation. This compact impact driver features an ergonomic design and weighs only 3.62 lbs (1.64 kg), making it easy to operate even in confined spaces and improving overall work flexibility. The handle is wrapped in soft rubber for a comfortable, secure grip that reduces hand strain during prolonged use, offering a pleasant and effortless working experience.
- Suitable for Various Projects Impact Driver Kit : 1 x 1/4" cordless impact driver, 2 x 4.0 Ah battery, 1 x charger, 14 x socket set(5,5.5,6,7,8,10,12mm; 3/16",1/4",9/32",5/16",11/32",3/8",7/16"), 10 x screwdriver bit(5/32,3/16,1/4; PZ1,PZ2, PZ3; T15,T20,T25,T30), 1 x carrying case, 1 x user manual
- User Service : GoYwato power screw driver cordless provides 365 days of product service, to ensure your shopping journey. If you have any problems, please tell us, we will solve your problems at the first time



As an Amazon Associate we earn from qualifying purchases. Product prices and availability are accurate as of the date/time indicated.
Impact drivers have become essential tools in modern workshops, and for good reason. They deliver rotational force combined with concussive blows that make driving screws and fasteners into tough materials feel almost effortless. Whether you’re hanging shelves, building a deck, or assembling furniture, understanding how to use an impact driver for the first time will transform how you approach fastening tasks in 2026.
This guide walks you through everything you need to know as a first-time user, from safety fundamentals to advanced techniques that will boost your confidence and efficiency.
Understanding Your Impact Driver Basics
Before you squeeze the trigger, you need to understand what makes an impact driver different from a traditional cordless drill. An impact driver uses a hammer-and-anvil mechanism inside the tool that creates quick, powerful bursts of rotational force. This mechanism is what gives the tool its name and its distinctive clicking or hammering sound.

Key Components You Should Know
Familiarizing yourself with the main parts of your impact driver ensures you’ll use it correctly and safely. The chuck is the collet that holds your bits and fasteners. Unlike a drill’s three-jaw chuck, impact drivers typically use a quick-change hex chuck that accepts quarter-inch hex bits. The motor powers the rotational force, while the impact mechanism creates those powerful bursts. The battery powers everything, and the trigger controls your speed and power output.
You’ll also notice a direction selector switch, usually located near the trigger. This lets you switch between forward (driving) and reverse (extracting) modes. Some models include a speed selector dial that lets you adjust the tool’s power output, which is incredibly useful when you’re learning how to use an impact driver for the first time.
Impact Driver vs. Cordless Drill: What’s the Difference?
While both tools drive fasteners, they work in fundamentally different ways. A cordless drill provides continuous rotational force, making it better for drilling holes and driving lighter fasteners. An impact driver delivers repeated bursts of torque, making it superior for driving large screws, bolts, and fasteners into dense materials. The impact driver’s concussive action also reduces the rotational force you feel in your hands, making it less tiring during extended use.
If you’re considering which tool to add to your workshop, our guide on how to choose a cordless drill for home use covers that comparison in depth and will help you understand when each tool shines best.
Safety First: Essential Precautions Before You Start
Learning how to use an impact driver for the first time means establishing safe habits from day one. These tools are powerful, and respecting that power is non-negotiable.

Personal Protective Equipment (PPE)
Always wear safety glasses when operating your impact driver. Flying debris, bits, or fasteners can cause serious eye injuries. Work gloves are optional but recommended, especially when working with metal fasteners that can become sharp. Hearing protection is a good idea too, since impact drivers produce significant noise during operation. A dust mask is useful if you’re working in environments where dust might be kicked up.
Workspace Preparation
Before you begin, ensure your workspace is clear of obstacles and distractions. Secure your workpiece so it won’t move or spin unexpectedly. The rotational force from an impact driver can cause the tool to twist sharply if a bit binds, and you need both hands free to maintain control. Never wear loose clothing, jewelry, or long hair that could get caught in the rotating chuck.
Battery and Tool Inspection
Check that your battery is fully charged and properly seated before you start. Inspect your impact driver for any cracks, damage, or loose parts. Make sure the chuck is tight and secure. If something seems off, don’t use the tool until you’ve had it checked by a professional.
Selecting and Installing the Right Bits
One of the most important aspects of learning how to use an impact driver for the first time is understanding bit selection. Using the wrong bit can damage your fastener, your workpiece, or even your tool.
Choosing the Correct Bit Type
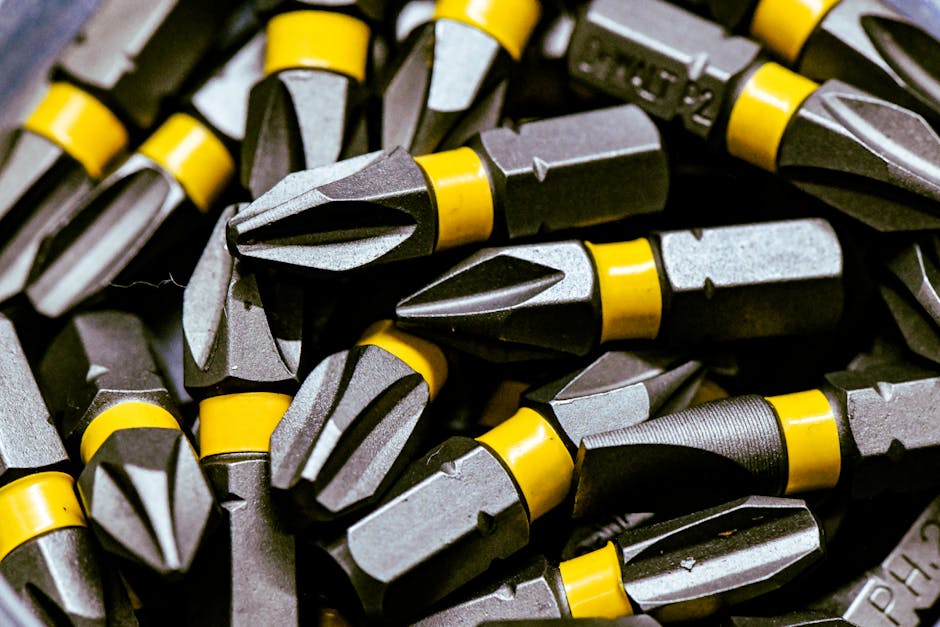
Impact drivers require bits specifically designed to handle the tool’s concussive force. Standard drill bits won’t work reliably, and they’ll wear out quickly. Instead, use impact-rated bits made from hardened steel. These bits feature a thicker shaft and reinforced construction to withstand repeated impacts. You’ll find bits for Phillips head, square drive, hex head, and other fastener types.
Match your bit to your fastener type exactly. A Phillips bit that’s slightly misaligned will slip and strip the fastener head. Square drive bits are generally more reliable because they grip fasteners more securely. If you’re working with bolts or lag screws, hex bits or socket bits are your best choice.
Bit Size and Length Considerations
Select a bit length that allows you to reach the fastener without the chuck colliding with your workpiece. Too short, and you won’t have enough contact with the fastener. Too long, and you risk the bit bending or breaking under load. Generally, you want the bit to fully engage the fastener while leaving at least a quarter-inch clearance between the chuck and your work surface.
Installing Your Bit Correctly
Most impact drivers feature a quick-change chuck that accepts quarter-inch hex shank bits. To install a bit, pull back the sleeve on the chuck, insert the bit fully, and release the sleeve. You should hear or feel a click, confirming the bit is locked in place. Give the bit a gentle tug to verify it’s secure. Never use bits that aren’t fully seated, as they can slip during operation and cause injury or damage.
Mastering the Proper Technique
Now that you understand the basics and safety protocols, it’s time to learn the actual technique for how to use an impact driver for the first time. Proper form ensures better results and reduces fatigue.
Grip and Stance
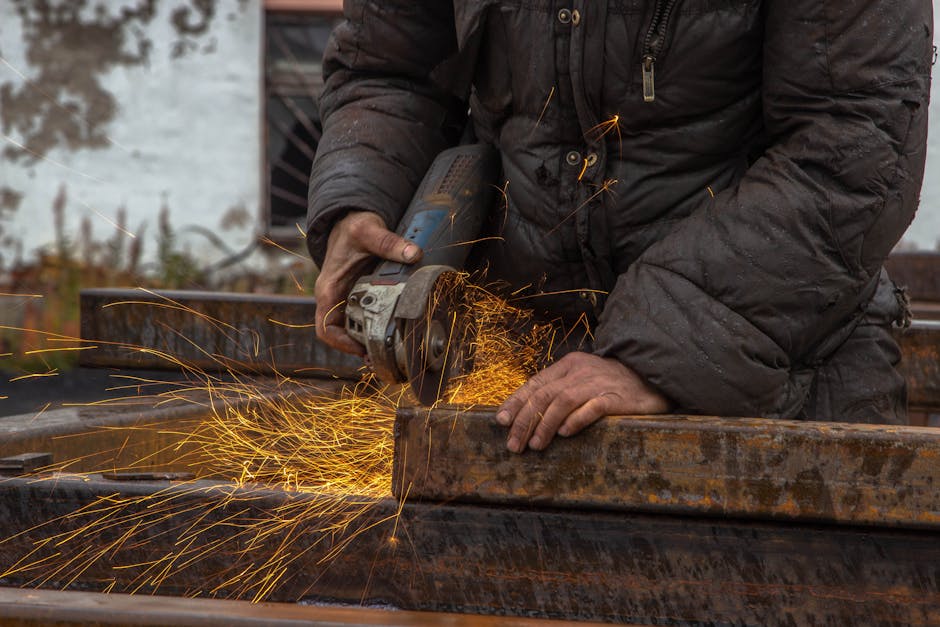
Hold the impact driver with both hands, one on the main handle and one on the side handle if your model has one. Keep your grip firm but not tense. Position yourself so you can maintain control if the tool suddenly twists. Your feet should be shoulder-width apart with one foot slightly forward, giving you stability and balance. This stance allows you to absorb any reaction force from the tool rather than letting it throw you off balance.
Bit Alignment and Pressure
Before you pull the trigger, align the bit perfectly with the fastener head. This is crucial for preventing bit slip and fastener damage. Apply firm, steady pressure perpendicular to your workpiece. The impact mechanism will do the work, so you don’t need to push hard. In fact, excessive pressure can cause the bit to slip or bind. Let the tool do what it’s designed to do.
Trigger Control and Speed Management
Start with the trigger partially depressed to get a feel for the tool’s behavior. The impact driver will ramp up power as you increase trigger pressure. For delicate work or when you’re first learning, use lower speeds. Many impact drivers feature a speed selector that lets you dial in the power you need. As you gain confidence, you can increase speed for faster fastening. Always release the trigger immediately once the fastener is fully seated. Continuing to apply power can strip the fastener or damage your workpiece.
Reversing and Extracting Fasteners
To extract a fastener, flip the direction selector switch to reverse. Align your bit with the fastener head and apply steady pressure. The impact mechanism works in reverse too, making it easy to back out even stubborn fasteners. This is one of the major advantages of impact drivers over traditional drills.
Common Materials and Fastener Scenarios
Learning how to use an impact driver for the first time means encountering different materials and fastener types. Each situation requires slight adjustments to your technique.
Driving Screws into Wood
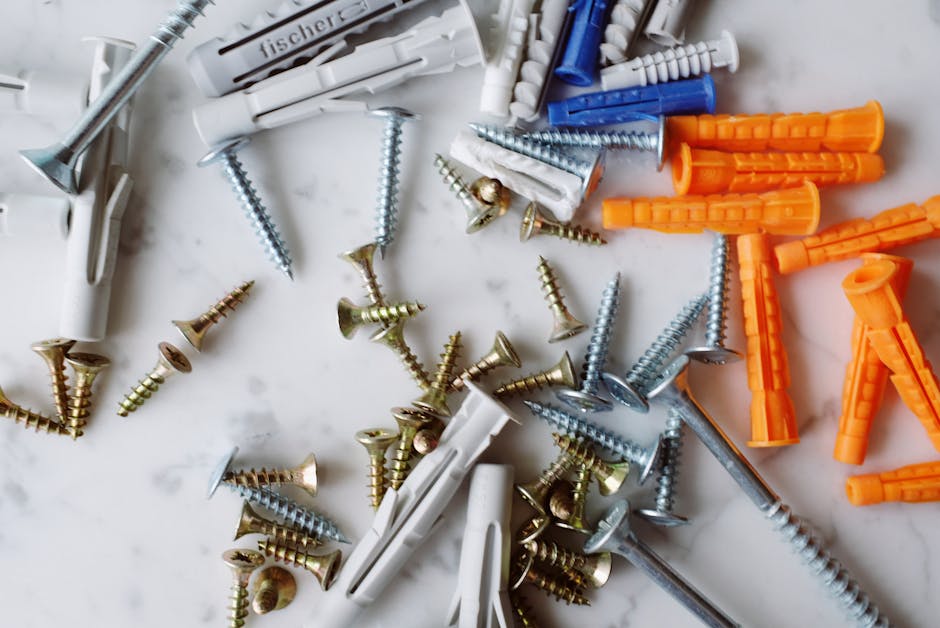
Wood is the most forgiving material for impact driver use. Pre-drilling pilot holes prevents splitting and makes driving easier. Use a screw bit that matches your screw head perfectly. Start with medium speed and increase as needed. Once the screw is seated flush with the surface, stop immediately to avoid stripping the head or sinking the screw too deep.
Fastening into Metal
Metal requires more care and precision. Always pre-drill holes to the correct size. Use a lower speed setting initially to maintain control and prevent bit slip. Metal fasteners can jam or bind more easily, so pay attention to any changes in the tool’s sound or feel. If you encounter resistance, back off immediately rather than forcing the fastener.
Working with Concrete and Masonry
Impact drivers aren’t ideal for drilling into concrete, but they excel at driving concrete screws or fasteners into pre-drilled holes. Use a lower speed to maintain control and prevent the bit from slipping. Wear a dust mask, as concrete creates significant dust. Consider using a hammer drill if you need to create holes in concrete rather than just driving fasteners.
Pro Tips and Best Practices
Keep Your Bits Clean and Organized
Store your impact bits in a dedicated organizer to prevent loss and damage. Wipe bits clean after use, especially if you’ve been working with wet materials or concrete dust. Damaged or worn bits should be replaced immediately, as they’ll slip and cause fastener damage.
Maintain Your Battery Health
Charge your battery fully before extended work sessions. Avoid letting the battery fully drain regularly, as this reduces its lifespan. Store batteries in a cool, dry place away from direct sunlight. A well-maintained battery ensures consistent power and tool performance.
Use the Correct Speed Setting for the Task
Lower speeds provide more control and are better for delicate work, fasteners that strip easily, or when you’re learning. Higher speeds are ideal for tough materials and repetitive fastening tasks where control is less critical.
Practice on Scrap Material First
Before tackling your actual project, spend time practicing on scrap wood or metal. This builds muscle memory and helps you develop a feel for the tool’s behavior without risking your final product.
Listen to Your Tool
The sound and feel of your impact driver tell you a lot about what’s happening. A smooth, rhythmic clicking is normal. Grinding sounds, binding, or sudden resistance means something’s wrong. Stop immediately and diagnose the issue before continuing.
Invest in Quality Impact-Rated Bits
Cheap bits wear out quickly and slip more often. Quality impact-rated bits cost more upfront but last longer and perform better, saving you money and frustration in the long run.
Common Mistakes to Avoid
Using Non-Impact-Rated Bits
Standard drill bits or bits not designed for impact use will wear out quickly and slip during operation. Always use bits specifically rated for impact drivers. This is one of the most common mistakes new users make, and it leads to frustration and damaged fasteners.
Applying Excessive Pressure
New users often think they need to push hard to make the tool work effectively. In reality, the impact mechanism does the heavy lifting. Excessive pressure causes bit slip, fastener damage, and unnecessary fatigue. Let the tool work for you by maintaining firm but light pressure.
Neglecting Bit Alignment
Driving a fastener with misaligned bits is a recipe for stripped heads and wasted fasteners. Take an extra second to ensure your bit is perfectly aligned with the fastener before you pull the trigger. This small habit prevents most fastener damage.
Ignoring Battery Maintenance
Many users treat their batteries carelessly, which reduces their lifespan and causes performance issues. Store batteries properly, charge them fully before use, and avoid letting them fully deplete. A healthy battery ensures your impact driver performs at its best.
Skipping Safety Precautions
Even experienced users sometimes skip safety glasses or proper grip because they’re in a hurry. Injuries from impact drivers can be serious and permanent. Never compromise on safety, regardless of how simple the task seems.
Conclusion
Learning how to use an impact driver for the first time opens up a whole new world of fastening possibilities. By understanding the tool’s basic mechanics, prioritizing safety, selecting the right bits, and mastering proper technique, you’ll quickly become confident and efficient. The key is to start slowly, practice on scrap material, and let the tool do the work rather than forcing it.
Remember that every expert was once a beginner. Your first few projects might feel awkward, but with each fastener you drive, your skills will improve. Before you know it, you’ll wonder how you ever managed without an impact driver in your workshop. If you’re still building out your tool collection, check out our comprehensive guide on how to choose a cordless drill for home use to ensure you have all the right tools for your projects.
Take action today: grab your impact driver, practice on some scrap material, and start building confidence. Your workshop success depends on knowing your tools inside and out, and you’re already on your way.
Recommended Products

DEWALT 20V MAX Cordless Drill & Impact Driver Combo Kit
- Ergonomically Designed: Work in tight areas with a compact design that gets into tough spots
- Compact and Lightweight: Both tools are designed to fit into difficult to reach spaces. The 1/4" impact driver has a length of 5.55 in. and weighs just 2.8 lbs, while the 1/2" drill/driver measures only 7.5 in. and weighs 3.6 lbs
- Both the DEWALT impact driver and electric drill driver feature integrated LED work lights with a convenient 20-second delay, ensuring enhanced visibility in dimly lit or challenging work areas
- One-Handed Loading - Keep one hand free with a 1/4 in. hex chuck that accepts 1 in. bit tips
- Power drill cordless with 1/2" single sleeve ratcheting chuck provides tight bit gripping strength, making bit changes faster and more secure
- 3 Year Limited Warranty


As an Amazon Associate we earn from qualifying purchases. Product prices and availability are accurate as of the date/time indicated.

DEWALT 40-Piece Impact Driver Bit Set with Storage Case
- Patented bit-bar design allows easy removal of bits and customizable placement
- Clear lid allows you to easily see contents at glance. Clip latch for secure closing. Small bulk storage size fits inside the small and medium ToughCase+ (sold separately) - ideal for organizing loose bits
- CNC-machined bit tip for precise fit in screw heads for reducing cam-out resulting in accurate manufacturing for optimal fit into screw recess
- Extended FLEXTORQ Zone* transfers optimal torque
- Magnetic screw lock sleeve minimizes drops & reduces wobbles
- The impact-rated design allows for use with high-torque cordless impact drivers, improving efficiency and durability across demanding tasks
- The range of bit types supports fastener profiles frequently encountered in HVAC, electrical, plumbing, carpentry, and maintenance
- The compact, quick-change format suits repetitive or multi-fastener jobs
- Connectable accessory storage system to optimize storage space. Screwdriving bit set Includes magnetic bit holder, long screwdriver bits, nutsetters, 1/4 bit set
- 3 Year Limited Warranty


As an Amazon Associate we earn from qualifying purchases. Product prices and availability are accurate as of the date/time indicated.
Frequently Asked Questions
What’s the difference between an impact driver and an impact wrench?
Impact wrenches are designed for heavy-duty fastening tasks and typically use larger fasteners like lug nuts and bolts. Impact drivers are lighter and more versatile for general fastening work with screws and smaller bolts. Impact drivers are better for most home workshop applications.
Can I use my impact driver to drill holes?
While technically possible, impact drivers aren’t ideal for drilling holes. They work best for fastening. For frequent drilling, a cordless drill is a better choice. However, an impact driver can drill small pilot holes in wood if necessary.
How do I know when to stop driving a fastener?
Stop when the fastener is flush with your workpiece surface. If you continue applying power after the fastener is seated, you risk stripping the head, damaging the fastener, or sinking it too deep into soft materials. Listen and feel for the moment the fastener becomes fully seated.
Is it normal for an impact driver to be loud?
Yes, impact drivers are considerably louder than regular drills because of the internal impact mechanism. Wearing hearing protection during extended use is recommended. If your impact driver sounds unusually loud or makes grinding noises, it may need servicing.
What should I do if my bit keeps slipping?
Bit slip usually indicates misalignment, a worn bit, or using a non-impact-rated bit. Check that your bit is fully seated in the chuck, perfectly aligned with the fastener, and rated for impact use. If the bit is damaged, replace it immediately.
Can I use my impact driver in wet conditions?
Most impact drivers aren’t waterproof unless specifically rated as such. Avoid using them in heavy rain or wet environments. If you must work in damp conditions, check your tool’s specifications and consider using a waterproof model designed for that purpose.







Write Your Review
No reviews yet. Be the first to share your experience!