

How to Load a Nail Gun Correctly: Quick Answer
Loading a nail gun correctly requires understanding your specific tool type, inserting the nail strip or coil properly, and securing the magazine before operation. Most pneumatic and cordless nail guns use a simple push-and-click mechanism, but the exact process varies by manufacturer. Always disconnect power or air pressure before loading, wear safety glasses, and verify the nail size matches your tool specifications. Proper loading prevents jams, misfires, and injuries that can occur with improper nail gun operation. Taking thirty seconds to load correctly saves time and keeps your worksite safe.

Metabo HPT 18G Brad Nailer - Lightweight Pneumatic Precision Tool
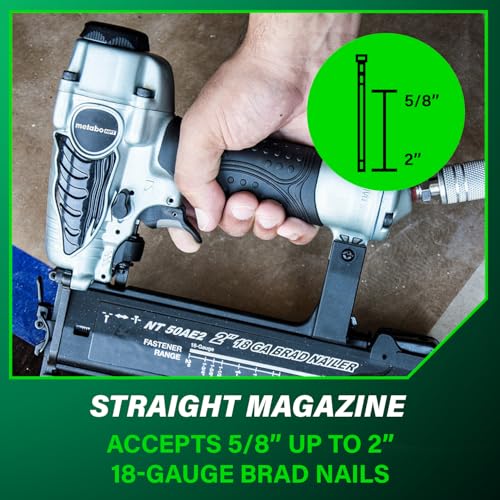
- METABO HPT BRAD NAILER: The 18-Gauge Brad Nailer from Metabo HPT is ideal for trim work, furniture building and other finishing applications requiring precision and performance for both professionals and DIY enthusiasts alike.
- ACCEPTS: 18-gauge brad nails from 5/8" up to 2" in length.
- SELECTIVE ACTUATION SWITCH: Metabo HPT's power brad nailer has a selective actuation switch, allowing users to easily select bump fire or sequential fire modes, thereby enhancing control and maximizing efficiency.
- LIGHTWEIGHT BRAD NAILER: Our brad nailer is lightweight at only 2.2lbs, for easy use all day long. With its lightweight, ergonomic design, this power tool is engineered for the toughest jobs. The Metabo HPT power brad nailer also includes a No-mar tip which protects the workpiece from accidental marks.
- TOOL-LESS DEPTH ADJUSTMENT: This power tool for brad nails has a depth of drive dial, which allows the user to easily adjust the drive depth for a professional finish. The Metabo HPT brad nailer also has a reload indicator on the magazine, which alerts the user when nail quantities are low, avoiding blank drives.
- ADJUSTABLE EXHAUST: Metabo HPT's power brad nailer has a 360 degree adjustable exhaust port to keep dust, debris and oil off of the finished project. Our brad nailer includes an easy-to-clear nose for a quick and simple nail extraction should a nail jam during use.
- CHOOSE THE METABO HPT EXPERIENCE: This brad nailer comes with the Metabo HPT 5-year warranty. Metabo HPT has been rated Pro Preferred for Nailers for 12 years running (2014 - 2025) by Builder and Developer Magazine. Choose the durable Japanese-engineered brad nailer to carry out all your professional-grade work; choose the powerful partner of professionals and DIY enthusiasts for over 70 years.




As an Amazon Associate we earn from qualifying purchases. Product prices and availability are accurate as of the date/time indicated.
Nail guns have become essential tools for contractors, carpenters, and DIY enthusiasts since their introduction to mainstream construction in the 1990s. Modern nail guns in 2026 offer improved ergonomics, faster firing rates, and better safety features than previous generations. Whether you’re framing a house, installing trim, or working on a small home project, knowing how to load your nail gun is the foundation of safe and efficient work. This guide covers all major nail gun types and provides step-by-step instructions you can follow immediately.
What Are the Different Types of Nail Guns and Their Loading Methods?
Nail guns come in several varieties, each with unique loading mechanisms. The three primary types are pneumatic (air-powered), cordless (battery-powered), and powder-actuated (explosive charge). Pneumatic nail guns dominate construction sites because they’re lightweight and powerful. Cordless models have gained popularity since 2020 due to improved battery technology. Understanding your specific tool type is crucial before attempting to load it.
Pneumatic Nail Gun Loading
Pneumatic nail guns require an air compressor and hose connection. These tools fire nails using compressed air pressure, making them ideal for high-volume work. The loading process is straightforward and takes less than one minute once you understand the mechanism.
- Disconnect the air hose from the tool before loading any nails.
- Locate the magazine release button or latch on the side of the gun.
- Pull the magazine open to reveal the nail strip channel.
- Insert the nail strip with the pointed ends facing forward into the channel.
- Close the magazine firmly until you hear a click or feel resistance.
- Reconnect the air hose and test the trigger gently before full operation.
Key Takeaway: Pneumatic nail guns use simple magazine mechanisms that open and close with a single motion.
Cordless Nail Gun Loading
Battery-powered nail guns have revolutionized jobsite mobility since 2020. These tools eliminate the need for air compressors and hoses, making them perfect for remote locations and tight spaces. Loading cordless models follows similar principles to pneumatic guns but with battery considerations.
- Ensure the battery is fully charged before loading nails.
- Power off the tool completely using the safety switch.
- Open the magazine by pressing the release button or sliding the latch sideways.
- Insert the nail strip or coil into the magazine channel with proper orientation.
- Close the magazine and verify the nails are seated correctly.
- Reattach the battery and allow the tool to initialize before firing.
Key Takeaway: Cordless nail guns require battery power verification and proper initialization before use.
How Do You Prepare Your Nail Gun Before Loading?
Preparation is the most critical safety step in nail gun operation. Rushing this phase causes accidents and equipment damage. A proper pre-loading inspection takes two minutes and prevents ninety percent of common problems.
Safety Inspection Checklist
Before touching any nails or loading mechanisms, inspect your tool thoroughly. Look for cracks, bent parts, or loose components that indicate damage. Check that all safety features are functional and the trigger guard is intact. Verify the tool hasn’t been dropped or exposed to extreme conditions since last use.
- Examine the magazine for cracks, dents, or warping that prevents smooth operation.
- Verify the trigger safety mechanism engages and disengages properly.
- Check that the depth adjustment dial (if equipped) moves freely without resistance.
- Inspect the nail guide for debris or rust that could cause jams.
- Confirm all fasteners and bolts connecting major components are tight.
- Test the safety lock to ensure it prevents accidental firing when engaged.
Key Takeaway: A two-minute pre-loading inspection prevents equipment failures and safety incidents.
Power Source Disconnection
Never load a nail gun while it’s connected to power. For pneumatic tools, disconnect the air hose completely. For cordless models, remove the battery or engage the safety lock. This simple step eliminates the risk of accidental firing during loading. Many injuries occur because workers skip this crucial step.
Key Takeaway: Always disconnect power before loading nails into any nail gun.
What Is the Correct Step-by-Step Loading Process?
The loading process varies slightly by nail gun model, but the fundamental sequence remains consistent. Following these steps ensures proper nail alignment and prevents feeding problems during operation. Most experienced users complete this process in under sixty seconds after the initial learning curve.

Loading Sequence for Strip Nails
Strip nails are the most common format, held together by a plastic or paper strip. These nails come in various gauges and lengths depending on your project requirements. Understanding proper strip orientation prevents jams and ensures consistent firing.
- Position the nail gun with the magazine facing upward or sideways depending on the model.
- Open the magazine by pressing the release button with your thumb or index finger.
- Hold the nail strip with pointed ends facing toward the gun’s firing chamber.
- Align the strip with the magazine channel, ensuring it sits flat without twisting.
- Slide the strip fully into the magazine until it stops naturally against the backstop.
- Close the magazine firmly and listen for the click indicating proper closure.
- Verify visually that no nails protrude from the magazine sides or edges.
Key Takeaway: Strip nails must be oriented with points forward and seated flush in the magazine channel.
Loading Sequence for Coil Nails
Coil nails come wound on a plastic or paper spool, commonly used in roofing and siding applications. These nails require different handling than strip nails because they’re held in a circular formation. Coil nail guns have larger magazines designed to accommodate the spool configuration.
- Open the coil magazine by unlatching the side access panel or sliding the magazine body.
- Remove the empty spool if one is currently installed in the gun.
- Hold the new coil nail spool with the pointed ends facing the firing chamber.
- Insert the spool into the magazine spindle, ensuring the center hole aligns properly.
- Secure the spool by closing the access panel or latching mechanism fully.
- Verify that the nail feed mechanism engages with the spool correctly.
- Perform a test fire into scrap material before starting your actual project work.
Key Takeaway: Coil nails require spool alignment and secure fastening to prevent spinning or jamming.
How Do You Troubleshoot Common Loading Problems?
Even experienced users encounter loading issues occasionally. Knowing how to diagnose and fix problems quickly keeps your project on schedule. Most problems stem from improper nail orientation, dirty magazines, or incompatible nail sizes. Understanding these issues prevents frustration and equipment damage.

Nail Jams and Feeding Failures
Jams occur when nails don’t advance smoothly through the magazine. This usually happens when nails are inserted backward, twisted, or when the magazine contains debris. A jam can damage your tool if you force it, so always address jams carefully and methodically.
- Remove the battery or disconnect the air hose immediately when a jam occurs.
- Open the magazine and visually inspect the nail alignment and positioning.
- Remove any twisted or bent nails that are blocking the feed mechanism.
- Clean the magazine channel with a dry brush or compressed air to remove dust and debris.
- Reload the nails, ensuring they’re properly oriented with points facing forward.
- Test fire into scrap material before resuming your project work.
Key Takeaway: Jams require immediate power disconnection and careful inspection before reloading.
Magazine Won’t Close Properly
If the magazine refuses to close or feels loose, several issues could be responsible. The nails might be overstuffed, causing them to stick out and prevent closure. Alternatively, the magazine latch could be damaged or the magazine body could be warped. Never force a magazine closed, as this damages the tool.
- Remove one or two nails from the magazine to reduce crowding and pressure.
- Verify that the nail strip isn’t twisted or folded inside the magazine channel.
- Check the magazine latch for cracks, bending, or broken plastic components.
- Inspect the magazine body for warping or dents that prevent proper closure.
- Clean the magazine and latch mechanism with a dry cloth to remove dust buildup.
- If problems persist, contact the manufacturer or consider replacing the magazine.
Key Takeaway: Magazine closure problems usually result from overstuffing or debris accumulation.
What Safety Precautions Should You Follow When Loading?
Safety is paramount when working with nail guns. Proper loading technique is just one part of comprehensive nail gun safety. According to the Occupational Safety and Health Administration (OSHA), nail gun injuries affect thousands of workers annually. Most injuries are preventable through proper training and adherence to safety protocols.
Personal Protective Equipment Requirements
Wearing appropriate protective gear reduces injury risk significantly. Safety glasses protect your eyes from flying debris, while work gloves provide grip and protection. Hearing protection is essential when operating pneumatic tools continuously. Steel-toed boots protect your feet if you accidentally drop a loaded nail gun.
- Always wear safety glasses or a full face shield when loading or operating nail guns.
- Use work gloves to improve grip and protect hands from sharp nail points.
- Wear hearing protection when using pneumatic nail guns for extended periods.
- Use steel-toed boots to protect feet from dropped tools or misfired nails.
- Consider wearing a dust mask when working in dusty environments or with coil nails.
Key Takeaway: Complete personal protective equipment prevents most common nail gun injuries.
Handling and Storage During Loading
How you handle your nail gun during the loading process affects both safety and tool longevity. Never point the gun at yourself or other people, even when it’s disconnected from power. Always keep your fingers away from the trigger area while loading. Store loaded nail guns in a safe location where children cannot access them.
For more information on proper tool storage, see our guide on how to store power tools safely in a garage.
Key Takeaway: Proper handling during loading prevents accidental injuries and tool damage.
How Do You Verify Correct Loading Before Operation?
Verification is the final step before you begin actual work. Taking thirty seconds to confirm proper loading prevents problems mid-project. A quick visual and functional check catches ninety-five percent of potential issues before they cause problems.
Visual Inspection After Loading
Look at your loaded nail gun from multiple angles. Verify that no nails protrude from the magazine sides or edges. Check that the magazine closure is secure and shows no gaps. Ensure the nail guide is clean and unobstructed. A visual inspection takes less than fifteen seconds and is absolutely essential.
- Confirm the magazine closure is complete with no visible gaps or separation.
- Verify that nail points are not visible outside the magazine housing.
- Check that the nail guide opening is clear of debris and fully aligned.
- Ensure the depth adjustment dial is set correctly for your fastening application.
- Look for any signs of damage or warping that occurred during loading.
Key Takeaway: A fifteen-second visual inspection prevents most loading-related operational failures.
Test Fire Procedure
Always perform a test fire into scrap material before starting your actual project. This confirms that nails feed smoothly and fire with proper velocity. A test fire reveals jams, misfeeds, or other issues in a safe, controlled environment. Never skip this step, even on simple projects where you’ve loaded the same gun dozens of times.
- Reconnect power or air pressure after completing the visual inspection.
- Point the gun at a piece of scrap wood or a test block at a safe angle.
- Fire three to five test nails, observing each one for proper depth and alignment.
- Verify that nails feed smoothly without jamming or misfiring between shots.
- Check that nail penetration depth matches your project requirements.
- Proceed to your actual work only after test fires confirm proper operation.
Key Takeaway: Test firing in scrap material confirms proper operation before starting your actual project.
What Nail Sizes and Types Work With Your Specific Gun?
Using the wrong nail size or type damages your tool and creates safety hazards. Every nail gun is designed for specific fastener dimensions. Consult your tool’s manual or the manufacturer’s website to confirm compatible nails. Using incorrect nails voids your warranty and can cause serious equipment failure.
Understanding Nail Gauge and Length Specifications
Nail gauge refers to wire thickness, while length is measured in inches. Common gauges range from 8 to 16, with higher numbers indicating thinner wire. Lengths typically range from one to three and a half inches depending on your application. Your nail gun manual specifies exact gauge and length ranges that it accepts.
- Consult your tool’s manual to find the exact gauge and length specifications.
- Purchase nails from the same manufacturer as your gun when possible for compatibility.
- Verify that nail strips or coils match your magazine type before purchasing.
- Check expiration dates on nail boxes, as old fasteners may have quality issues.
- Keep a reference card with your tool’s specifications for quick verification on jobsites.
Key Takeaway: Always verify nail specifications in your tool’s manual before loading.
Recommended Products

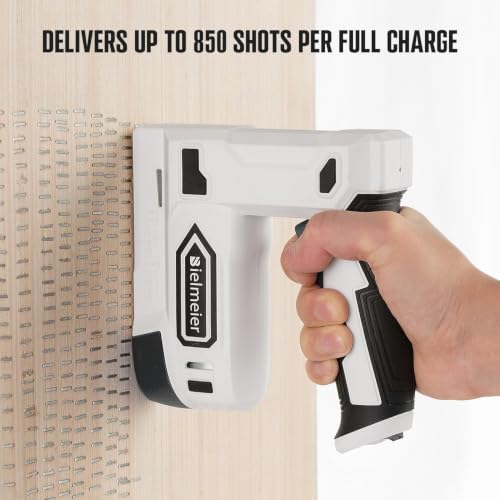
2-in-1 Cordless Electric Staple Gun & Brad Nailer Kit
- T50-FIRST FASTENING FOR EVERYDAY PROJECTS — T50 staples are the primary fastening function; 1/2 in. T50 staples are recommended for upholstery, fabric, foam, canvas, cardboard and thin softwood. Use 18GA brad nails up to 9/16 in. as a secondary option for light trim, picture frames and small finishing details.
- CORDLESS, LIGHTWEIGHT CONTROL — The 1.6 lb 4V tool keeps repair and decorating jobs mobile. Charge by Type-C in about 2 hours and work at up to 50 fasteners per minute.
- CHOOSE THE RIGHT MATERIAL BEFORE YOU START — Built for soft materials and thin softwood. Test on scrap first. It is not designed for hardwood, plywood, OSB, thick lumber, framing or heavy construction.
- BETTER RESULTS WITH CORRECT SETUP — Load the magazine from the bottom, use the specified T50 staple length, then press the contact nose flat at 90° before pulling the trigger.
- READY FOR LIGHT DIY — Includes 1,200 T50 staples and 400 brad nails to start common upholstery, display, décor and repair tasks. Use the safety switch and keep hands clear of the firing area.




As an Amazon Associate we earn from qualifying purchases. Product prices and availability are accurate as of the date/time indicated.

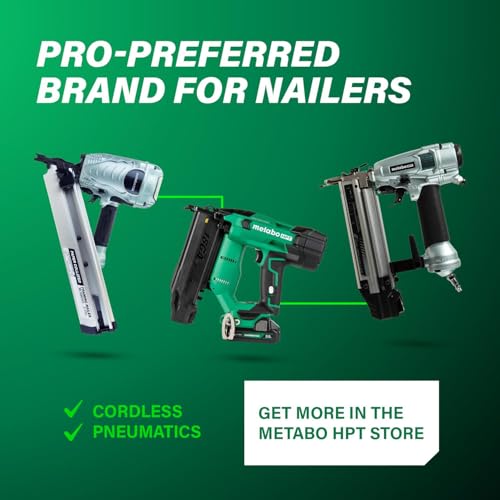
Metabo HPT NR90AES1 Framing Nailer - Pro-Grade 21° Pneumatic
- NAILER: 21 degree plastic collated framing nailer
- APPLICATIONS: Great for flooring and framing, truss build-up, window build-up, sub flooring, roof decking, wall sheathing and housing construction
- LIGHTWEIGHT: At only 7. 5 lbs and well-balanced allowing for ease of maneuverability and less user fatigue
- SELECTIVE ACTUATION: Allows for quick changes between sequential and contact nailing with the flip of a switch
- TOOL-LESS DEPTH ADJUSTMENT: Depth adjustment to countersink or flush drive into a variety of materials
- FASTENERS: Accepts 2-in up to 3-1/2-in plastic collated framing nails
- AWARD: Rated the Pro Preferred Nailer for 7 years running (2014 - 2020) by Builder and Developer Magazine
- WARRANTY: Covered by Metabo HPT's Professional 5-Year Tool Warranty
- COMPLIANT: Safety standards for pneumatic nailers in the United States




As an Amazon Associate we earn from qualifying purchases. Product prices and availability are accurate as of the date/time indicated.
Frequently Asked Questions
Can you load a nail gun while it’s plugged in or connected to air pressure?
No, never load a nail gun while it’s connected to power. For pneumatic tools, disconnect the air hose completely. For cordless models, remove the battery or engage the safety lock. This prevents accidental firing during the loading process. Even experienced users disconnect power before loading as a fundamental safety practice.
How do you know if your nails are loaded in the correct direction?
Nail points should always face toward the firing chamber. The plastic or paper strip should be positioned so the pointed ends go into the gun first. If nails are backward, they won’t fire properly and may jam. Check your tool’s manual for a diagram showing correct orientation specific to your model.
What should you do if your nail gun won’t fire after loading?
First, disconnect power and check for jams in the magazine or firing chamber. Verify that nails are properly oriented and fully seated. Ensure the battery is charged or the air pressure is adequate. Clean any debris from the nail guide. If problems persist, contact the manufacturer for warranty service.
How often should you clean your nail gun magazine?
Clean your magazine every month or after extended use in dusty environments. Use a dry brush or compressed air to remove dust and debris. Never use water or solvents, as these cause rust and damage. Regular cleaning prevents jams and extends your tool’s lifespan significantly.
Can you use different brands of nails in your nail gun?
Using the same brand as your gun is recommended, but compatible nails from other manufacturers usually work. Verify that nails match your gun’s exact specifications for gauge and length. Different brands may have slightly different strip or coil configurations. Always test fire in scrap material when switching brands.
What’s the difference between sequential and contact firing nail guns?
Sequential firing requires pulling the trigger for each individual nail, offering more control and safety. Contact firing allows rapid firing by holding the trigger while bouncing the nose against the work surface. Contact firing is faster for high-volume work but requires more skill and safety awareness. Check your gun’s manual to determine which firing mode it supports.
How Can You Maintain Your Nail Gun for Long-Term Performance?
Proper maintenance extends your nail gun’s lifespan and ensures reliable operation. Loading is just one part of comprehensive tool care. Regular cleaning, lubrication, and inspection keep your gun performing like new for years. A well-maintained nail gun costs less in repairs and downtime than a neglected one.
Regular Cleaning and Lubrication
Clean your nail gun after each project, especially when working in dusty environments. Use a dry brush to remove dust from the magazine and firing chamber. Apply manufacturer-recommended lubricant to moving parts monthly. Never over-lubricate, as excess oil attracts dust and debris. Proper maintenance takes fifteen minutes monthly and prevents expensive repairs.
Key Takeaway: Monthly cleaning and lubrication prevent most common nail gun problems.
Battery and Air Pressure Maintenance
For cordless models, charge batteries fully before each use and store them in cool, dry conditions. For pneumatic tools, drain your air compressor regularly to remove moisture. Check air hose connections for leaks that reduce efficiency. Proper power source maintenance ensures consistent performance and prevents operational failures.
Key Takeaway: Power source maintenance is as important as tool maintenance for reliable operation.
What Are the Best Practices for Loading Different Applications?
Different projects require different loading approaches. Framing work demands high-capacity magazines for efficiency. Trim work requires precision and careful nail placement. Understanding application-specific loading techniques improves both speed and quality. Experienced professionals adapt their loading methods based on project requirements.
High-Volume Framing Applications
Framing requires rapid firing and high nail capacity. Load coil nails whenever possible, as they hold more fasteners than strip nails. Ensure your magazine is completely full before starting work. Keep spare loaded magazines on hand to minimize downtime. High-volume work benefits from pneumatic tools due to their speed and power.
Precision Trim and Finish Work
Trim work requires careful nail placement and minimal surface damage. Use shorter nails and load them carefully to ensure proper seating. Test fire frequently to verify depth settings. Cordless nail guns offer better control and maneuverability in tight spaces. Strip nails work better than coil nails for trim applications.
Key Takeaway: Application-specific loading techniques improve both efficiency and quality.
Conclusion: Mastering Nail Gun Loading for Safe and Efficient Work
Learning how to load a nail gun correctly is the foundation of safe and efficient fastening work. The process takes less than one minute once you understand the basic principles, but skipping steps or rushing creates safety hazards and equipment damage. Always disconnect power before loading, verify nail orientation, and perform test fires before starting your project. Whether you’re using pneumatic, cordless, or coil-fed models, the fundamental safety principles remain consistent across all nail gun types.
Proper loading prevents jams, misfires, and injuries that can sideline projects and cause serious harm. Take time to inspect your tool before loading, follow the manufacturer’s specifications exactly, and never skip the verification steps. Invest in quality safety equipment and maintain your tools regularly. By following the comprehensive guidance in this article, you’ll develop professional-grade nail gun skills that keep you safe and productive for years to come.
For additional tool safety information, explore our guides on how to use a heat gun to strip paint and how to use an angle grinder safely to expand your power tool expertise.







Write Your Review
No reviews yet. Be the first to share your experience!