

What Is Metal Engraving with a Rotary Tool?
Metal engraving with a rotary tool involves using a high-speed handheld device to cut precise designs, text, or patterns into metal surfaces. A rotary tool operates at speeds between 5,000 and 35,000 revolutions per minute, making it ideal for detailed work on aluminum, steel, copper, and brass. This technique creates permanent, professional-looking marks that won’t fade or wear away easily. Rotary tools are affordable, versatile, and perfect for personalizing jewelry, tool handles, plaques, and decorative items. Whether you’re a hobbyist or professional, engraving metal opens creative possibilities for custom gifts and personalization projects.

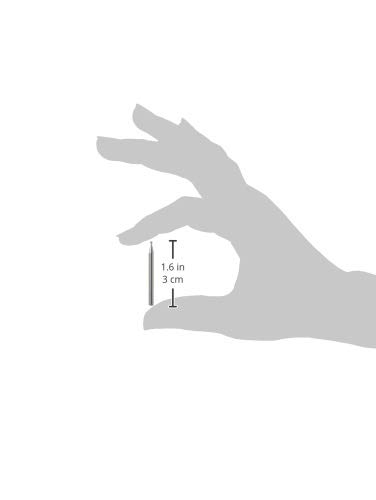
Dremel 106 Rotary Tool Accessory Engraving Bit- Perfect for Wood, Plastic, Linoleum, and Soft Metals
- Dremel's versatile and simple-to-use engraving bits make it easy to express your creativity
- Ideal for detailed material removal in applications like shaping, carving, engraving, hollowing, grooving, slotting, inlaying, making tapered holes, or freehand routing. Use bits on materials like wood, fiberglass, ceramics, plastic, jewelry and soft metals.
- The ball shape of the engraving bit can be used to make concave cuts or hollows out material - the tip makes round bottom slots and grooves and can be used for rounded side cuts
- Working diameter: 1/16-in (1.6 mm), shank: 1/8-in (3.2 mm), material: high speed steel
- For use with rotary tools that can accommodate a 1/8" shank size


As an Amazon Associate we earn from qualifying purchases. Product prices and availability are accurate as of the date/time indicated.
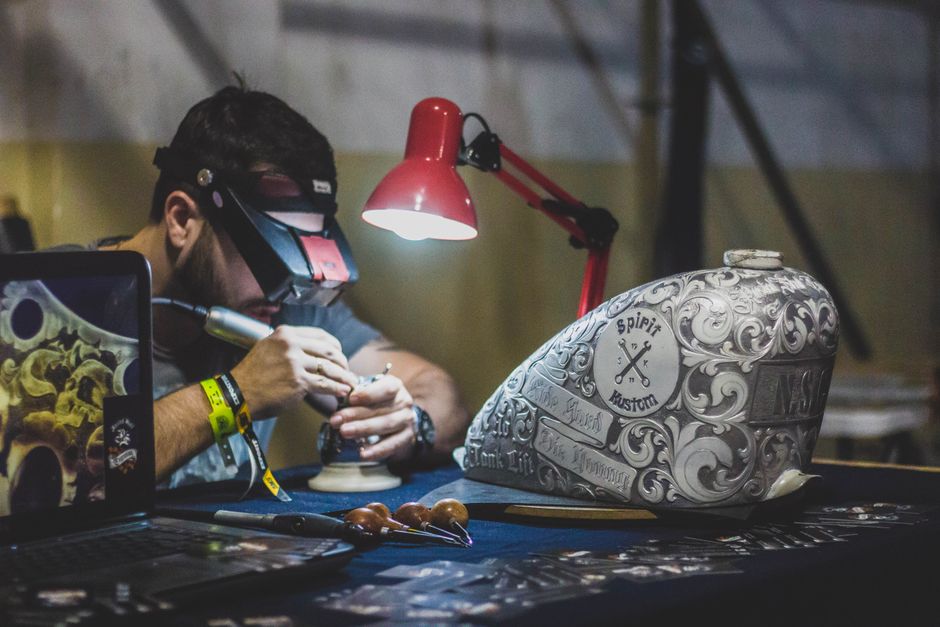
The beauty of rotary tool engraving lies in its precision and accessibility. Unlike expensive laser engravers, rotary tools cost between $30 and $150, making them practical for home workshops. The learning curve is gentle—most beginners achieve satisfying results within their first few attempts. You control the depth, speed, and detail entirely by hand, allowing artistic freedom and customization that machines cannot replicate.
Key Takeaway: Rotary tools offer an affordable, accessible method for creating permanent, detailed engravings on metal surfaces.
What Equipment and Materials Do You Need for Metal Engraving?
Before starting your first engraving project, gather the essential tools and materials. A quality rotary tool is your foundation, but several accessories and safety items matter equally. Proper preparation ensures clean results and protects your hands and eyes from metal dust and debris.
Essential Rotary Tool Accessories
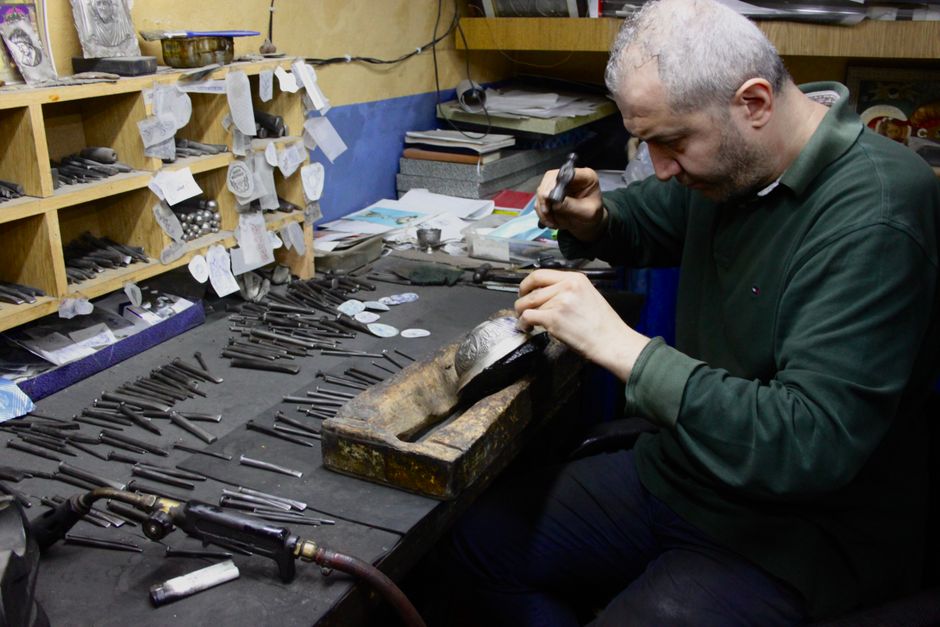
- Engraving bits (carbide or diamond-coated, typically 1/32″ to 1/8″ diameter).
- Cutting wheels for detail work and precision lines.
- Polishing and cleaning attachments for surface prep.
- Flexible shaft attachment for better control and reduced hand fatigue.
- Collet wrench and chuck to secure bits firmly in place.
Engraving bits come in various shapes: pointed tips for fine lines, rounded tips for smooth curves, and flat tips for broad strokes. Carbide bits last longer and handle harder metals better than steel alternatives. Diamond-coated bits provide even greater durability for extended use on stainless steel or hardened metals.
Safety Gear and Workspace Setup
Metal engraving generates fine dust particles and requires protective equipment. Wear safety glasses or a face shield to shield your eyes from flying debris. A dust mask or respirator prevents inhalation of metal particles, which can irritate lungs over time. Work gloves protect your hands, though avoid loose fabric that could catch on the rotating tool.
- Safety glasses or face shield (mandatory).
- Dust mask or N95 respirator for fine metal particles.
- Work gloves or leather finger guards.
- Secure clamp or vise to hold the metal steady.
- Well-lit workspace with adjustable task lighting.
- Workbench with a padded surface to protect metal from scratches.
Key Takeaway: Invest in quality engraving bits, proper safety gear, and a secure clamping system before beginning any project.
How Do You Prepare Metal Surfaces for Engraving?
Surface preparation determines the quality of your final engraving. A clean, properly prepared metal surface ensures sharp lines, consistent depth, and professional appearance. Skipping this step often results in uneven cuts, slipped bits, and disappointing results.
Cleaning and Degreasing
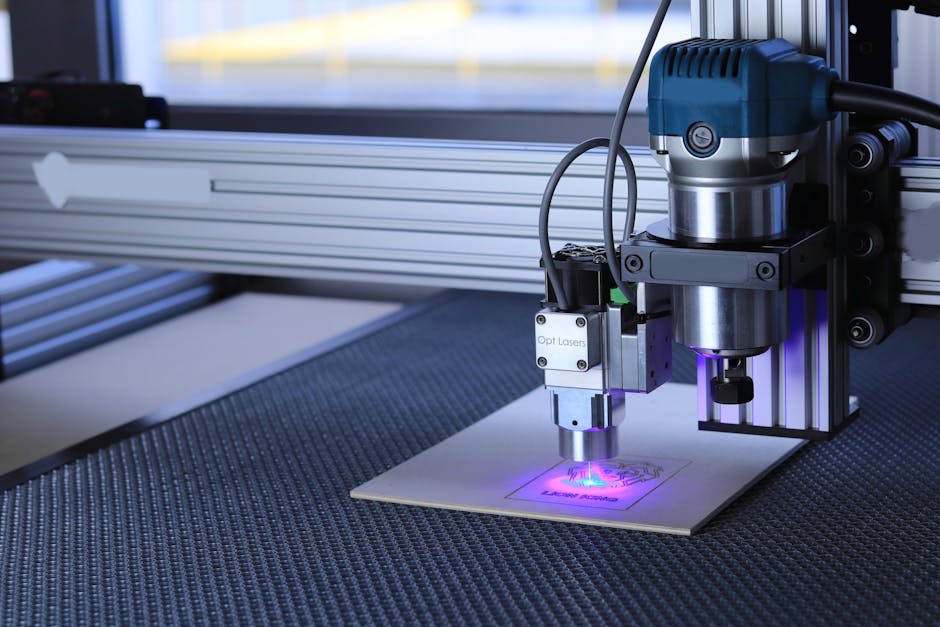
Start by removing dirt, oil, and oxidation from the metal surface. Use a wire brush or brass brush to scrub away loose debris and surface rust. For stubborn grime, soak the metal in a degreaser or use rubbing alcohol and a cloth. Dry the surface completely with a clean rag—moisture interferes with bit grip and can cause slipping during engraving.
If working with aluminum or copper, mild oxidation is normal but should be removed. Use fine-grit sandpaper (220-400 grit) to gently polish the surface until it appears uniform and clean. Avoid aggressive scrubbing that could create uneven surfaces or gouges.
Design Transfer and Marking
Before cutting, transfer your design onto the metal. Print your design and use carbon paper to trace it onto the metal surface, or use a scribe tool to lightly etch the outline. For simple designs, you can mark guidelines with a pencil or marker. Use masking tape to secure the design if needed, ensuring it won’t shift during engraving.
- Use carbon paper to transfer printed designs accurately.
- Scribe tools create light, visible guidelines without permanent marks.
- Tape down designs to prevent movement during cutting.
- Mark depth guides with a marker if creating uniform cuts.
Key Takeaway: Clean surfaces thoroughly and transfer designs carefully to ensure professional, precise engraving results.
What Techniques Should You Master for Quality Metal Engraving?
Successful engraving requires understanding speed settings, pressure control, and hand stability. These three factors separate amateur results from professional-quality work. Mastering them transforms your rotary tool into a precision instrument capable of stunning detail.
Speed and Pressure Control
Speed selection depends on the metal type and bit size. Harder metals like steel require lower speeds (around 10,000-15,000 RPM) to prevent bit breakage and ensure clean cuts. Softer metals like aluminum and copper tolerate higher speeds (20,000-30,000 RPM) for faster, more detailed work. Always start slower than you think necessary and increase gradually as you gain confidence.
Pressure control is equally critical. Apply steady, light pressure—let the bit do the work rather than forcing it. Excessive pressure causes the bit to skip, creating uneven lines or breaking the bit entirely. Think of it as guiding the tool gently rather than pushing it aggressively. Consistent, moderate pressure produces the cleanest, most uniform engravings.
Hand Stability and Line Quality
Steady hands create smooth, professional lines. Use a flexible shaft attachment to reduce vibration and improve control compared to holding the main tool body. Rest your forearm on the workbench or table for added stability. For curved designs, rotate the metal rather than rotating your wrist—this maintains consistent tool angle and line width.
- Use a flexible shaft for better control and reduced hand fatigue.
- Rest your forearm on the bench for stability during detailed work.
- Rotate the metal for curves instead of twisting your wrist.
- Practice on scrap metal before attempting final designs.
- Take breaks to avoid hand fatigue affecting line quality.
Practice on scrap pieces before committing to final projects. This builds muscle memory and helps you understand how different bits behave on your specific metal type. Even experienced engravers test techniques on practice pieces first.
Key Takeaway: Master speed adjustment, light pressure control, and hand stability to achieve clean, professional-quality engravings consistently.
What Step-by-Step Process Should You Follow for Engraving Metal?
Following a structured process ensures consistent results and prevents costly mistakes. This methodical approach works whether you’re personalizing a wedding ring or engraving a tool handle.
Complete Engraving Process
- Secure the metal: Clamp the metal firmly in a vise or secure it with C-clamps. Ensure it cannot shift during engraving.
- Install the correct bit: Select the appropriate engraving bit for your design detail level. Tighten it securely in the collet using the wrench.
- Set the speed: Adjust the rotary tool to the appropriate RPM for your metal type. Softer metals: 20,000-30,000 RPM. Harder metals: 10,000-15,000 RPM.
- Test on scrap: Run a quick test on scrap metal to verify settings and bit performance.
- Engrave slowly: Start your design, moving the tool slowly along guidelines. Maintain consistent pressure and speed throughout.
- Check depth: Pause periodically to examine depth. Adjust pressure if cuts appear too shallow or too deep.
- Clean as you go: Wipe away metal dust occasionally to see your work clearly.
- Finish and polish: After engraving, clean the metal thoroughly and apply finishing oil or clear coat if desired.
This systematic approach prevents common mistakes like uneven depth, skipped lines, or bit breakage. Each step builds on the previous one, creating a reliable workflow you can repeat for multiple projects.
Key Takeaway: Follow a structured process from securing metal through final polishing to achieve consistent, professional results.
What Common Mistakes Should You Avoid When Engraving Metal?
Learning from others’ mistakes accelerates your skill development. These common pitfalls waste time, materials, and frustration—but they’re entirely preventable with proper knowledge.
Technical Mistakes and How to Fix Them
- Pressing too hard: Reduces control, breaks bits, and creates uneven cuts. Solution: Use light, consistent pressure.
- Incorrect speed settings: Causes bit slipping or breakage. Solution: Match speed to metal hardness and bit size.
- Loose bit installation: Creates vibration and poor line quality. Solution: Always tighten the collet securely with the wrench.
- Dirty or unprepared surfaces: Causes bits to slip and lines to appear ragged. Solution: Clean thoroughly before starting.
- Rushing the design: Results in shaky lines and mistakes. Solution: Work slowly and deliberately, taking breaks as needed.
Many beginners rush through their first projects, eager to see results. Engraving rewards patience. Slow, deliberate movements produce far superior results than hurried attempts. If a line isn’t perfect, you can often deepen or widen it with additional passes rather than abandoning the project.
Key Takeaway: Avoid common mistakes by using light pressure, matching speed to metal type, and working deliberately rather than rushing.
What Types of Metals Are Best for Rotary Tool Engraving?
Different metals respond differently to engraving. Understanding these characteristics helps you choose appropriate projects and adjust your technique accordingly.
Metal Compatibility and Characteristics
- Aluminum: Soft, easy to engrave, excellent for beginners. Takes detail beautifully.
- Copper: Soft, warm appearance, ideal for decorative items and jewelry.
- Brass: Medium hardness, professional appearance, works well for plaques and handles.
- Steel: Hard, requires lower speeds, produces durable engravings for tools and industrial items.
- Stainless steel: Very hard, requires patience and sharp bits, but results are extremely durable.
- Silver: Soft and precious, excellent for jewelry but requires careful handling.
Softer metals like aluminum and copper are ideal for learning because they forgive minor technique errors. Harder metals like stainless steel demand more precision but produce engravings that last indefinitely. Consider starting with aluminum or copper before progressing to steel or stainless steel projects.
Key Takeaway: Start with softer metals like aluminum and copper, then progress to harder metals as your skills develop.
How Can You Achieve Professional Finishing Touches?
The finishing process separates amateur engravings from professional-quality work. Proper finishing enhances appearance, protects the metal, and adds polish to your project.
Cleaning and Polishing Options
After engraving, thoroughly clean away all metal dust and debris. Use a soft brush and compressed air to reach inside engraved lines. For stubborn residue, use rubbing alcohol and a soft cloth. Once clean and dry, consider polishing the entire piece to enhance its appearance and protect the metal.
For decorative items, apply a clear protective coat. Polyurethane spray, clear lacquer, or clear enamel protects the metal from oxidation and keeps engravings looking sharp. For functional items like tool handles, a simple oil finish prevents rust while maintaining grip. Test any finish on a scrap piece first to ensure it complements your design.
- Use compressed air and soft brushes to remove all metal dust from engraved lines.
- Polish with fine-grit sandpaper or polishing compound for enhanced appearance.
- Apply clear protective coating to prevent oxidation and maintain sharpness.
- Test finishes on scrap metal before applying to finished projects.
Key Takeaway: Professional finishing requires thorough cleaning, optional polishing, and protective coating to preserve your engraving quality.
What Project Ideas Can You Start With as a Beginner?
Starting with appropriate projects builds confidence and ensures early success. These beginner-friendly ideas showcase rotary tool engraving capabilities without overwhelming complexity.
Beginner-Friendly Engraving Projects
- Personalized aluminum tags: Simple initials or names on small aluminum blanks. Excellent practice for letter formation.
- Tool handle identification: Engrave your initials or shop name on tool handles. Functional and satisfying.
- Decorative copper coasters: Simple geometric patterns or designs on soft copper. Beautiful results with minimal complexity.
- Brass drawer pulls: Add decorative flourishes to plain brass hardware. Transforms ordinary items into custom pieces.
- Gift jewelry: Engrave initials, dates, or coordinates on bracelets, pendants, or keychains for personalized gifts.
These projects use soft metals, simple designs, and small work areas—perfect for building foundational skills. Success with these projects motivates progression to more complex designs and harder metals. Each project teaches valuable lessons about pressure control, speed adjustment, and design execution.
Key Takeaway: Start with simple projects on soft metals to build confidence and foundational skills before attempting complex designs.
Recommended Products

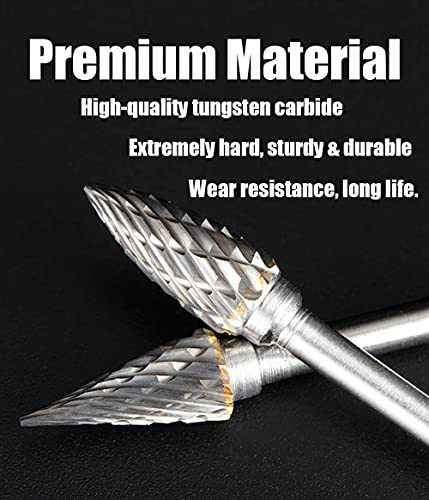
Tungsten Carbide Rotary Burr Set for Dremel, 10PCS Carbide Double Cut Carving Burr Bits with 1/8” Shank Rotary Tool Accessories for Woodworking, Engraving, Drilling, Steel Metal Working
- 【Carbide Burr Set】: These carving bits are made from Tungsten Carbide Steel for long life , sturdy and durable. Shank Diameter: 1/8'' , Total Length:45-50mm, Cutting Diameter: 1/4''. 1/8'' shank fits most small rotary tools with three jaw chuck
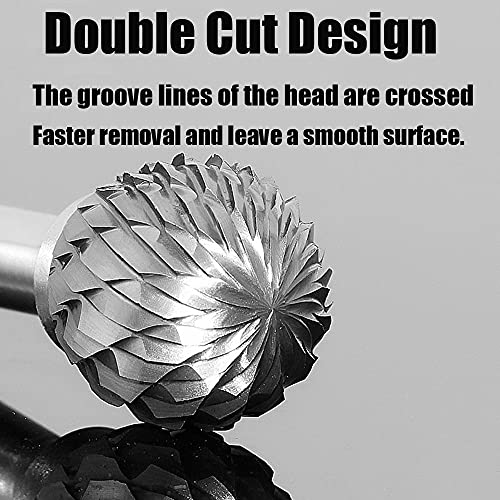
- 【Double Cut Design】: The groove lines of these carving bits’ head are crossed, which makes it more suitable for materials with relatively low density, such as wooden, plastic and aluminum. To maximize cutting and material removal efficiency and effectiveness
- 【Premium Material】: This carbide burr set/rotary bit set is made of premium tungsten Carbide steel which has long working life, it has extremely high hardness and good toughness, machining hardness reach to HRC70. The carbide burr set cut through extraneous material like a hot knife through butter
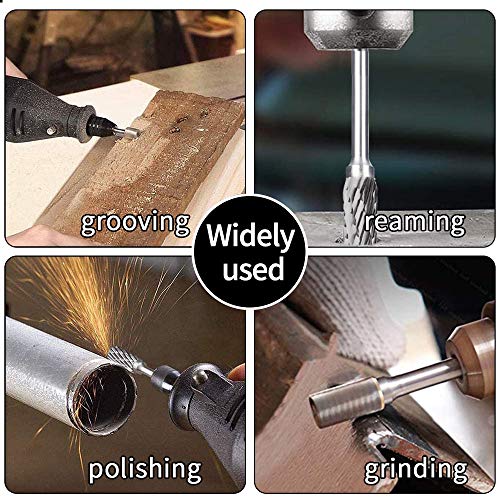
- 【Wide Range Adaptability】: 1/8” shank carbide rotary file fits dremel and most die grinders or rotary tools. An ideal choice for metal working, tool making, DIY woodworking, wood carving, model engineering ,groove processing, engraving, polishing, touch-up and smooth finishing
- 【You Will Get】: 10 PCS tungsten steel rotary burrs set packaged into a small case for safety storage and protection. Any problems, please feel free to contact us. We are happy to make solution or send replacement and sincere apologies. Many thanks for your support!


As an Amazon Associate we earn from qualifying purchases. Product prices and availability are accurate as of the date/time indicated.

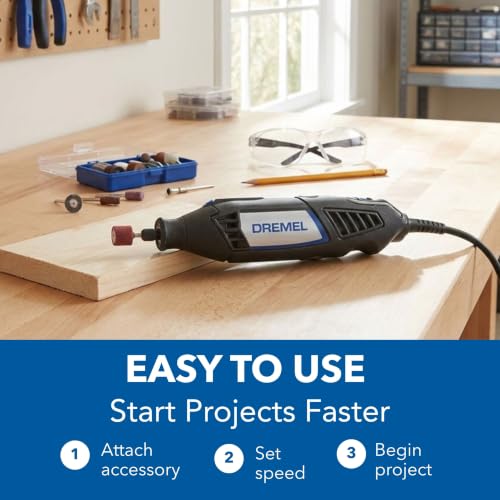
Dremel 4000 Variable Speed Rotary Tool Kit - 32 Accessories
- HIGH performance motor: This corded rotary tool is 33% more powerful than the DREMEL 3100, and the 4000’s powerful 1.6 Amp motor provides maximum performance and high power at all speeds (5,000-35,000 RPM)
- SUSTAINABLY focused power tool: The 4000's tool housing uses > 55% recycled plastic. The DREMEL kit is contained in a fully recyclable carton, and the tool kit is polybag-free to help reduce landfill waste
- SLEEK tool design built for endurance: These DREMEL tools feature a sleek & ergonomic corded design with 360-degree grip zone, maximizing comfort and control allowing continuous performance for extended working sessions
- ELECTRONIC speed control: Power rotary tools maintain consistent speed even during the most demanding applications, while an innovative air flow system provides ventilation to prevent heat build-up for smoother, cooler, and quieter operation
- VERSATILE: DREMEL tool accessories offer the widest range of applications, including but not limited to cutting, sanding, cleaning / polishing, carving / engraving, & sharpening/ grinding



As an Amazon Associate we earn from qualifying purchases. Product prices and availability are accurate as of the date/time indicated.
Frequently Asked Questions
Can you engrave stainless steel with a rotary tool?
Yes, but stainless steel requires lower speeds (8,000-12,000 RPM) and sharp, quality bits. The process takes longer than softer metals, and you must maintain steady pressure to prevent bit slipping. Use carbide or diamond-coated bits for best results. Practice on aluminum first to develop proper technique before attempting stainless steel.
What’s the best rotary tool speed for engraving metal?
Speed depends on metal hardness. Aluminum and copper: 20,000-30,000 RPM. Brass and mild steel: 15,000-20,000 RPM. Stainless steel and hardened steel: 8,000-15,000 RPM. Start slower than recommended and increase gradually. Higher speeds work for softer metals and fine detail work; lower speeds suit harder metals and prevent bit breakage.
How deep should metal engravings be?
Typical engraving depth ranges from 0.5mm to 2mm depending on design and metal type. Shallow engravings (0.5-1mm) work for delicate detail; deeper cuts (1.5-2mm) create bold, durable engravings. Practice on scrap metal to understand depth control with your specific tool and technique.
Can you engrave gold or silver jewelry with a rotary tool?
Yes, rotary tools work beautifully on precious metals. Use high speeds (25,000-30,000 RPM) and very light pressure to prevent gouging soft metals. Sharp bits are essential. Work slowly and carefully since precious metals are expensive and mistakes are costly. Practice extensively on base metals first.
How do you prevent the rotary tool bit from slipping during engraving?
Ensure the bit is tightened securely in the collet using the wrench. Clean the metal surface thoroughly before starting. Use appropriate speed for your metal type. Apply light, consistent pressure rather than forcing the tool. Secure the metal firmly so it cannot shift during engraving.
What’s the difference between engraving and etching with a rotary tool?
Engraving cuts into the metal surface using a rotating bit, creating raised edges and defined grooves. Etching uses chemicals or specialized techniques to create surface-level marks. Rotary tools perform engraving, not etching. Engraving is more durable and visible than etching.
What Should You Remember About Metal Engraving with a Rotary Tool in 2026?
Metal engraving with a rotary tool remains one of the most accessible and rewarding techniques for personalizing metal items in 2026. The affordability and versatility of rotary tools make them perfect for hobbyists, small business owners, and professional craftspeople. Whether you’re personalizing jewelry, creating custom gifts, or identifying tools, rotary tool engraving offers professional results without expensive equipment or extensive training.
Success depends on understanding your equipment, preparing surfaces properly, and mastering fundamental techniques. Start with soft metals and simple designs, then progress to harder metals and more complex artwork as your confidence grows. Invest in quality bits and safety gear—these small expenses prevent frustration and ensure consistent results. Most importantly, practice patience and deliberation; rushing leads to mistakes, while slow, careful work produces stunning engravings.
The engraving community continues to grow, with countless online resources, tutorials, and inspiration available. Join forums, watch demonstrations, and study others’ work to continuously improve. Your first engravings may be simple, but with dedication and practice, you’ll develop skills capable of creating heirloom-quality custom pieces. The rotary tool in your hand is capable of far more than you initially imagine—unlock that potential through proper technique and persistent practice.
Key Takeaway: Master rotary tool engraving through proper preparation, correct technique, and deliberate practice to create professional-quality metal engravings.







Write Your Review
No reviews yet. Be the first to share your experience!