

How to Use a Heat Gun to Strip Paint: Quick Answer and Introduction
A heat gun strips paint by softening the coating with controlled heat, allowing you to scrape it away cleanly without harsh chemicals. Point the gun 3-6 inches from the surface, heat for 30-60 seconds until paint bubbles, then scrape gently with a putty knife. Heat guns work best on wood, metal, and drywall surfaces. They’re faster than chemical strippers and safer for indoor use. Always wear safety gear, maintain proper ventilation, and test on inconspicuous areas first. Modern heat guns in 2026 offer variable temperature controls and ergonomic designs for better precision and comfort during extended projects.

Wagner Spraytech HT1000 Kit Dual-Temperature Heat Gun with 3 Nozzles
- DUAL TEMP HEAT GUN: The HT1000 Heat Gun Kit offers a 750ᵒF and 1000ᵒF temperature setting to help complete household home improvement tasks or projects that require heat
- HEAT GUN FOR HOUSEHOLD PROJECTS: Use this electric heat gun to easily loosen rusted bolts, shrink heat shrink tube, remove flooring, thaw frozen pipes, shrink wrap, heat PVC, remove paint from furniture for paint removal, and more
- INCLUDES THREE NOZZLES ATTACHMENTS: The kit includes an edge protector nozzle for directing heat away from delicate surfaces. The flare nozzle distributes heat across a long, narrow area. The concentrator nozzle outputs heat in a small, focused area
- DURABLE WITH BUILT IN SAFETY: Features a corrosion resistant nozzle for long lasting use and has an integrated stand for safe, hands-free operation
- CUSTOMER CENTRIC: Wagner has been in the business for 50+ years and puts safety first and our products are ETL Listed (tested and approved by Intertek to UL and CSA Safety Standards). Have questions? Our U.S based customer service team is happy to help!


As an Amazon Associate we earn from qualifying purchases. Product prices and availability are accurate as of the date/time indicated.
Paint stripping is a common DIY task for renovations, furniture restoration, and surface preparation. Heat gun methods have become increasingly popular because they eliminate toxic fumes and reduce cleanup time significantly. Whether you’re refinishing antique furniture or preparing walls for new paint, understanding heat gun techniques ensures professional results without damaging underlying surfaces.
What Is a Heat Gun and How Does It Work for Paint Removal?
A heat gun is an electrical tool that blows hot air at controlled temperatures, typically ranging from 200°F to 1,200°F. The device heats paint until it loses adhesion and bubbles away from the substrate. This thermal method is gentler than scraping alone because the softened paint releases naturally rather than being forcibly removed.
The mechanism is straightforward: electricity heats an internal coil, a fan circulates air across it, and heated air exits through a nozzle. Modern 2026 models feature digital temperature displays and multiple heat settings for different paint types. Latex paints typically soften around 350°F, while oil-based paints require 600°F or higher. The heat penetrates paint layers gradually, making removal easier without gouging wood or metal underneath.
Key Components of Modern Heat Guns
- Variable temperature controls for different paint types and materials.
- Ergonomic handles with heat-resistant grips for extended use.
- Multiple nozzle attachments for precision work and large surfaces.
- Cool-down features and automatic shutoff for safety.
- Lightweight designs under 2 pounds for reduced hand fatigue.
Key Takeaway: Heat guns work by softening paint adhesion through controlled thermal energy, making removal safer and cleaner than mechanical scraping alone.
How Do You Prepare Your Workspace Before Using a Heat Gun?
Proper preparation prevents accidents and ensures efficient paint removal. Start by clearing the work area of flammable materials, including curtains, papers, and stored chemicals. Heat guns generate extreme temperatures that can ignite combustibles within seconds. Ensure adequate ventilation by opening windows and doors, or use fans to direct fumes away from your workspace.
Protect floors and adjacent surfaces with drop cloths or plastic sheeting. Scraped paint chips fall continuously during the process. Lay newspaper under your work zone to catch debris for easier cleanup. Test the heat gun on a hidden area first to confirm it won’t damage the underlying surface or cause excessive darkening.
Essential Preparation Steps
- Remove or cover flammable items within 3 feet of the work area.
- Lay drop cloths under and around the project surface.
- Open windows and set up fans for continuous air circulation.
- Inspect the surface for existing damage or weak spots.
- Gather all tools within arm’s reach before starting.
- Put on safety glasses, gloves, and a dust mask.
Key Takeaway: Thorough workspace preparation prevents fires, protects surfaces, and creates a safe environment for extended heat gun use.
What Safety Equipment Do You Need When Using a Heat Gun?
Safety gear is non-negotiable when working with heat guns. Wear heat-resistant gloves rated for at least 500°F to protect your hands from accidental contact. Safety glasses shield your eyes from paint chips and dust particles ejected during scraping. A respirator or dust mask filters particles and prevents inhalation of old paint dust, which may contain lead in pre-1978 structures.
Clothing matters too: wear long sleeves and closed-toe shoes to protect skin from heat exposure and falling debris. Keep a fire extinguisher within reach in case of accidental ignition. Never wear synthetic fabrics that melt easily. Ensure proper ventilation to disperse fumes and prevent dizziness or headaches during extended sessions.
Complete Safety Gear Checklist
- Heat-resistant gloves rated for 500°F or higher temperatures.
- Safety glasses or face shield for eye protection.
- NIOSH-approved respirator or N95 dust mask.
- Long sleeves and pants made from natural, fire-resistant materials.
- Closed-toe shoes with thick soles.
- Fire extinguisher positioned nearby for emergency use.
Key Takeaway: Proper safety equipment prevents burns, inhalation injuries, and eye damage during heat gun paint stripping operations.
How Do You Strip Paint Step-by-Step Using a Heat Gun?
Begin by plugging in your heat gun and allowing it to warm up for 30-60 seconds. Set the temperature based on your paint type: start with lower settings around 500°F for latex paints, and increase to 800°F for oil-based or multiple paint layers. Position the gun nozzle 3-6 inches from the surface, angling it slightly downward. Never hold it stationary; keep it moving in circular motions to prevent scorching the underlying material.
Watch for paint bubbling as the heat penetrates the coating. This bubbling indicates the paint is softening and ready for removal. Once bubbling appears, immediately scrape with a putty knife held at a 30-45 degree angle. Use gentle, controlled pressure to avoid gouging wood or metal. Work in small sections to maintain heat consistency and prevent paint from re-hardening.
Detailed Paint Stripping Procedure
- Heat the surface for 30-60 seconds using circular motions.
- Watch for paint bubbling as your removal signal.
- Scrape immediately with a putty knife at 30-45 degrees.
- Use gentle pressure to avoid damaging the substrate.
- Work in small 12-18 inch sections for consistent results.
- Repeat heating and scraping until all paint is removed.
- Sand the surface smooth after paint removal is complete.
Multiple paint layers require patience and repetition. Heat each layer individually, scraping thoroughly before moving to the next section. Stubborn paint may need 90-120 seconds of heating. If paint hardens before scraping, reheat rather than forcing the scraper, which risks surface damage. After removing all paint, allow the surface to cool completely before sanding or refinishing.
Key Takeaway: Systematic heating and scraping in small sections ensures complete paint removal while protecting underlying surfaces from damage.
What Techniques Help You Work Efficiently on Different Surfaces?
Wood surfaces require lower heat settings (450-600°F) to prevent scorching or charring. Move the heat gun constantly to distribute warmth evenly. Metal surfaces tolerate higher temperatures (800-1,000°F) and conduct heat rapidly, so work quickly to prevent overheating. Drywall needs careful attention because excessive heat can damage the paper facing; use lower temperatures and shorter heating intervals.
Vertical surfaces demand different techniques than horizontal ones. Gravity helps paint fall away on walls, but you must work upward to prevent hot debris from falling on your hands. On furniture, work with the wood grain when possible. Intricate details and corners require a narrower nozzle attachment to concentrate heat precisely without affecting surrounding areas.
Surface-Specific Tips
- Wood: Use 450-600°F, move constantly, and sand after removal.
- Metal: Use 800-1,000°F with faster scraping to prevent heat damage.
- Drywall: Use lower temperatures and shorter heating times.
- Vertical surfaces: Work upward to avoid hot debris contact.
- Corners and details: Use narrow nozzles for precision control.
Key Takeaway: Adjusting heat settings and techniques for specific surfaces prevents damage while maximizing paint removal efficiency.
How Do You Handle Stubborn Paint and Multiple Layers?
Stubborn paint requires extended heating times and sometimes multiple passes. Increase the heat gun temperature gradually until paint bubbles consistently. If paint re-hardens between scraping attempts, simply reheat rather than applying excessive scraper pressure. Some old paint, especially multiple layers, may need 120-180 seconds of heating before it releases properly.
For multiple paint layers, work one layer at a time rather than trying to remove everything at once. The bottom layer often bonds more firmly to the substrate, requiring longer heating and gentler scraping. If you encounter lead-based paint (common in pre-1978 homes), consult a professional abatement service instead of heating, which can release lead particles into the air.
Strategies for Difficult Paint Removal
- Extend heating time to 120-180 seconds for stubborn paint.
- Gradually increase temperature if initial settings don’t bubble paint.
- Remove one layer at a time rather than all at once.
- Reheat sections that harden before scraping.
- Use a wire brush to loosen paint edges before final scraping.
- Consider chemical strippers for extremely resistant finishes.
Key Takeaway: Patience with heating times and layered removal prevents surface damage and ensures complete paint elimination.
What Post-Removal Steps Ensure a Smooth Finish?
After paint removal, allow the surface to cool completely before touching it. Inspect for remaining paint residue, heat spots, or incomplete areas. Use a wire brush or fine-grit sandpaper to remove any remaining paint chips and smooth rough spots. Sand the entire surface with 120-150 grit sandpaper to prepare it for staining, painting, or sealing.
Clean the surface thoroughly with a damp cloth to remove dust and debris. For wood, allow it to dry completely before applying stain or primer. Metal surfaces may show oxidation or rust spots; address these with appropriate primers or rust converters. Drywall may need spackling compound to fill minor gouges before repainting.
Post-Stripping Finishing Process
- Allow the surface to cool completely before handling.
- Inspect for remaining paint residue or heat damage.
- Use wire brushes to remove paint chips and debris.
- Sand with 120-150 grit paper for smooth surface preparation.
- Clean thoroughly with a damp cloth and allow drying.
- Apply primer or sealer appropriate to your material type.
Key Takeaway: Proper post-removal cleaning and sanding prepare surfaces for finishing while ensuring longevity of new paint or stain applications.
How Do You Maintain and Store Your Heat Gun Safely?
Proper maintenance extends your heat gun’s lifespan and ensures consistent performance. Allow the tool to cool completely after each use before storing. Never wrap the cord around the hot body; instead, coil it loosely once the unit is completely cool. Check the power cord regularly for damage or fraying. Clean the nozzle with a soft brush to remove paint residue that may accumulate during use.
Store your heat gun in a dry location away from moisture and temperature extremes. Keep it in a toolbox or cabinet rather than exposed to dust. For related storage guidance, see our comprehensive guide to storing power tools safely in a garage. Never store the heat gun while still warm or with debris in the nozzle. Replace the nozzle if it becomes damaged or clogged.
Key Takeaway: Regular maintenance and proper storage preserve your heat gun’s functionality and safety for years of reliable paint stripping performance.
Recommended Products

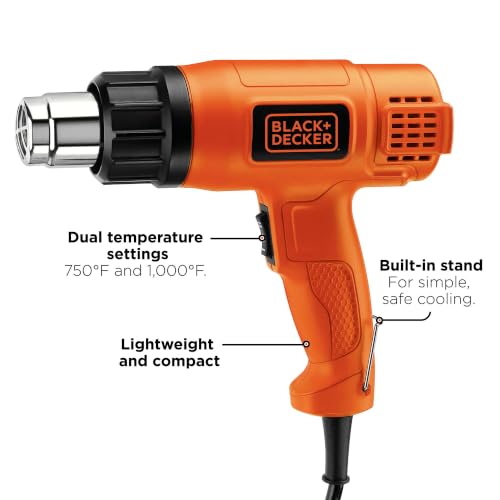
BLACK+DECKER Heat Gun for Crafts, Corded, Dual Heat Settings up to 1000 Degrees, 1350 Watt (HG1300)
- Versatile Use – 1,350 W heat gun is useful for a variety of applications, such as stripping paint, loosening rusted nuts, thawing pipes, and more.
- Dual Temperature Settings – Switch between 750°F and 1,000°F temperature settings.
- Built-In Stand – Makes cooldown easier and safer.
- 3-Position Side Handle – Provides a comfortable grip and superb control for all applications.
- Lightweight and Compact – Simple to maneuver and reduces muscle fatigue.
- Corded – Corded design offers unlimited runtime.
- High temperature output - please consult user manual for safe operation of this tool.
- Includes a glass protect nozzle.


As an Amazon Associate we earn from qualifying purchases. Product prices and availability are accurate as of the date/time indicated.

Rerdeim 5Pcs Putty Knife, Set, 1" 2" 3" 4" 5" Scraper, Spackle Knife, Paint Scraper, Scraper Tool, No Rusting, Perfect For Repairing Drywall, Removing Wallpaper, Mud, Plaster Scraping
- 【Multipurpose】5pcs Spackling Knives Different Sizes Are Available, Perfect for Putty, Wallpaper, Applique, Backing, Repair, Paint, Plaster, Including Drywall, Plaster, Baking, Spackling, Patching, Stucco and Much More, Can Be Used to Repair All Kinds of Dents, Cracks, Holes, Spackle Tool Suitable for Any Work Project
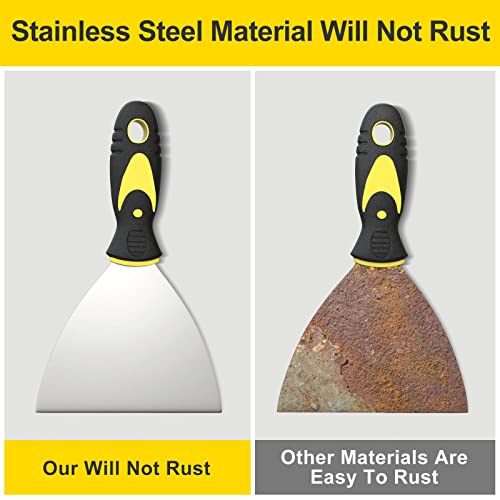
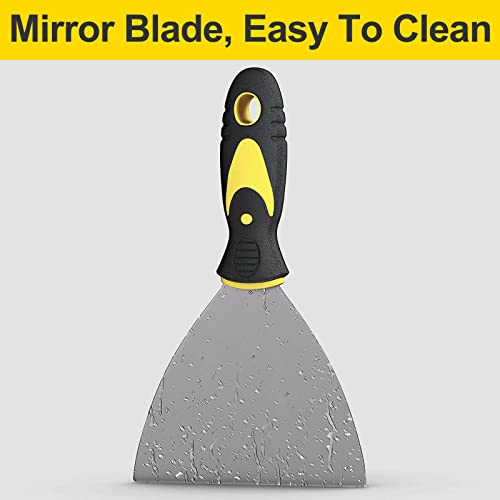
- 【Will Not Corrode】Putty Knives Use of High-quality Stainless Steel Material, not Rust, Solid Corrosion Resistance, Easy To Clean, no Need To Worry About Deformation And Breakage. Is The Perfect Metal Scraper Tool
- 【Comfortable Grip】The Handle Part Is A Perfect Combination Of Soft Rubber And Plastic, Retains Sturdiness And Durability While Ensuring A Comfortable Grip. Also Designed With Holes For Easy Storage
- 【Family Essentials】What You Get: 1inch Putty Knife, 2inch Putty Knife, 3inch Putty Knife, 4inch Putty Knife, And 5inch Putty Knife; come With 5 Different Sizes Meet Your Different Using Requirements, can Be Used As Paint Scraper Tool, Wallpaper Remover, Drywall Knife Set And Most
- 【Customer Commitment】our Commitment to Rerdeim Has Always Been Committed To Providing Customers With Higher Quality Products And A Comfortable Customer Experience. If You Have Any Concerns Or Questions About This Product, Please Feel Free To Contact Us



As an Amazon Associate we earn from qualifying purchases. Product prices and availability are accurate as of the date/time indicated.
Frequently Asked Questions
Can you use a heat gun on lead-based paint?
No, heating lead-based paint releases toxic lead particles into the air. If your project involves pre-1978 construction, hire a certified lead abatement professional. They use safe removal methods that don’t create airborne contamination. Never attempt DIY heat gun removal on suspected lead paint.
What temperature should you set a heat gun for latex paint?
Set your heat gun to 500-600°F for latex paint removal. Start at the lower end and increase gradually if paint doesn’t bubble within 30-45 seconds. Latex softens at lower temperatures than oil-based paints, so excessive heat risks scorching underlying surfaces unnecessarily.
How long does it take to strip paint with a heat gun?
Paint stripping time varies by surface area, paint type, and layer count. Small furniture pieces typically take 1-3 hours. Larger wall sections or multiple layers may require 4-8 hours or more. Plan for 30-90 seconds per small section, including heating and scraping time.
Is it safe to use a heat gun indoors?
Yes, heat guns are safer indoors than chemical strippers because they don’t release toxic fumes. However, ensure proper ventilation by opening windows and using fans. Wear a dust mask to avoid inhaling old paint particles. Never use heat guns in enclosed spaces without airflow.
Can you use a heat gun on plastic or vinyl?
No, heat guns will melt or warp plastic and vinyl surfaces. Use chemical strippers or manual scraping for these materials. If your project involves plastic trim or vinyl siding, cover these areas completely before using a heat gun nearby.
What’s the difference between a heat gun and a hair dryer?
Heat guns reach temperatures up to 1,200°F, while hair dryers only reach 140°F. Heat guns have concentrated airflow and precise temperature control. Hair dryers cannot soften paint effectively. Always use proper heat guns designed for paint stripping, never household appliances.
How Can You Troubleshoot Common Heat Gun Paint Stripping Problems?
Paint not bubbling indicates insufficient heat or temperature settings too low. Increase the heat gun temperature gradually in 50°F increments until bubbling occurs. Extend heating time to 60-90 seconds if the surface is particularly thick or layered. Ensure the nozzle isn’t clogged with debris, which reduces heat output.
Surface scorching or darkening means the heat gun is too close or temperatures are too high. Increase the distance to 4-6 inches and lower the temperature setting. Work more quickly to prevent heat concentration in one area. If scorching occurs on wood, sand it out after paint removal or consider using chemical strippers instead.
Key Takeaway: Systematic troubleshooting and temperature adjustments resolve most paint stripping challenges without resorting to harsh chemicals or damaging underlying surfaces.
What Are the Advantages of Heat Gun Paint Stripping Compared to Alternatives?
Heat guns offer significant advantages over chemical strippers and mechanical methods. They produce no toxic fumes, making them safe for indoor use without extensive ventilation requirements. Chemical strippers often require hours of soaking and generate hazardous waste disposal challenges. Mechanical scraping damages surfaces easily and creates excessive dust.
Heat gun stripping is faster than chemical methods for most applications. Results are cleaner with minimal residue left behind. The process is environmentally friendly because it generates no chemical waste. Heat guns cost less than chemical stripper purchases and professional abatement services. For detailed comparisons with other tool techniques, explore our guide to sanding furniture for finishing work after paint removal.
- No toxic fumes or chemical disposal concerns.
- Faster results than chemical strippers on most surfaces.
- Safer for underlying materials when properly controlled.
- Lower cost than professional services or chemical alternatives.
- Environmentally friendly with minimal waste generation.
- Suitable for indoor use with proper ventilation.
Key Takeaway: Heat guns provide a safe, efficient, and environmentally responsible alternative to chemical and mechanical paint removal methods.
How Do You Choose the Right Heat Gun for Your Project?
Select a heat gun based on your project scope and material types. For small furniture or trim work, a basic model with fixed temperatures suffices. Larger projects or varied surfaces benefit from variable temperature control. Look for models with multiple nozzle attachments for precision work on corners and details. Wattage affects heating speed; 1,500-2,000 watts heats surfaces adequately for most DIY applications.
Ergonomic design matters for extended use. Lightweight models under 2 pounds reduce hand fatigue during long sessions. Cool-touch handles and heat-resistant grips improve safety and comfort. Digital temperature displays help you maintain consistent settings. Read reviews from users who’ve tackled similar projects to ensure the model suits your specific needs.
Key Features to Consider When Purchasing
- Variable temperature control for different paint types.
- Multiple nozzle attachments for versatile applications.
- 1,500-2,000 watt power for adequate heating speed.
- Lightweight design under 2 pounds for comfort.
- Digital temperature display for precise control.
- Cool-down features and automatic shutoff for safety.
- Durable cord and heat-resistant grip materials.
Key Takeaway: Choosing a heat gun with variable temperature control and ergonomic design ensures successful results across diverse paint stripping projects.
What Is the Final Verdict on Using Heat Guns for Paint Stripping in 2026?
Heat guns remain the preferred method for DIY paint stripping in 2026 due to their safety, efficiency, and environmental benefits. Modern models feature improved temperature controls and ergonomic designs that make the process accessible for homeowners and professionals alike. By following proper safety protocols, preparing your workspace thoroughly, and using systematic techniques, you can achieve professional-quality results without toxic chemicals or surface damage.
The process requires patience and attention to detail, but the rewards justify the effort. Whether refinishing antique furniture, preparing walls for new paint, or restoring metal surfaces, heat guns deliver reliable performance across diverse applications. Start with small test areas to build confidence, then tackle larger projects as your technique improves. Combined with proper post-removal finishing steps, heat gun stripping sets the foundation for beautiful, long-lasting paint applications that enhance your home’s value and appearance for years to come.







Write Your Review
No reviews yet. Be the first to share your experience!