

How to Sand Furniture with a Random Orbital Sander: Quick Answer
A random orbital sander removes old finishes and smooths wood surfaces using circular, random-pattern motion. It’s faster and less likely to create swirl marks than traditional sanders. Start with coarse grit (60-80), progress to medium (120-150), then finish with fine grit (180-220). Always sand with the wood grain when possible, wear dust protection, and let the tool do the work without excessive pressure. This method works for tabletops, chairs, cabinets, and most furniture pieces. Modern random orbital sanders in 2026 feature improved dust collection and ergonomic designs for longer, more comfortable work sessions.

SKIL 5" Random Orbital Sander with Cyclonic Dust Box
- POWERFUL - With a 2.8 amp motor and 13,000 orbits per minute, it's able to deliver a smooth performance over a variety of sanding applications.
- EASY TO CLEAN DUST CONTAINER - The X-flow dust collector uses cyclone force to collect dust in it's easy-to-empty transparent container.
- SPEED CONTROL - Variable speed control provides the right amount of power and control across different materials.
- LOW VIBRATION - Through its ergonomic design and a soft rubber grip your hand stays comfortable while counterweight balance reduces hand fatigue from vibration. All so that you can work longer.
- SAND IN TIGHT PLACES - With a compact size and ergonomic design This sander can get into tight spaces easily and maximizes user control.
- EASY ON/OFF - The dust sealed on/off switch makes a hassle-free flip-of-the-switch during application.


As an Amazon Associate we earn from qualifying purchases. Product prices and availability are accurate as of the date/time indicated.
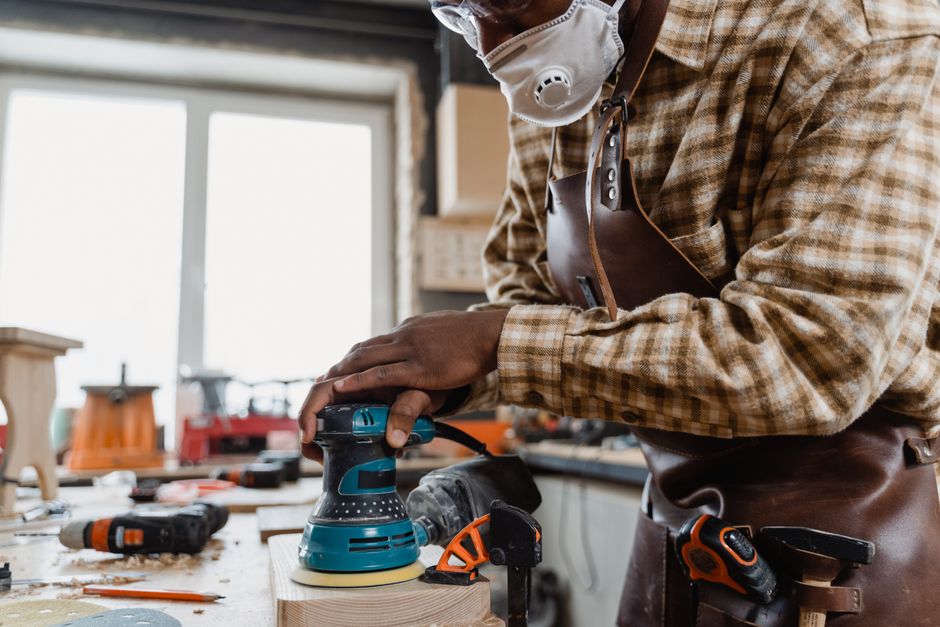
Random orbital sanders have become the gold standard for furniture restoration and refinishing projects. These tools combine rotational and orbital motion, creating a swirl-free finish that’s difficult to achieve with other sanders. Whether you’re preparing furniture for staining, painting, or simply refreshing a worn surface, understanding proper technique prevents damage and saves time. The learning curve is gentle, making this tool accessible for beginners while remaining efficient for experienced craftspeople.
What Makes a Random Orbital Sander Different from Other Sanders?
Random orbital sanders differ fundamentally from belt sanders and detail sanders in their motion pattern. The sanding pad moves in two directions simultaneously: it rotates while also moving in small orbital patterns. This dual motion creates a random pattern that prevents visible swirl marks on the wood surface. The result is a uniformly smooth finish without the directional scratches that belt sanders sometimes leave behind.
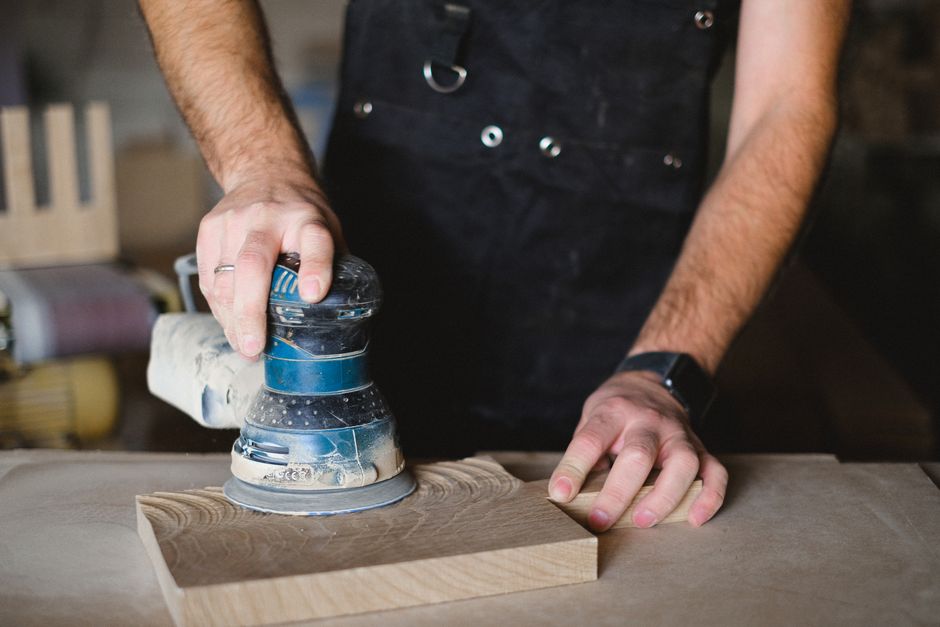
The pad size matters significantly for your work. Most random orbital sanders have either a five-inch or six-inch diameter pad. Larger pads cover more area quickly, making them ideal for table surfaces and wide panels. Smaller pads provide better control on edges and curved furniture pieces. Power ratings typically range from three to five amps for corded models, with cordless versions offering increasing battery capacity throughout 2026.
- Five-inch pads: Better control, ideal for detailed work and edges.
- Six-inch pads: Faster coverage on large flat surfaces like tabletops.
- Orbital motion reduces swirl marks compared to belt sanders.
- Random pattern prevents visible sanding lines on finished wood.
- Lower vibration than belt sanders makes extended use more comfortable.
Key Takeaway: Random orbital sanders combine rotation and orbital motion to eliminate swirl marks while providing faster coverage than detail sanders.
Corded vs. Cordless Options for Furniture Work
Corded random orbital sanders deliver consistent power without battery concerns, making them reliable for marathon finishing sessions. They’re typically lighter and more affordable than cordless models. However, the power cord restricts movement and requires access to electrical outlets. Cordless models offer freedom of movement and work well for smaller furniture pieces or touch-up projects. Battery technology in 2026 has improved significantly, with many models providing two to three hours of runtime on a single charge.
How Do You Choose the Right Grit Progression for Your Furniture Project?
Grit selection determines how aggressively the sander removes material and how smooth the final surface becomes. Coarser grits (60-80) remove old paint, stain, and heavy imperfections quickly. Medium grits (120-150) smooth the surface after coarse sanding and prepare wood for staining. Fine grits (180-220) create the smooth finish necessary before applying topcoats. Using the correct progression prevents deep scratches that become visible after staining or painting.
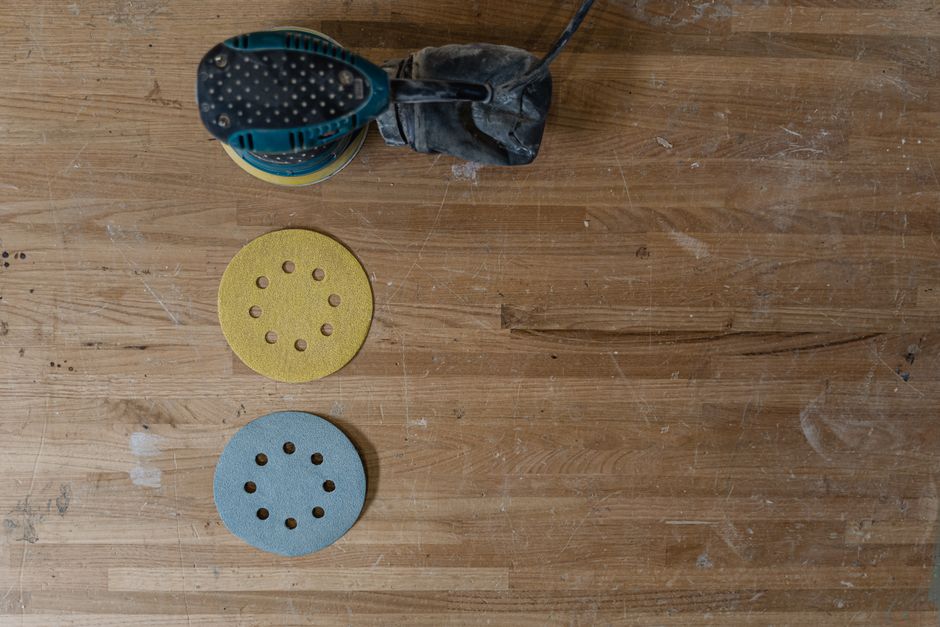
Start by assessing your furniture’s current condition. If the piece has thick paint or varnish, begin with 60-grit paper. For lightly finished or already-smooth surfaces, start at 100-grit. Never skip steps in the progression, as each grit removes the scratches left by the previous one. Always move to the next finer grit only after the surface shows uniform sanding marks.
- 60-80 grit: Removes paint, varnish, and deep imperfections quickly.
- 100-120 grit: Intermediate step for moderately finished furniture.
- 150-180 grit: Final smoothing before stain or paint application.
- 220+ grit: Ultra-fine finishing for high-end lacquer or polyurethane.
- Skip grits only if surface condition permits; never jump more than one grit level.
Key Takeaway: Progress through grit sizes systematically, starting coarse and finishing fine, to achieve a professional smooth surface without visible scratches.
Understanding Grit Compatibility with Wood Types
Hardwoods like oak and maple require slightly finer starting grits than softwoods like pine. Hardwoods show scratches more readily, so beginning at 80 or 100 grit prevents visible damage. Softwoods can tolerate coarser grits but still benefit from proper progression. Exotic woods demand extra care and finer grits throughout to prevent tearout and surface damage.
What Are the Essential Safety Precautions When Sanding Furniture?
Dust exposure is the primary health concern when using random orbital sanders. Wood dust contains fine particles that lodge in lungs and can cause respiratory issues with prolonged exposure. Always wear a dust mask rated N95 or higher when sanding. Even better, use a powered air-purifying respirator for extended projects. Many modern sanders feature integrated dust collection systems that capture 90 percent or more of airborne particles.
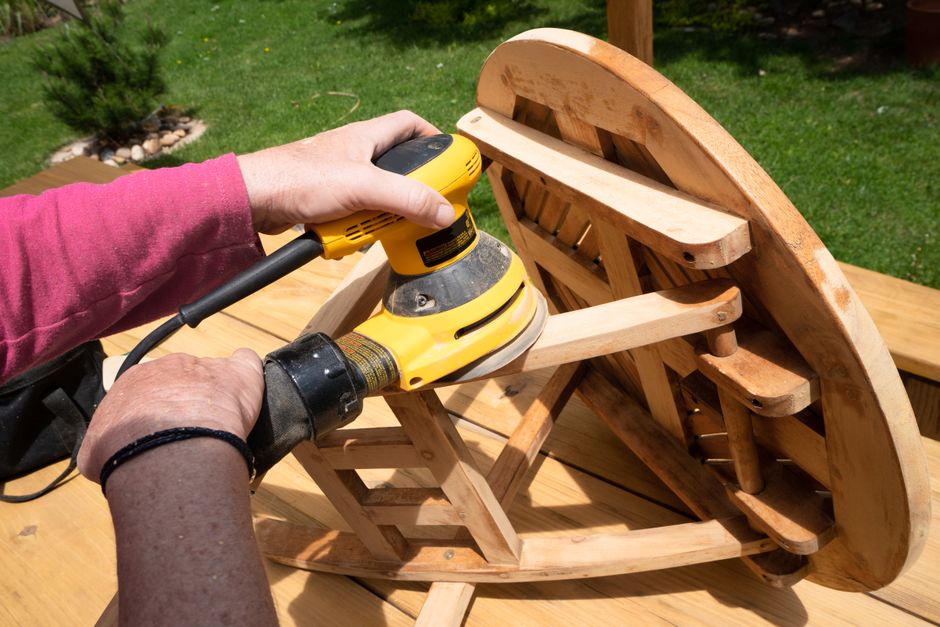
Eye protection prevents dust particles from irritating eyes and shields against unexpected flying debris. Wear safety glasses or a full face shield rated for woodworking. Hearing protection matters too, as sanders produce noise levels around 85-90 decibels. Foam earplugs or over-ear muffs reduce fatigue during longer sessions. Ensure proper ventilation in your workspace by opening windows or using shop fans.
- Wear N95 dust masks or powered respirators for all sanding work.
- Use safety glasses or face shields to protect eyes from dust.
- Wear hearing protection for sessions longer than 30 minutes.
- Ensure good workshop ventilation with open windows or exhaust fans.
- Keep long hair and loose clothing away from the rotating pad.
- Never force the sander or apply excessive pressure downward.
Key Takeaway: Prioritize dust control, eye protection, and hearing protection to work safely with random orbital sanders on any furniture project.
Setting Up Dust Collection Systems
Most random orbital sanders have dust ports that connect to shop vacuums. Use a hose with proper diameter matching your sander’s port for maximum efficiency. Position the vacuum nearby with the hose secured so it doesn’t tangle or restrict movement. Some woodworkers use two-stage filtration systems with pre-filters and HEPA filters for superior air quality during extended sanding sessions.
How Do You Prepare Furniture Before Starting the Sanding Process?
Preparation determines how efficiently your sanding goes and how professional your final results look. Begin by removing all hardware like handles, hinges, and drawer pulls. Use a screwdriver or power drill to speed this process. Fill any gaps, cracks, or holes with appropriate wood filler, then let it dry completely. Sand the filler smooth by hand or with fine-grit paper before beginning the main sanding project.
Inspect the furniture for nails, screws, or staples that might damage the sanding pad. Run your hand across the surface to feel for protruding fasteners. Countersink any nails and remove visible screws. Clean the furniture thoroughly with a tack cloth or damp rag to remove dust, dirt, and debris. Allow wood to dry completely before beginning work, especially if you’ve used water-based cleaners.
- Remove all hardware and store in labeled containers for reassembly.
- Fill cracks and gaps with appropriate wood filler.
- Inspect for and countersink any nails or protruding fasteners.
- Clean the surface with a tack cloth to remove dust and debris.
- Allow wood to dry completely before beginning sanding.
- Protect surrounding areas with plastic sheeting to contain dust.
Key Takeaway: Thorough preparation prevents damage to your sander and ensures smooth, efficient sanding throughout your furniture project.
Protecting Your Work Area During Sanding
Wood dust spreads throughout your shop and home if left uncontrolled. Drape plastic sheeting around your work area to contain particles. Position the sander’s dust collection port strategically to maximize capture. Work in a well-ventilated space or outdoors when weather permits. Cover nearby furniture and tools with drop cloths to simplify cleanup.
What Sanding Techniques Produce the Best Results on Furniture?
Technique fundamentally affects your final results when using a random orbital sander. Always sand with the wood grain whenever possible. Sanding against the grain causes tearout and creates visible scratches that become prominent after staining. On figured or multi-directional grain, sand diagonally at 45 degrees to the primary grain direction. This approach minimizes visible scratches while maintaining efficiency.
Let the sander do the work without forcing it. Excessive downward pressure doesn’t speed sanding and actually damages the tool and wood. Keep the sander moving constantly in overlapping passes. Avoid stopping the sander while it’s in contact with the wood, as this creates divots and uneven surfaces. Use smooth, flowing motions rather than scrubbing back and forth.
- Sand with the wood grain, never against it, to prevent tearout.
- Use light pressure and let the sander’s weight do the work.
- Keep the sander moving in overlapping, flowing passes.
- Maintain consistent speed and pressure throughout each pass.
- Avoid stopping the sander while in contact with wood.
- Check progress frequently by running your hand over the surface.
Key Takeaway: Proper technique—sanding with the grain, using light pressure, and maintaining steady motion—produces professional results without damaging furniture or the sander.
Handling Edges and Curved Surfaces
Edges require special attention to avoid rounding them excessively. Keep the sander pad flat and parallel to the edge surface. Use lighter pressure and shorter strokes on edges compared to flat surfaces. For curved furniture pieces, follow the contour smoothly without stopping. A five-inch sander provides better control on curved surfaces than larger six-inch models. Hand-sanding edges with fine-grit paper creates crisp, clean transitions after power sanding.
How Do You Handle Common Sanding Challenges on Different Furniture Pieces?
Different furniture types present unique sanding challenges. Tabletops with thick finishes require starting with coarser grits and multiple progression steps. Drawers need careful handling to avoid rounding edges during removal and reinstallation. Chair frames with spindles demand hand-sanding or detail sanders for tight spaces. Veneered surfaces require extreme care, as aggressive sanding penetrates veneer and damages the base wood underneath.
Stained or painted surfaces may contain lead in older furniture. Test suspected lead paint with a kit from your local hardware store before sanding. If lead is present, use wet sanding techniques or HEPA-filtered dust collection to prevent inhalation. Never sand lead paint dry. For antique furniture restoration, consider consulting guides like How to Restore Antique Wood Furniture Tools to understand specific restoration approaches.
- Tabletops: Start with 60-80 grit for thick finishes, progress methodically.
- Drawers: Sand before removal if possible to avoid damaging edges.
- Spindles and turnings: Use hand-sanding or detail sanders for tight spaces.
- Veneered surfaces: Use fine grits only and avoid aggressive pressure.
- Painted furniture: Test for lead before sanding; use wet methods if present.
- Curved pieces: Follow contours smoothly without stopping the sander.
Key Takeaway: Adapt your sanding approach to specific furniture types and conditions to achieve professional results while preventing damage.
Addressing Uneven Surfaces and Problem Areas
Low spots and dips require extra attention during sanding. Use longer strokes that extend beyond problem areas to gradually blend them with surrounding surfaces. Check progress frequently by running your hand across the piece. For stubborn dips, hand-sand with a sanding block to maintain flat pressure. Never concentrate sander time in one spot, as this creates divots and uneven surfaces that become visible after finishing.
What Post-Sanding Steps Prepare Furniture for Finishing?
After completing all grit progressions, your furniture needs final preparation before staining or painting. Use a tack cloth to remove all fine dust particles. Tack cloths are slightly sticky and capture dust that regular cleaning misses. Allow the wood to rest for 24 hours after final sanding before applying finishes. This permits any moisture absorbed during sanding to evaporate, preventing finish problems.
Inspect the surface under bright light at various angles to identify any remaining scratches or imperfections. Sand out any problem areas with fine-grit paper. Wipe the surface once more with a tack cloth immediately before applying stain or paint. Some woodworkers apply a wood conditioner on softwoods before staining to ensure even color absorption. Always follow the conditioner manufacturer’s instructions for drying time before staining.
- Use a tack cloth to remove all fine dust particles thoroughly.
- Allow wood to rest 24 hours before applying finishes.
- Inspect under bright light for remaining scratches or imperfections.
- Apply wood conditioner on softwoods before staining if recommended.
- Wipe with tack cloth again immediately before finishing.
- Test stain or paint on a hidden area first to verify color.
Key Takeaway: Thorough post-sanding preparation, including dust removal and proper drying time, ensures finishes adhere evenly and look professional.
Choosing Between Stain and Paint After Sanding
Your sanding progression should match your intended finish. For staining, sand through 180-220 grit to reveal grain character. For painting, 120-150 grit typically provides sufficient surface for paint adhesion. Stains emphasize wood grain and require finer final grits. Paints hide grain, so slightly coarser final grits work well. Consider your furniture’s wood type when choosing between these finishes.
How Do You Maintain Your Random Orbital Sander for Long-Term Use?
Regular maintenance extends your sander’s lifespan and keeps it performing optimally. Empty the dust collection bag or canister after each session to prevent clogging and airflow restriction. Check the sanding pad for wear, replacing it when it becomes glazed or damaged. Most pads last through several furniture projects before requiring replacement. Clean the tool’s exterior with a damp cloth to remove dust accumulation.
Inspect the power cord regularly for damage, and never use a sander with a damaged cord. Store the tool in a dry location away from moisture and extreme temperatures. For cordless models, charge batteries according to manufacturer specifications and store them separately from the tool. Replace worn or damaged parts promptly to maintain safety and performance. Many tool manufacturers offer replacement pads, dust bags, and other consumables through their websites.
- Empty dust collection after each use to maintain airflow.
- Replace sanding pads when they become glazed or worn.
- Inspect power cords regularly for damage before use.
- Store in dry location away from moisture and temperature extremes.
- Charge cordless batteries per manufacturer specifications.
- Replace consumable parts promptly for optimal performance.
Key Takeaway: Consistent maintenance keeps your random orbital sander reliable and safe for years of furniture projects and refinishing work.
Recommended Products

DEWALT 5-Inch Random Orbit Sander - Variable Speed Corded
- 3-Amp motor spins the pad at 8,000 - 12,000 OPM
- Separate counterweight design reduces vibration for improved comfort
- Improved dust-sealed switch protects against dust ingestion for longer switch life
- Dust port is designed to fit directly to the DWV010 or DWV012 dust collectors
- Shorter height allows the user to get closer to the workpiece
- Rubber overmold improves grip in all of the critical areas of the sander
- Improved dust collection and one-handed locking dust bag
- To attach the dust port to other vacuum systems with 1-1/4 in. hoses, use DWV9000 Universal Quick Connector





As an Amazon Associate we earn from qualifying purchases. Product prices and availability are accurate as of the date/time indicated.

52-Pack 5" Hook & Loop Sanding Discs - Mixed Grits 60-320
- Easy to Identify: The grits of the sanding discs are printed on the backside for easy identification.
- NOOKEYA 5 inch sanding discs fit universal orbital sander; pre-punched 8 holes for dust collection, Velcro design for quicker and easier sandpaper installation and removal,
- Good Material: Made from aluminium oxide abrasive, anti-static and provide durability and sharpness grit, Easy installation and removal, also will not fall off when installed in use.
- Meet All Your Need: 52pcs 60# 80# 120# 220# 320# grits sanding discs assortment pack, 60# and 80# grit 11pcs, 120# 220# 320# grits 10 pcs.
- Great work for art and wood, aluminum alloy, fiberglass, leather, rubber, stone, craft, painted surface, metal and non-ferrous metals for buffing and polishing.


As an Amazon Associate we earn from qualifying purchases. Product prices and availability are accurate as of the date/time indicated.
Frequently Asked Questions
Can You Use a Random Orbital Sander on Stained or Painted Furniture?
Yes, random orbital sanders work excellently for removing old stain and paint. Start with 60-80 grit for thick finishes and progress through finer grits as the old finish removes. Test for lead paint on furniture older than 1978 before sanding. If lead is present, use wet sanding or HEPA filtration to prevent inhalation. Always wear appropriate dust protection when removing old finishes.
How Long Does It Take to Sand a Typical Furniture Piece?
Sanding time varies based on furniture size, current finish condition, and desired smoothness. A small table might take two to four hours, while larger pieces require six to eight hours across multiple grit progressions. Heavily finished pieces need more time than lightly finished ones. Allow additional time for preparation, drying between grits, and post-sanding inspection. Plan for at least one full day for most furniture projects.
What Grit Should You Use for Final Sanding Before Painting?
Use 120-150 grit as your final sanding before painting. Paint adheres well to slightly rougher surfaces, so ultra-fine grits aren’t necessary. Finer grits like 180-220 work better for staining, where grain visibility matters. Always sand with the grain and use light pressure for final passes. Wipe thoroughly with a tack cloth before applying primer or paint.
Is It Better to Sand by Hand or Use a Random Orbital Sander?
Random orbital sanders are faster and more efficient for large flat surfaces, while hand-sanding provides better control on edges and detailed work. Most professionals use both methods—power sanding for main surfaces and hand-sanding for finishing touches. For furniture with curves, spindles, or intricate details, combine both approaches. Power sanders save time and reduce fatigue on larger projects.
Can You Sand Veneer Furniture with a Random Orbital Sander?
Yes, but with extreme caution. Veneers are thin and easily damaged by aggressive sanding. Use only fine grits (150-220) and apply minimal pressure. Start with 150 grit and progress to finer grits. Avoid coarse grits that penetrate veneer and damage the substrate. Hand-sanding provides better control on veneered pieces. Test on a hidden area first to ensure the veneer tolerates your technique.
What’s the Difference Between 5-inch and 6-inch Random Orbital Sanders?
Five-inch pads provide better control and maneuverability, making them ideal for detailed work and edges. Six-inch pads cover more area faster, making them better for large flat surfaces like tabletops. Five-inch models are lighter and less fatiguing for extended use. Six-inch models are more efficient for production work. Choose based on your typical projects and furniture sizes.
How Can You Achieve Professional Results When Sanding Furniture in 2026?
Professional sanding results come from mastering technique, using proper grit progression, and maintaining your equipment. Start with thorough preparation by removing hardware and inspecting for fasteners. Follow a systematic grit progression from coarse to fine, allowing adequate drying time between steps. Sand with the wood grain using light pressure and smooth, flowing motions. Let the sander’s weight do the work rather than forcing it.
Invest in quality dust collection to protect your health and maintain a clean workspace. Modern sanders in 2026 offer improved features like better ergonomics and more efficient dust capture. Combine power sanding with strategic hand-sanding on edges and detailed areas for truly professional results. Finally, dedicate time to post-sanding preparation with tack cloths and proper drying before applying finishes. These fundamentals, when executed consistently, produce furniture that looks professionally refinished.
Whether you’re restoring vintage pieces or refreshing tired furniture, a random orbital sander is an invaluable tool. The learning curve is gentle, but the results reward your effort with smooth, beautiful surfaces ready for staining or painting. Practice proper technique on smaller projects first, then tackle larger furniture with confidence. Your investment in quality tools and proper technique pays dividends through years of successful furniture refinishing projects.







Write Your Review
No reviews yet. Be the first to share your experience!