

What Is an Oscillating Tool and How Does It Remove Grout?
An oscillating tool is a versatile power tool that vibrates side-to-side at high speeds, making it ideal for grout removal between tiles. These tools typically operate at 10,000 to 20,000 oscillations per minute, creating a rapid cutting and scraping action. The oscillating motion breaks down hardened grout without damaging surrounding tile surfaces. Modern oscillating tools feature variable speed settings and lightweight designs, making them accessible for both professionals and DIY enthusiasts tackling bathroom or kitchen renovations in 2026.

DEWALT 20V MAX Brushless Oscillating Multitool Kit
- 3-speed selector allows users to choose their speed setting based on the application. A brushless motor delivers up to 57% more runtime over brushed
- Dual-Grip variable-speed trigger gives users ultimate speed and application control. Universal accessory adaptor for use with most oscillating tool accessory brands
- Quick-Change accessory system allows blades and attachments to be changed quickly without wrenches
- Bright LED illuminates dark worksurfaces for accurate cutting
- 3 Year Limited Warranty





As an Amazon Associate we earn from qualifying purchases. Product prices and availability are accurate as of the date/time indicated.
Grout removal is one of the most practical applications for oscillating tools because the vibrating blade or bit can access tight spaces between tiles where traditional chisels fail. Unlike angle grinders or rotary tools, oscillating tools produce minimal dust and provide superior control. The tool’s compact head fits into narrow grout lines without chipping adjacent tiles. This precision makes oscillating tools the preferred choice for homeowners wanting to refresh tile surfaces without expensive professional help.
Key Takeaway: Oscillating tools excel at grout removal due to their high-speed oscillating motion, precision control, and ability to work in tight spaces without damaging tiles.
What Attachments and Bits Do You Need for Grout Removal?
Selecting the right attachment is crucial for effective and safe grout removal. Most oscillating tool manufacturers offer specialized grout removal kits that include multiple blade styles designed for different grout types and thicknesses. The correct attachment ensures faster work, better results, and reduced risk of tile damage during your project.
Essential attachments for grout removal include:
- Grout blade or grout saw bit — specifically designed for cutting and scraping hardened grout.
- Carbide-edged blade — more durable for thick or epoxy grout that resists standard steel blades.
- Flexible scraper blade — ideal for softer grout or delicate tile surfaces requiring gentler removal.
- Diamond-grit blade — best for extremely hard grout or stone tile applications.
- Oscillating sanding pad — useful for smoothing grout residue after blade work.
Most quality oscillating tool kits sold in 2026 include universal quick-change systems that snap attachments in place without tools. Always verify your tool’s compatibility before purchasing attachments. Premium brands like Bosch, DeWalt, and Fein offer dedicated grout removal kits with multiple blade options for different tile and grout scenarios.
Key Takeaway: Invest in a quality grout removal kit with carbide-edged and flexible blades to handle various grout types and tile surfaces effectively.
How Do You Prepare Your Work Area Before Starting Grout Removal?
Proper preparation prevents damage to your home and ensures your safety during grout removal work. Start by clearing the area of loose items, furniture, and decorations. Cover nearby surfaces with drop cloths or plastic sheeting to protect against dust and debris. Grout removal creates significant dust, so ventilation is essential for your health and comfort during extended work sessions.
Preparation steps for grout removal include:
- Turn off water supply to the area if working near plumbing fixtures or shower walls.
- Apply painter’s tape along tile edges to protect grout lines from accidental blade contact.
- Ensure adequate lighting in your work area — use work lights or headlamps for visibility.
- Wear safety glasses, a dust mask or respirator, and work gloves throughout the project.
- Test your oscillating tool on a hidden or inconspicuous area first to verify blade depth and control.
Moisture removal is equally important before starting work. If your grout is wet, allow it to dry completely for at least 24 hours. Wet grout becomes sticky and clogs blade teeth, reducing efficiency and increasing tool strain. Dry grout removes cleanly and quickly, making your work faster and more satisfying.
Key Takeaway: Thorough preparation including ventilation, protective gear, and dry grout ensures safer, faster, and more effective removal results.
What Are the Step-by-Step Techniques for Removing Grout with an Oscillating Tool?
Mastering proper technique transforms grout removal from frustrating to efficient. Begin by inserting your chosen grout blade into the oscillating tool’s quick-change chuck, ensuring it clicks firmly into place. Adjust the tool to a medium speed setting (around 12,000 to 15,000 oscillations per minute) for initial work. Higher speeds work faster but risk tile damage; lower speeds give better control on delicate surfaces.
Positioning and Angle Control
Position the blade directly into the grout line at a slight angle, approximately 15 to 30 degrees from vertical. This angle maximizes cutting efficiency while preventing the blade from slipping sideways onto tile surfaces. Keep steady downward pressure on the tool without forcing it — let the oscillating motion do the work. Forcing the tool fatigues your arms and risks blade breakage or tile damage.
Move the tool slowly along the grout line in one direction, working from top to bottom on vertical surfaces. For horizontal grout lines, work left to right or right to left in steady, controlled motions. Maintain consistent pressure and speed throughout each grout line. Rushing or jerking the tool causes uneven removal and potential tile chipping.
Progressive Removal Technique
Make multiple passes along each grout line rather than trying to remove all grout in a single pass. First pass removes the bulk of grout; subsequent passes clean out stubborn residue. This progressive approach reduces strain on your tool and minimizes tile damage. After 2-3 passes, switch to a flexible scraper blade to remove loosened grout fragments and clean the joint completely.
Grout removal sequence for best results:
- First pass with grout blade at medium speed removes 60-70% of hardened grout.
- Second pass with same blade clears remaining grout from joint center.
- Third pass with flexible scraper blade removes loose fragments and smooths the joint.
- Final pass with sanding pad smooths edges if needed for new grout application.
Key Takeaway: Multiple controlled passes with angle positioning work better than forcing removal in one aggressive pass.
How Do You Handle Different Grout Types and Tile Materials?
Different grout compositions and tile materials require adjusted techniques. Standard cement-based grout removes relatively easily with carbide-edged blades at medium speeds. Epoxy or urethane grout is harder and requires carbide or diamond-grit blades at higher speeds. Knowing your grout type before starting saves time and prevents blade damage from using incorrect attachments.
Grout type considerations for oscillating tool removal:
- Cement-based grout — standard blade, medium speed, 2-3 passes per line.
- Epoxy grout — carbide blade, higher speed (16,000+ oscillations), 3-4 passes needed.
- Urethane grout — carbide or diamond blade, high speed, requires patience and multiple passes.
- Sanded grout — easier than unsanded; standard blade works effectively.
- Unsanded grout — slightly harder; may need carbide blade for thick applications.
Tile-Specific Techniques
Ceramic and porcelain tiles tolerate oscillating tools well due to their hardness. Natural stone tiles like marble, limestone, or travertine require gentler handling. Use flexible scraper blades and lower speeds on delicate stone to prevent surface damage or etching. Glass tiles need careful blade angle control to prevent cracking. Test your technique on a small, hidden area first when working with premium or delicate tile materials.
Key Takeaway: Match blade type and speed to your specific grout composition and tile material for optimal results and safety.
What Safety Precautions Should You Follow During Grout Removal?
Safety is paramount when operating oscillating tools for extended grout removal projects. These tools generate significant vibration and dust, creating both physical strain and respiratory hazards. Proper safety practices protect your health and ensure accident-free work throughout 2026 and beyond. Always read your specific tool’s safety manual before beginning any project.
Essential safety precautions include:
- Wear NIOSH-certified dust masks or respirators rated for fine construction dust particles.
- Use safety glasses or face shields to protect eyes from flying grout fragments.
- Wear work gloves to protect hands from sharp blade edges and vibration.
- Maintain firm grip with both hands on tool handles to control vibration and movement.
- Never reach underneath or behind the tool while it operates.
- Unplug tool when changing blades or making adjustments.
- Take breaks every 30-45 minutes to reduce vibration-related hand fatigue.
Dust Management and Respiratory Protection
Grout removal generates fine silica dust that poses serious respiratory risks. Modern oscillating tools often feature dust collection ports that connect to shop vacuums. Using dust collection reduces airborne particles by 70-80% compared to unfiltered work. Pair dust collection with a quality respirator rated P100 or N95 for maximum protection. Ventilate your work area with open windows and fans to disperse remaining dust.
Key Takeaway: Invest in proper respiratory protection, eye wear, and dust collection systems to safely handle grout removal’s health hazards.
How Do You Finish and Clean Up After Grout Removal?
Finishing work properly ensures your tile joints are ready for new grout application or sealing. After removing bulk grout with the blade, use the flexible scraper attachment to clean out remaining fragments from the joint. Vacuum loose debris thoroughly using a shop vacuum with HEPA filtration. Wipe joints with a damp cloth to remove dust residue, then allow surfaces to dry completely before applying new grout.
Post-removal cleanup checklist:
- Vacuum entire work area with HEPA-filter shop vacuum to capture fine dust.
- Wipe tile surfaces and joints with damp cloth to remove dust coating.
- Inspect joints for remaining grout fragments and remove with flexible blade if needed.
- Allow surfaces to dry for 24 hours before applying new grout.
- Clean your oscillating tool by removing blade and wiping debris from chuck.
- Store attachments in original kit container to prevent loss or damage.
Inspection and Quality Check
Examine your work carefully before cleanup. Grout lines should be clean and uniform in depth. All old grout should be removed without tile surface damage. If you notice chips or cracks in tiles, assess whether they require professional repair before regrouting. Properly cleaned joints ensure new grout adheres correctly and creates lasting, attractive results.
Key Takeaway: Thorough cleanup and inspection prepare your joints for perfect new grout application and ensure professional-quality results.
What Are Common Mistakes to Avoid When Using Oscillating Tools for Grout Removal?
Understanding common pitfalls helps you work smarter and avoid costly mistakes. Many DIY enthusiasts rush the process, using excessive force or speed that damages tiles. Others neglect safety equipment or proper ventilation, risking health issues. Learning from others’ mistakes accelerates your success and protects your investment in both tools and materials.
Mistakes to avoid during grout removal:
- Using wrong blade type for your grout composition wastes time and dulls attachments.
- Forcing the tool or using excessive pressure causes blade breakage and tile damage.
- Working with wet grout clogs blades and reduces efficiency significantly.
- Skipping safety gear puts your eyes, lungs, and hands at unnecessary risk.
- Neglecting dust collection creates hazardous airborne particles and cleanup challenges.
- Holding the tool at wrong angles slips onto tile surfaces and causes chipping.
- Attempting removal without testing on hidden areas risks visible tile damage.
Key Takeaway: Patience, proper technique, correct blade selection, and safety precautions prevent expensive mistakes and ensure professional results.
How Does Grout Removal with an Oscillating Tool Compare to Other Methods?
Oscillating tools offer distinct advantages over traditional grout removal methods like manual chisels or angle grinders. Manual chisels require significant physical effort and skill to avoid tile damage. Angle grinders remove grout quickly but generate excessive dust and risk serious tile damage in inexperienced hands. Oscillating tools balance speed, control, and safety in a user-friendly package suitable for most DIY projects.
Comparison of grout removal methods:
- Oscillating tools — moderate speed, excellent control, minimal tile damage risk, moderate dust.
- Manual chisels — slow, labor-intensive, high tile damage risk, no dust.
- Angle grinders — very fast, difficult control, high tile damage risk, excessive dust.
- Rotary tools — very slow, fine control, minimal dust, limited grout depth.
- Grout saws — moderate speed, good control, moderate dust, requires steady hand.
For most homeowners tackling bathroom or kitchen tile projects in 2026, oscillating tools represent the best balance of speed, control, and safety. If you’re interested in alternative power tool techniques, check out our guide on how to use an angle grinder safely for comparison. For other precision tool work, explore our article on how to cut curves in wood with a jig saw.
Key Takeaway: Oscillating tools provide the ideal combination of speed, control, and safety for residential grout removal projects.
What Should You Know About Oscillating Tool Maintenance After Grout Removal?
Proper maintenance extends your oscillating tool’s lifespan and ensures reliable performance for future projects. Grout removal is particularly demanding on tools due to fine dust and abrasive particles. Regular cleaning and inspection after each use prevents dust accumulation and blade dulling. Well-maintained tools perform better, last longer, and save money on replacements.
Post-project maintenance steps:
- Remove blade immediately after finishing and wipe debris from chuck and shaft.
- Use compressed air to blow out dust from motor vents and internal passages.
- Wipe exterior housing with damp cloth to remove fine dust coating.
- Inspect power cord for damage and store properly to prevent kinks.
- Check blade edges for damage or dulling; replace if bent or chipped.
- Store tool in dry location away from moisture and temperature extremes.
- Charge batteries fully if using cordless model and store in cool environment.
Blade replacement is a normal maintenance cost. Quality carbide or diamond-grit blades cost $8-20 each but last through multiple projects. Dull blades reduce efficiency and increase tool strain, so replace them when cutting performance declines noticeably. Keeping spare blades on hand ensures you never stop mid-project due to blade failure.
Key Takeaway: Regular cleaning, blade inspection, and proper storage keep your oscillating tool performing optimally for years of reliable use.
Recommended Products

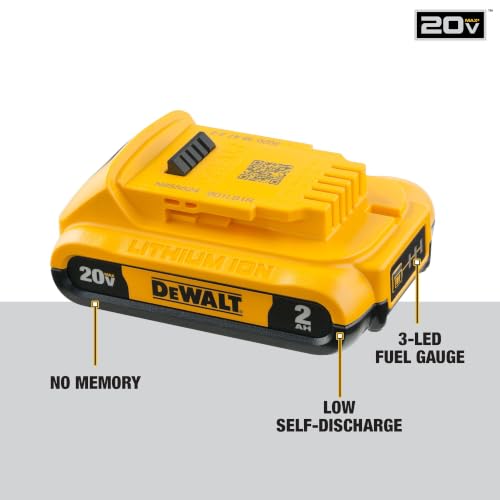
DEWALT 20V MAX XR Cordless Oscillating Multi-Tool Kit
- The 3-speed selector allows users to choose their speed setting based on application.
- Brushless delivers up to 57% more run time over brushed
- Dual-Grip variable speed trigger gives users ultimate speed and application control
- Universal accessory adapter for use with most oscillating tool brands
- Quick-Change accessory system allows blades and attachments to be changed quickly without wrenches
- Bright LED light illuminates dark work surfaces for accurate cutting




As an Amazon Associate we earn from qualifying purchases. Product prices and availability are accurate as of the date/time indicated.

LEILUO 6Pcs Diamond Oscillating Tool Blades Grout Removal Multitool Blade
- 📦 2-STEP PRECISION GROUT CLEARING KIT Stop guessing which blade to use for tile repairs. This 6-piece set assigns clear roles for flawless results: use the flat blade for straight grout lines, and switch to the curved blade for tight corners and tricky angles without chipping surrounding tiles.
- 💎 DIAMOND GRIT EDGE — CONTROLLED REMOVAL Coated with high-density, evenly distributed diamond grit engineered for controlled detailing rather than heavy demolition. Effortlessly grinds away old mortar, tile joints, and dried thin-set adhesive while protecting intact porcelain surfaces.
- ⚡ FLAWLESS SURFACE & SUBSTRATE PREPARATION A successful tile replacement requires a clean base. Utilize these ultra-thin 2.0mm multi tool blades to effectively shave away residual wall adhesive and dried thin-set mortar left on floor substrates, ensuring your new tiles sit completely flush.
- 🛡️ PRO-LONGEVITY OPERATING TECHNIQUE Maximize your oscillating saw blade lifespan with ease. Set your multi-tool to low or medium speed, apply light pressure, and use a slight lateral swinging motion. This technique allows the diamond grit to work efficiently without overheating or dulling premature.
- 🔗 BROAD QUICK-RELEASE COMPATIBILITY Equipped with a universal quick-release interface compatible with major brands including DeWalt, Makita, Milwaukee, Ryobi, and Porter Cable. ⚠️ COMPATIBILITY CHECK: Not compatible with star.lock interface systems (Bosch, Fein); Dremel tools require included C-clip adapters.





As an Amazon Associate we earn from qualifying purchases. Product prices and availability are accurate as of the date/time indicated.
Frequently Asked Questions
Can you use an oscillating tool on all tile types?
Oscillating tools work on ceramic, porcelain, and glass tiles safely. Natural stone tiles like marble require gentler handling with flexible blades and lower speeds to prevent etching or cracking. Always test on hidden areas first with premium or delicate tiles. Most standard residential tiles tolerate oscillating tool removal without damage when proper techniques are used.
How long does grout removal typically take with an oscillating tool?
A typical bathroom with 50-75 square feet of tile takes 2-4 hours for complete grout removal. Speed depends on grout type, thickness, and your experience level. Epoxy or thick grout requires more passes and takes longer than standard cement grout. Professional experience and proper technique reduce time significantly compared to first-time users.
Is it safe to remove grout from shower walls with an oscillating tool?
Yes, oscillating tools safely remove grout from shower walls when proper precautions are taken. Turn off water supply before starting work. Ensure adequate ventilation since bathrooms have limited air circulation. Allow surfaces to dry completely before beginning. Wear safety glasses to protect against water spray and debris. Use the same techniques as for other tile surfaces.
What’s the best blade depth setting for grout removal?
Most oscillating tool blades have adjustable depth settings from 1/8 inch to 1/2 inch. For standard grout removal, set depth to 1/4 inch to 3/8 inch, matching your grout joint width. Shallow depths prevent blade contact with tile surfaces. Deeper settings remove more grout per pass but increase tile damage risk if blade angle slips.
Can you reuse oscillating tool blades after grout removal?
Grout removal dulls blades quickly due to abrasive grout composition. While blades can technically be reused, performance declines noticeably after heavy grout work. Most professionals replace blades after each major grout removal project. Dull blades require more pressure and vibration, increasing tool strain and reducing efficiency.
Do you need dust collection equipment for grout removal?
Dust collection is highly recommended though not absolutely required. Grout removal generates significant silica dust hazardous to lungs. Shop vacuums with HEPA filters capture 70-80% of airborne particles when connected to tool dust ports. Pair dust collection with a quality respirator for maximum respiratory protection during extended work.
What’s the Best Way to Master Grout Removal with an Oscillating Tool in 2026?
Mastering oscillating tool grout removal combines proper technique, correct equipment, and consistent practice. Start with small, inconspicuous projects to build confidence and skill before tackling visible bathroom or kitchen areas. Invest in quality tools and attachments designed specifically for grout work rather than generic multi-purpose blades. Watch instructional videos from reputable manufacturers and read user reviews to learn from experienced professionals’ insights.
Success requires patience and attention to detail. Don’t rush the process or force the tool beyond its capabilities. Multiple controlled passes with appropriate blade selection work better than aggressive single passes. Prioritize safety throughout every project by wearing protective gear and maintaining proper ventilation. Take breaks to reduce hand fatigue and vibration strain on your body.
Your first grout removal project teaches valuable lessons that improve subsequent work. Document your process with photos and notes about what worked well and what you’d change. Share experiences with others undertaking similar projects. As you gain experience, you’ll develop intuitive feel for blade angles, pressure, and speed that produces professional results consistently.
Key Takeaway: Master grout removal through patient practice, proper equipment selection, and consistent attention to technique and safety throughout your projects.







Write Your Review
No reviews yet. Be the first to share your experience!