

How to Cut Curves in Wood with a Jig Saw: Quick Answer
Cutting curves in wood with a jig saw requires selecting the right blade, securing your workpiece firmly, and using steady hand pressure while following your marked line. A jig saw excels at curved cuts because its thin blade oscillates vertically, allowing sharp turns and intricate patterns that larger saws cannot achieve. Start with a medium-tooth blade for general curves, maintain a comfortable cutting speed, and let the tool do the work without forcing it. Practice on scrap wood first to build confidence and muscle memory before tackling your final project.
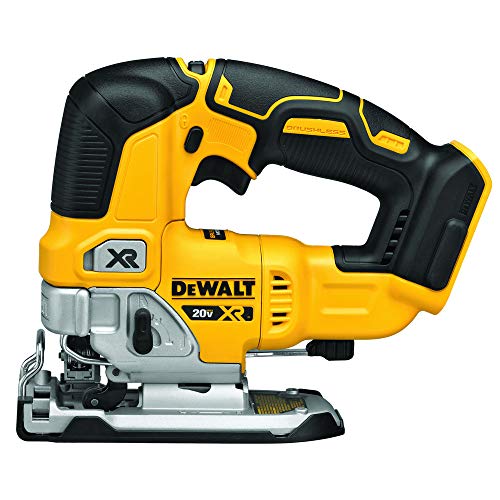
DEWALT 20V MAX XR Jig Saw, 3,200 Blade Speed, Cordless, Brushless Motor, LED Light, Bare Tool Only (DCS334B)
- Brushless motor of the cordless jigsaw delivers efficient performance for longer runtime (vs. DCS331 Jig Saw)
- Compact size for easy grip and maximum control of the jig saw
- Bright LED on the jigsaw tool helps illuminate dimly lit work surfaces
- Variable speed trigger and dial provide precise speed control
- All-metal, lever-action keyless blade change allows for quick and easy t-shank blade changes
- Integrated dust blower helps clear line of sight while cutting
- 4-position orbital action provides control of cut quality and speed
- All-metal, keyless shoe bevel with detents at 0 degree, 15 degree, 30 degree, and a positive stop at 45 degree for easy adjustment
- No-mar shoe cover to help protect work surface from scratches
- Accepts t-shank jig saw blades for optimal holding power and professional results
As an Amazon Associate we earn from qualifying purchases. Product prices and availability are accurate as of the date/time indicated.
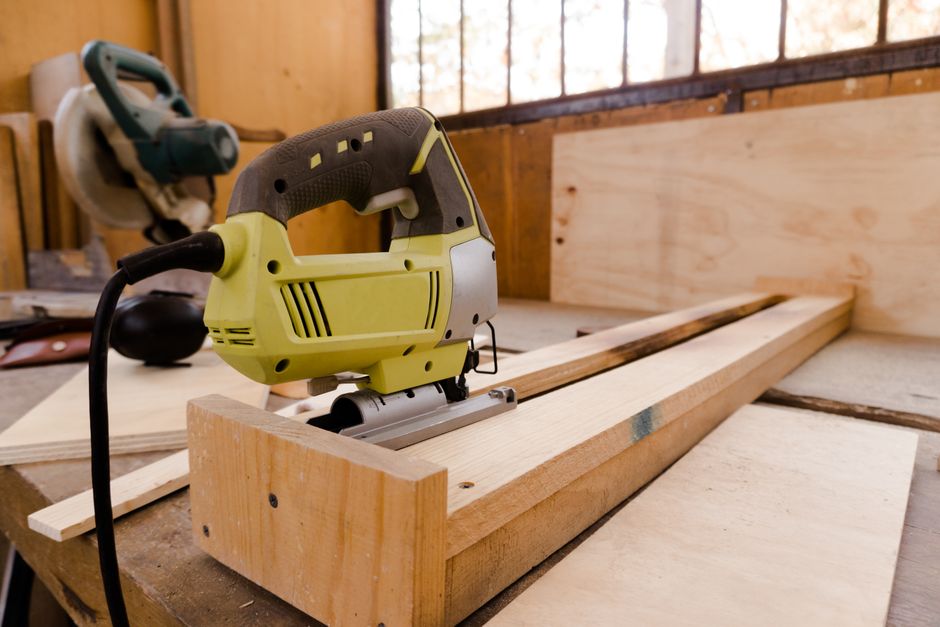
The jig saw remains one of the most versatile tools in any woodworking shop. Whether you’re creating decorative scroll work, cutting cabinet door shapes, or making custom puzzle pieces, mastering this tool opens creative possibilities. Modern jig saws in 2026 offer improved dust collection, better ergonomics, and more stable bases than ever before. Understanding the fundamentals of curve cutting will transform your woodworking from basic straight cuts to professional-looking curved designs.
What Makes a Jig Saw Ideal for Cutting Curves?
The jig saw’s vertical oscillating blade motion makes it uniquely suited for curved cutting work. Unlike circular saws or miter saws that only cut straight lines, the jig saw blade moves up and down rapidly while you guide the tool along your desired path. This design allows you to pivot the tool smoothly around corners and follow complex patterns without repositioning your workpiece repeatedly.

A jig saw can handle various wood thicknesses and materials. Softwoods cut easily, while hardwoods require patience and proper blade selection. The tool’s compact size gives you excellent control and visibility of your cutting line. You can see exactly where the blade is going, which is crucial for precision work.
- Thin blade enables tight radius turns and intricate patterns.
- Vertical oscillation prevents binding and kickback during curves.
- Adjustable speed settings match different wood types and thicknesses.
- Orbital settings enhance cutting action for faster material removal.
- Small footprint allows detailed work on large sheets or panels.
Key Takeaway: The jig saw’s blade motion and compact design make it the premier tool for precision curved cuts in woodworking.
Understanding Blade Oscillation and Orbital Motion
Jig saw blades oscillate vertically, moving up and down thousands of times per minute. This rapid motion cuts on the downstroke while the blade retracts on the upstroke. Modern jig saws add orbital motion, where the blade also moves forward slightly during the cutting stroke. This orbital action removes material faster but produces rougher edges, making it ideal for faster work on softer woods.
How Do You Choose the Right Blade for Curved Cuts?
Blade selection determines your cut quality, speed, and ease of work. The wrong blade wastes time, creates rough edges, and frustrates even experienced woodworkers. Your choice depends on wood type, thickness, and the tightness of your curves. Thinner blades turn sharper corners, while wider blades stay straighter for gentler curves.

Blade tooth count directly affects cut speed and smoothness. More teeth create finer cuts but cut slower. Fewer teeth cut faster but leave rougher edges. For general curve cutting in hardwood, a medium-tooth blade balances speed and finish quality. Softwoods benefit from fewer teeth, while fine detail work demands more teeth.
- Fine-tooth blades (10-14 TPI): Best for hardwoods and smooth finishes.
- Medium-tooth blades (6-10 TPI): Versatile choice for mixed wood types.
- Coarse-tooth blades (4-6 TPI): Fast cutting in softwoods and thick stock.
- Scroll blades: Narrow for tight radius curves and intricate patterns.
- Metal-cutting blades: For composite materials and laminates.
Blade width matters significantly for curve radius. Narrow blades (1/8 inch or less) navigate tight turns easily, essential for scrollwork and detailed designs. Wider blades (1/4 inch) stay straighter on gentler curves but cannot turn sharp corners. For most curved work, choose blades between 1/8 and 3/16 inches wide.
Matching Blade Selection to Wood Type
Hardwoods like oak and maple require fine-tooth blades with 10-14 teeth per inch for clean edges. These denser woods resist cutting, so slower speeds and sharp blades prevent binding. Softwoods like pine and cedar cut easily with 6-8 tooth blades at faster speeds. Plywood demands careful blade selection because the thin veneer layers can splinter easily with coarse teeth.
Key Takeaway: Match your blade’s tooth count and width to your wood type and curve complexity for optimal results.
What Preparation Steps Ensure Accurate Curved Cuts?
Proper preparation prevents mistakes and produces professional results. Start by marking your cutting line clearly using a pencil, marker, or chalk. Visible lines help you follow curves accurately while cutting. Transfer patterns using carbon paper, a light box, or free-hand drawing depending on complexity and your skill level.
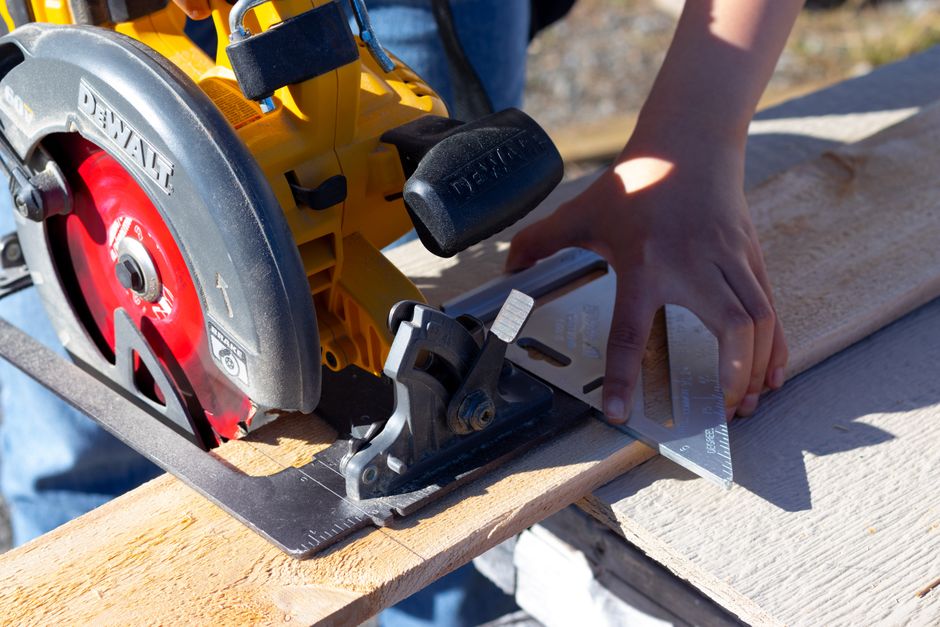
Secure your workpiece firmly before cutting. Movement during cutting ruins your line and creates safety hazards. Use a workbench with a vise, clamps, or a jig saw table to hold the wood steady. The workpiece should not move at all during the cutting process. Proper clamping also keeps your hands safely away from the blade.
- Mark cutting lines with dark, visible pencil or chalk marks.
- Use carbon paper or pattern transfer methods for complex designs.
- Clamp workpiece securely to prevent movement during cutting.
- Position clamps away from the cutting path.
- Ensure adequate workspace around the jig saw for smooth operation.
Creating and Transferring Patterns
Accurate pattern transfer prevents cutting mistakes. For simple curves, draw directly on the wood using a pencil and straightedge or flexible curve tool. For complex designs, print or draw your pattern on paper, then use carbon paper to transfer it to your workpiece. Alternatively, attach the paper pattern directly to the wood with spray adhesive and cut right through it, removing the paper afterward.
Key Takeaway: Thorough preparation with clear markings and secure clamping sets you up for precise, safe curved cuts.
How Do You Execute Smooth Curved Cuts with Proper Technique?
Cutting technique directly affects your results and safety. Let the jig saw do the work—avoid forcing the blade through the wood. Excessive pressure causes binding, blade breakage, and poor cut quality. Use a firm but gentle grip, guiding the tool along your marked line without pushing. The blade cuts on the downstroke naturally if you let it operate at proper speed.
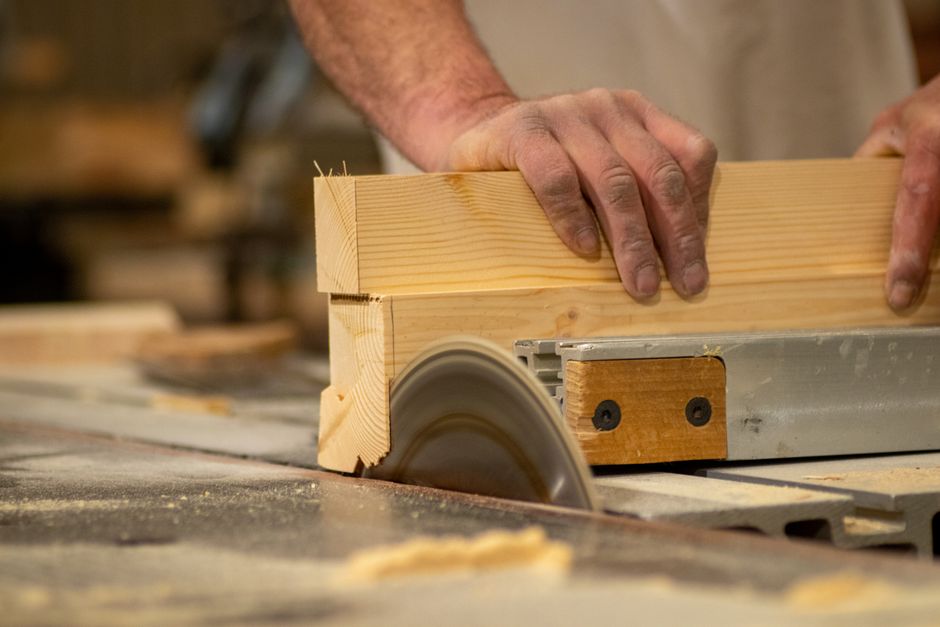
Feed the tool slowly and steadily along your curve. Rushing produces rough edges and increases blade breakage risk. For tight curves, reduce your speed further to allow the blade time to cut through the wood properly. Listen to the tool’s sound; a high-pitched strain indicates you’re pushing too hard or the blade is dull.
- Maintain steady, even pressure without forcing the blade.
- Follow marked lines carefully while keeping hands clear of blade.
- Reduce speed for tight curves and intricate details.
- Use proper orbital setting for your wood type and thickness.
- Allow the tool’s vibration to settle before starting your cut.
Navigating Tight Turns and Complex Curves
Tight curves require special attention and technique adjustments. Slow your cutting speed significantly when approaching sharp turns. Let the blade reach the turn point before pivoting the tool, rather than forcing it through the corner. Small, deliberate pivots work better than large rotations. For extremely tight corners, you may need to back up slightly, pivot more, then continue forward.
Practice on scrap wood before attempting tight curves on your final project. Each wood type behaves differently, and building muscle memory through practice ensures success. Mark your practice lines clearly so you can see how well you’re following them. This feedback helps you adjust your technique and speed for better results.
Managing Blade Drift and Staying on Line
Blade drift occurs when your jig saw wanders from the marked line. This happens from uneven pressure, dull blades, or forcing the tool. Maintain consistent, light pressure and let the blade do the cutting. Check that your blade is sharp and properly installed. Dull blades wander more than sharp ones, making curve following difficult.
If drift occurs, don’t panic. Slowly guide the blade back toward your line with gentle hand movements. Avoid sudden corrections that might break the blade. Some drift is normal; aim for staying within 1/16 inch of your line for most projects. Finer work may require staying closer to the line.
Key Takeaway: Steady pressure, proper speed, and practice enable smooth, accurate curved cuts that follow your marked lines.
What Safety Precautions Protect You While Cutting Curves?
Safety must always come first when operating power tools. Keep your hands at least two inches away from the blade at all times. Never reach under the workpiece while cutting or immediately after stopping. The blade continues moving briefly after you release the trigger. Always wear safety glasses to protect from wood chips and dust ejected during cutting.
Use a dust collection system or wear a dust mask to protect your lungs. Jig saw work creates significant sawdust that accumulates in your workspace. Many modern jig saws include built-in dust collection ports that connect to shop vacuums. Proper ventilation keeps your work area clear and improves visibility of your cutting line.
- Maintain minimum two-inch clearance between hands and blade.
- Wear safety glasses to protect eyes from wood chips.
- Use dust collection or wear respiratory protection.
- Never force the tool or reach under the workpiece.
- Disconnect power before changing blades or adjusting settings.
- Keep work area clear of obstacles and tripping hazards.
Proper Grip and Body Position
Hold the jig saw with both hands, maintaining a firm but relaxed grip. Position yourself to the side of the cutting line, never directly behind the tool. This positioning keeps you clear if the blade breaks or the tool kicks. Keep your body balanced and your feet stable throughout the cut. Never stand on a ladder or unstable surface while operating a jig saw.
Key Takeaway: Maintaining proper hand position, wearing safety gear, and using dust collection prevents injuries during curved cutting work.
How Do You Achieve Professional Finishing After Cutting?
Even with excellent technique, jig saw cuts benefit from finishing work. Sand the cut edges with progressively finer sandpaper, starting with 80-grit for rough edges and finishing with 220-grit for smooth surfaces. Hand-sand along the curve’s direction to avoid splintering. For tight curves, wrap sandpaper around a dowel or foam block to conform to the shape.
Fine-tooth blades produce smoother edges requiring less sanding. Coarse-tooth blades leave rougher edges that need more finishing work. Scroll blades create the smoothest cuts for intricate work. Planning your blade choice based on your finishing timeline helps manage overall project duration.
- Start with 80-grit sandpaper for rough edge removal.
- Progress to 150-grit for intermediate smoothing.
- Finish with 220-grit for final smooth surfaces.
- Sand along the curve direction to prevent splintering.
- Use foam blocks or dowels to sand tight curves.
Sanding Techniques for Curved Surfaces
Curved surfaces demand different sanding approaches than flat edges. Wrap sandpaper around a flexible foam block or dowel that matches your curve’s radius. This conforms the sanding surface to your shape, preventing flat spots. For very tight curves, use folded sandpaper and work carefully by hand. Always sand in the direction of the wood grain when possible to minimize splintering.
Key Takeaway: Progressive sanding with proper technique transforms jig saw cuts into smooth, professional-looking finished edges.
What Common Mistakes Should You Avoid?
Forcing the tool through wood is the most common mistake. This causes blade breakage, poor cut quality, and safety hazards. Let the jig saw work at its own pace. Using the wrong blade for your material wastes time and produces rough results. Take time to select the appropriate blade before starting your cut.
Inadequate workpiece support causes movement and inaccurate cuts. Always clamp your wood securely before cutting. Skipping the preparation step of marking clear cutting lines leads to wandering cuts. Spend extra time on layout and pattern transfer to ensure accuracy. Ignoring safety precautions puts you at risk of serious injury.
- Forcing the blade through wood causes breakage and poor quality.
- Using wrong blade for material creates rough edges and frustration.
- Failing to secure the workpiece allows movement and inaccuracy.
- Skipping clear marking leads to wandering cuts and mistakes.
- Neglecting safety gear and procedures invites injury.
- Cutting too fast on tight curves breaks blades and ruins lines.
Key Takeaway: Avoiding common mistakes through proper preparation, tool selection, and technique ensures successful curved cutting projects.
How Do You Practice and Build Curved Cutting Skills?
Practice on scrap wood before attempting your final project. Cut simple curves first, then progress to tighter turns and more complex designs. Each practice session builds muscle memory and confidence. Keep your practice pieces to compare your improvement over time. This tangible feedback motivates continued skill development.
Start with softwoods like pine, which are more forgiving than hardwoods. Progress to hardwoods as your skills improve. Try different blade types to understand how each performs. Join woodworking communities online or locally to learn from experienced craftspeople. Many experienced woodworkers share tips and techniques that accelerate your learning curve.
- Begin with simple curves on softwood scrap material.
- Progress gradually to tighter turns and complex designs.
- Try different blade types to understand their characteristics.
- Save practice pieces to document your skill improvement.
- Connect with experienced woodworkers for guidance and tips.
Creating a Practice Progression Plan
Structure your practice with a clear progression. Week one: cut basic gentle curves in pine. Week two: attempt tighter curves in the same material. Week three: practice the same curves in hardwood. Week four: combine multiple curves in a single project. This structured approach ensures steady improvement and prevents frustration from attempting too-difficult projects too soon.
Key Takeaway: Deliberate practice on progressively challenging projects builds the muscle memory and confidence needed for professional curved cutting.
Recommended Products

SEESII Jig Saw, Cordless Jigsaw Tool with 2×2.0Ah Batteries and Charger
- Cordless Jigsaw That Extends Runtime: No need for frequent recharges! The SEESII Jig saw comes with 2 x 21V lithium batteries, providing reliable, long-lasting power. Unlike many others, our jigsaw saw includes extra batteries, ensuring you're ready to cut without delay
- 9 Blades That Tackle Every Job: Whether you're trimming hardwood, slicing through pipes, or working with other materials, you'll always have the perfect blade for the job, ensuring clean and precise cuts every time with our mini small compact jigsaw
- Change Blades in Seconds: Swap blades instantly with the thumb-push quick-release. One push, one pull, and the blade is locked. Fast, secure, and steady—so you stay focused on the work, not the hardware
- Achieve Bevel Cuts from 0–45°: The SEESII battery powered jigsaw tool makes angled cuts easy with an adjustable base for bevel cutting from 0 to 45 degrees. Ideal for crown molding, trim work, or detailed DIY projects
- Control Speed from 0–2800 SPM: Speed is controlled by how far you press the trigger. This allows you to adjust the handheld jigsaw cutting speed based on your material—slower speeds for delicate cuts and faster speeds for quicker cuts through tougher materials
- Switch Between 4 Smooth Orbital Actions: Dial in the perfect cut with 4 orbital levels. 0 for clean finishes, 3 for fast cuts in soft wood—every material gets the setting it deserves for smoother, more accurate results
- Illuminate Cuts with Built-in LED: The integrated LED light brightens the cut line, ensuring precision even in dark or dimly lit workspaces
- Lock in Full Safety: Unlike basic tools with a simple trigger, this jigsaw with battery requires both the safety lock and trigger to be engaged simultaneously, ensuring complete protection against accidental activation
- Grab a Complete Kit with Exclusive Items: The kit includes 1 jigsaw, 2 long-lasting batteries, and 1 charger for uninterrupted work. Plus, you’ll receive 9 premium jigsaw blades for versatile cutting. For added convenience, we also include a hex wrench and a carrying bag to keep everything organized





As an Amazon Associate we earn from qualifying purchases. Product prices and availability are accurate as of the date/time indicated.

GINEPAN Jigsaw Blades T Shank 20PCS T101AO with Storage Case
- GINEPAN Jigsaw Blades T Shank are made of High-Carbon steel through multiple processes such as quenching/burning/returning/Grinding, making the jig saw blades more durable.
- T101AO 20TPI Jigsaw Blade Designed for Curved & Scrolling Fine Finish Cuts in double-sided laminates, laminated substrates, mdf, hard and soft woods, and plywood. Pointed teeth reduce splintering on both sides of the workpiece.
- COMPATIBLE -- T-shank design fits over 95 percent of current jigsaws such as : GINEPAN, Bosch , DEWALT , BLACK and DECKER , TOOLDO , Makita , SKIL , Ryobi and Rockwell BladeRunner x2 jigsaw blades
- Factory direct price! GINEPAN T Shank jigsaw blade provide the best cost but remain in great quality.
- 20 Piece GINEPAN universal T101AO jigsaws jig saw blades accessory kit with case. (Warm tips: Since the attached Case is compatible with most saw blades, the gap is relatively large. T101AO saw blade is small, easy to scatter in the Case, but does not affect the use)


As an Amazon Associate we earn from qualifying purchases. Product prices and availability are accurate as of the date/time indicated.
Frequently Asked Questions
What is the best jig saw blade for curved cuts in hardwood?
For hardwood curves, use a fine-tooth blade with 10-14 teeth per inch. Narrow scroll blades (1/8 inch wide) handle tight curves best. Fine teeth produce smooth edges that require minimal sanding. Brands like Bosch and DeWalt offer excellent hardwood-specific blades. Test different brands to find which performs best with your jig saw.
How tight of a curve can a jig saw cut?
Jig saw minimum radius depends on blade width. A 1/8-inch blade can cut curves with approximately 1/2-inch radius. Narrower blades handle tighter curves. Scroll blades designed for detailed work can cut extremely tight curves and sharp corners. Practice with scrap wood to understand your specific tool’s capabilities and limitations.
Why does my jig saw blade keep breaking?
Blade breakage usually results from forcing the tool, using dull blades, or improper installation. Ensure blades are installed correctly with proper tension. Replace dull blades immediately. Let the tool cut at its own pace without forcing. Check that you’re using the correct blade for your material and thickness. Reduce cutting speed on tight curves to prevent excessive stress.
Can you use a jig saw to cut curves in thick wood?
Yes, but with limitations. Most jig saws cut wood up to 2 inches thick, though cutting speed decreases significantly. Use coarse-tooth blades for faster cutting through thick stock. Reduce orbital settings for better control. Make multiple passes if necessary rather than forcing through thick material. Check your jig saw’s specifications for maximum cutting depth.
What is the difference between orbital and straight cutting modes?
Straight mode moves the blade only vertically for clean, smooth cuts. Orbital mode adds forward motion during the cutting stroke for faster material removal but rougher edges. Use straight mode for detailed work and fine finishes. Use orbital mode for faster cutting in softwoods when edge smoothness is less critical. Most modern jig saws offer adjustable orbital settings.
How do you prevent splintering when cutting curves?
Use fine-tooth blades and reduce cutting speed to minimize splintering. Apply painter’s tape along your cutting line to reduce splintering on the bottom surface. Cut slightly outside your line, then sand to final dimension. Ensure your blade is sharp and properly installed. Support the wood firmly to prevent vibration that causes splintering.
Conclusion: Mastering Curved Cuts with Your Jig Saw
Cutting curves in wood with a jig saw becomes achievable through proper blade selection, thorough preparation, and steady technique. The jig saw remains an essential tool for any woodworker pursuing curved designs and decorative work. Start with the fundamentals covered in this guide: choose appropriate blades, secure your workpiece, and let the tool do the work without forcing. Practice on scrap wood to build confidence before tackling your final projects.
Your success depends on understanding how different blade types perform with various wood species and thicknesses. Invest time in proper preparation, including clear marking and secure clamping. Safety must always guide your work, with proper hand positioning and protective equipment. As your skills develop, you’ll tackle increasingly complex curved projects with confidence and precision. The satisfaction of creating smooth, professional-looking curves rewards your effort and practice.
For additional woodworking knowledge, explore related topics like how to restore antique wood furniture tools and how to choose a cordless drill for home use. Each tool in your workshop serves specific purposes, and understanding their capabilities expands your creative possibilities. Continue learning, practicing, and refining your techniques to become a skilled woodworker.







Write Your Review
No reviews yet. Be the first to share your experience!