

What Is the Best Way to Build a Simple Workbench for a Small Garage?
A simple workbench is the foundation of any productive small garage workshop. Building your own workbench saves money and lets you customize it to fit your specific space and projects. In September 2026, DIY makers are prioritizing compact, multifunctional designs that maximize limited square footage. A basic workbench requires only fundamental carpentry skills, standard materials, and a few hours of work. This guide walks you through selecting materials, planning your layout, and assembling a sturdy workspace that supports woodworking, repairs, and creative projects.
Small garage workshops demand smart design choices. Your workbench should be sturdy enough to handle hand tools, power tools, and clamping pressure without wobbling. The ideal height for most workers is 34 to 36 inches—roughly elbow height when standing. Space constraints mean you’ll want a bench between 24 and 36 inches deep and 48 to 60 inches wide. Consider wall-mounted options, fold-down designs, or benches with integrated storage underneath. These strategies keep your workspace functional without consuming your entire garage.
Key Takeaway: A well-built simple workbench combines smart space planning, appropriate height, and sturdy construction to create an efficient small garage workshop.
What Materials Do You Need for a Basic Garage Workbench?
Building a simple workbench requires straightforward materials that are affordable and widely available. Most DIY makers choose 2×4 lumber for the frame, plywood for the top, and hardware like bolts and lag screws for assembly. The total material cost typically ranges from $150 to $400 depending on size and finish quality. You don’t need exotic hardwoods or expensive components—pressure-treated lumber and standard plywood work perfectly for functional garage workbenches.

Here’s what you’ll need to gather before starting your project:
- 2×4 lumber for frame construction and legs.
- 3/4-inch plywood or hardwood for the work surface.
- Lag screws, bolts, and washers for reinforcement.
- Wood glue and clamps for assembly.
- Sandpaper and wood stain or finish (optional).
- Vise and bench dogs if budget allows.
The work surface is critical—thicker plywood or solid wood resists dents and provides a flat foundation for precise work. Many builders use 3/4-inch plywood for affordability or upgrade to hardwood like maple or oak for longevity. Your choice depends on the types of projects you’ll tackle and your budget. A vise mounted to one end adds tremendous functionality for holding workpieces during sawing, planing, and hand tool work.
Key Takeaway: Use 2×4 lumber and 3/4-inch plywood to build a durable, affordable workbench that handles most garage workshop tasks.
How Do You Design a Workbench Layout for Limited Space?
Space planning is essential when building a workbench for a small garage. Measure your available floor space carefully, accounting for door swings, tool storage, and movement around the bench. A bench that’s too large blocks traffic; one that’s too small limits your projects. Most small garage workshops benefit from benches between 48 and 60 inches long and 24 to 30 inches deep. This size accommodates most hand and power tool work while leaving room to walk around.
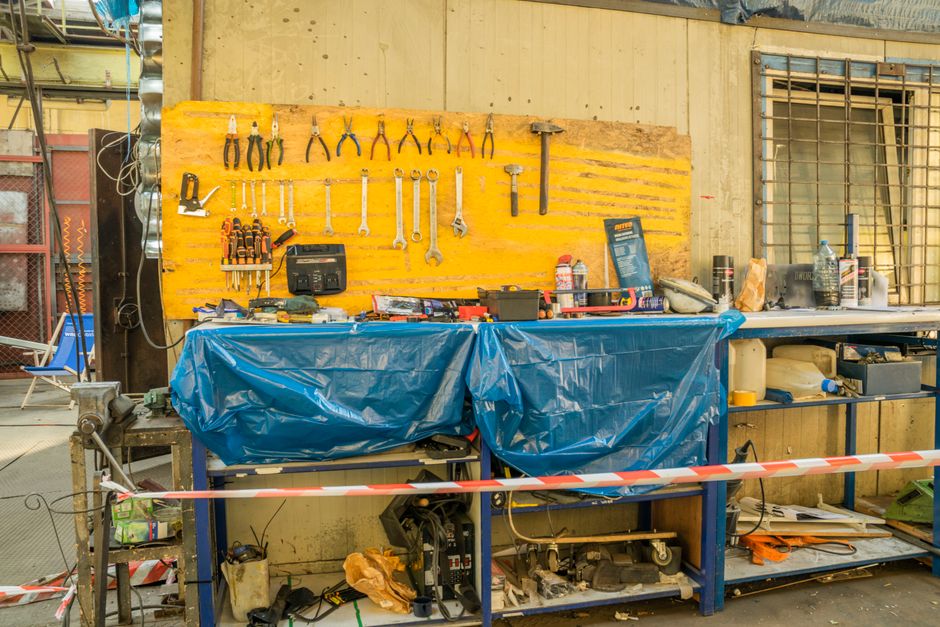
Consider these layout strategies for maximum efficiency:
- Wall-mounted benches fold up when not in use, freeing floor space.
- Corner benches utilize otherwise wasted space and provide stability.
- Benches with open undersides allow tool storage or mobile cabinets.
- Adjustable-height benches work for multiple users and project types.
- Mobile bases let you move the bench when you need extra floor room.
Vertical Storage Integration
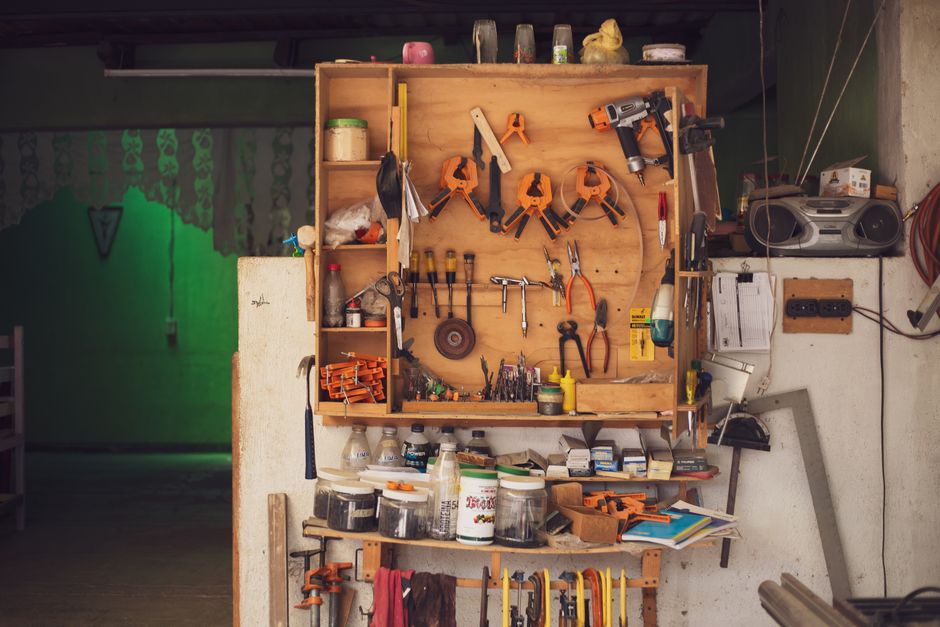
Small garages demand vertical thinking. Design your workbench with shelves, pegboards, or magnetic strips mounted above or beside it. This keeps frequently used tools within arm’s reach without cluttering your work surface. Wall-mounted storage transforms dead wall space into functional tool organization. Many builders add a narrow shelf 12 to 18 inches above the bench for tools and supplies.
Key Takeaway: Design your workbench with vertical storage and appropriate dimensions to maximize functionality in limited garage space.
What Are the Essential Steps to Build Your Workbench?
Building a simple workbench follows a logical sequence from frame assembly to surface finishing. This process typically takes 6 to 10 hours for a basic model. Start with the frame, add the top, then install accessories like vises and storage. Each step builds on the previous one, so take time to ensure squareness and stability before moving forward. Proper assembly prevents wobbling and extends your bench’s working life.
Step-by-Step Assembly Process
- Cut all pieces to length: Frame components, legs, and top material. Double-check measurements before cutting.
- Build the base frame: Assemble four 2x4s into a rectangle using lag screws and wood glue. Ensure corners are square using a carpenter’s square.
- Attach legs: Mount four vertical 2×4 legs at each corner, securing with bolts and washers for maximum strength.
- Add cross bracing: Install diagonal braces or shelving supports to prevent racking and improve stability.
- Attach the top: Screw 3/4-inch plywood or hardwood to the frame using countersunk bolts or screws.
- Sand and finish: Smooth the surface with 120-grit sandpaper, then apply stain or polyurethane for protection.
- Install accessories: Mount a vise, add bench dogs, and attach any storage components.
Precision matters during assembly. Use a level to check that your bench is perfectly flat and level before tightening all fasteners. Uneven benches cause problems with hand planing and precise layout work. Take extra time squaring the frame corners—this foundation ensures years of reliable performance.
Key Takeaway: Follow a methodical assembly sequence, prioritizing squareness and stability to build a workbench that performs reliably for years.
How Do You Make Your Workbench More Functional?
A basic workbench becomes truly useful when you add functional accessories. A woodworking vise holds workpieces securely during sawing, planing, and hand tool work. Bench dogs—small pegs that fit into holes across the top—help position longer pieces. Tool racks and pegboards keep your most-used implements within reach. These additions transform a simple flat surface into a capable workshop hub that supports serious projects.

Consider adding these functional upgrades:
- A quality woodworking vise mounted at one end for holding workpieces.
- Bench dog holes drilled across the top in a grid pattern.
- A leather apron or tool belt hanging nearby for quick access.
- Clamp storage racks built into the bench structure.
- Drawers or shelves underneath for storing hardware and supplies.
- A power strip mounted to the side for convenient tool charging.
Integrating Power Tools
Your workbench should accommodate power tool use safely. Leave clear space around the vise for operating sanders, drills, and routers. Mount a power strip within reach but away from the work surface. Consider adding a dust collection port if you’ll use power tools regularly. Many small garage workshops benefit from a scroll saw or other stationary tools positioned near the bench for efficient workflow. Proper layout prevents accidents and keeps your workspace organized.
Key Takeaway: Add a vise, bench dogs, and storage accessories to transform your basic workbench into a fully functional workshop hub.
What Practical Tips Help You Build and Use Your Workbench Successfully?
Building and maintaining a workbench involves practical considerations beyond the basic construction. Proper fastener selection, surface protection, and regular maintenance extend your bench’s lifespan. These tips help you avoid common mistakes and maximize your investment. Whether you’re building your first workbench or upgrading an existing one, these strategies improve results.
Follow these practical guidelines for workbench success:
- Use lag screws or bolts instead of nails for stronger, more durable construction.
- Apply a protective finish like polyurethane to resist stains and moisture damage.
- Keep your work surface clear of clutter to maintain a safe, organized workspace.
- Check levelness and squareness monthly, tightening loose fasteners as needed.
- Use parallel jaw clamps and proper clamping techniques to protect your bench top.
- Organize tools by frequency of use—keep daily tools closest to your work area.
- Mount a light fixture above the bench for better visibility during detailed work.
- Consider a rubber mat or towel to protect the surface when working with metal or messy materials.
Maintenance and Long-Term Care
Regular maintenance keeps your workbench safe and functional. Inspect fasteners quarterly and tighten any that have loosened from vibration. Clean the work surface regularly to prevent dust accumulation and see your layout clearly. If you spill finish or glue, clean it immediately to prevent permanent staining. A well-maintained bench serves reliably for decades, making it one of your best workshop investments.
Key Takeaway: Use quality fasteners, apply protective finishes, and maintain your bench regularly to ensure years of reliable performance.
How Does Your Workbench Support Different Types of Projects?
A well-designed workbench adapts to various workshop tasks. Whether you’re doing wood carving, hand planing, or general repairs, your bench should provide stable support. The height, surface area, and accessory configuration determine what projects work best. Many makers discover that their initial bench design evolves as they tackle new challenges. Building flexibility into your design helps your workspace grow with your skills and interests.
Your workbench enables these common workshop activities:
- Hand tool work like planing and chiseling with secure clamping.
- Power tool operation with clear work space and dust management.
- Assembly and glue-ups using clamps and bench dogs.
- Detailed layout work on a flat, well-lit surface.
- Tool maintenance and sharpening with dedicated space.
Key Takeaway: A properly designed workbench adapts to support hand tools, power tools, and assembly work, growing with your workshop skills.
What Should You Know About Workbench Height and Ergonomics?
Workbench height dramatically affects comfort and work quality. The standard height of 34 to 36 inches works for most people, placing the surface near elbow height when standing with arms relaxed. Incorrect height causes fatigue, poor posture, and reduced accuracy. If you’re significantly taller or shorter than average, adjust your bench height accordingly. Ergonomic considerations matter more than you might think—spending hours at an uncomfortable bench leads to injury and frustration.
Consider these ergonomic factors when building your bench:
- Standard height is 34 to 36 inches for most adults.
- Taller workers benefit from 36 to 38-inch benches.
- Shorter workers work better with 32 to 34-inch benches.
- Adjustable-height benches accommodate multiple users.
- Test your height by standing at your bench—your elbows should bend at roughly 90 degrees.
Key Takeaway: Build your workbench at the correct height for your body to ensure comfort and reduce fatigue during long work sessions.
Frequently Asked Questions
What is the minimum size for a functional small garage workbench?
A functional small garage workbench needs to be at least 48 inches long and 24 inches deep. This size accommodates most hand tool work and assembly projects while fitting in tight spaces. Smaller benches limit your options; larger ones consume valuable garage real estate. Many builders find that 48 x 30 inches provides an ideal balance between functionality and space efficiency.
How much weight can a simple 2×4 workbench hold?
A properly constructed 2×4 workbench typically supports 500 to 1,000 pounds of distributed weight. The actual capacity depends on your specific design, fastener quality, and how weight is distributed. For most hand tool work and light assembly, a well-built simple bench provides more than enough capacity. Heavy power tool operation or concentrated loads require heavier construction or reinforcement.
Can I build a workbench without a vise?
Yes, you can build a functional workbench without a vise, though one adds significant capability. Bench dogs, clamps, and creative clamping solutions can hold workpieces securely. Many DIY makers start without a vise and add one later as their budget allows. A vise transforms your bench’s versatility, but it’s not essential for basic projects and repairs.
How do I protect my workbench top from damage?
Apply a protective finish like polyurethane or lacquer to resist stains and moisture. Use a rubber mat or towel when working with metal, paint, or other damaging materials. Keep your bench clean and dry, wiping up spills immediately. Avoid placing hot tools directly on the surface. Regular maintenance prevents most damage and keeps your bench looking and performing well.
What tools do I need to build a workbench?
You need basic carpentry tools: a circular saw or miter saw for cutting, a drill for fasteners, a level for checking squareness, and a carpenter’s square for layout. Clamps hold pieces while assembling. A tape measure, pencil, and socket wrench complete the essential toolkit. Most DIY makers have these tools already; if not, consider borrowing or renting before investing in new equipment.
Should I use hardwood or plywood for the workbench top?
Both work well—plywood is affordable and durable, while hardwood like maple offers superior longevity and resists dents better. Plywood suits most DIY makers and costs significantly less. Hardwood appeals to serious woodworkers who value performance and aesthetics. Your choice depends on budget and how heavily you’ll use your bench. Either option provides years of reliable service with proper care.
How Can You Build a Workbench That Fits Your Specific Garage Needs?
Building a simple workbench for your small garage is an achievable project that pays dividends for years. The key is matching your design to your available space, budget, and the types of projects you’ll tackle. Start with solid fundamentals—proper height, sturdy construction, and quality materials. Then customize with accessories and storage that reflect your working style. A workbench you build yourself becomes a proud centerpiece of your workshop, tailored perfectly to your needs.
Your workbench is more than just a flat surface—it’s the foundation of your creative workspace. Whether you’re doing cabinet work with pocket hole jigs, board flattening, or general repairs, a well-built bench supports your efforts. Take time during the planning and assembly phases to get details right. Invest in quality fasteners and a good work surface. The result is a reliable workshop hub that grows with your skills and supports projects for decades to come.
Key Takeaway: Build your workbench thoughtfully, matching design to your space and projects, and you’ll have a reliable workshop foundation for years of creative work.







Write Your Review
No reviews yet. Be the first to share your experience!