

How to Use a Scroll Saw for Fretwork: Quick Answer
A scroll saw is the ideal tool for fretwork—intricate decorative woodwork with detailed cuts and curves. To use it effectively, select the correct blade size for your wood thickness, secure your workpiece firmly, and maintain steady hand pressure while guiding the wood through the blade. Fretwork requires patience, precision, and practice with blade tension and feed speed. Start with simple designs before attempting complex patterns. Proper setup prevents blade breakage and ensures clean, accurate cuts that define quality fretwork.
Fretwork has been a cornerstone of decorative woodworking for centuries, appearing in Victorian furniture, architectural trim, and fine art pieces. Modern scroll saws make this craft accessible to hobbyists and professionals alike. Unlike band saws that cut thicker stock, scroll saws excel at delicate work in thin materials. The narrow blade allows for tight radius turns and intricate detail work impossible with larger tools. Understanding scroll saw operation transforms your ability to create stunning decorative pieces.
Key Takeaway: Scroll saws are specialized tools designed for precision fretwork, requiring proper blade selection, secure workpiece clamping, and controlled hand guidance.
What Is a Scroll Saw and Why Is It Perfect for Fretwork?
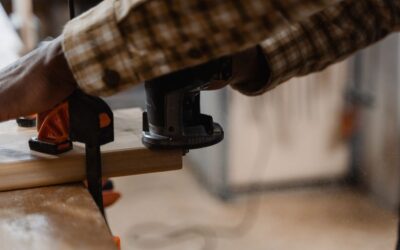
A scroll saw is a stationary power tool with a thin blade that moves up and down in rapid strokes. The blade’s narrow profile—typically 0.125 inches wide—enables extremely tight curves and intricate patterns. Unlike band saws or jigsaws, scroll saws hold the workpiece stationary while the blade does the work, giving you superior control. This makes them ideal for decorative fretwork where precision matters.
Fretwork involves cutting detailed designs into thin wood, often creating open patterns or ornamental pieces. The scroll saw’s oscillating blade creates clean, splinter-free cuts in materials like hardwood, plywood, and veneer. The tool’s design allows you to make inside cuts without removing the workpiece, perfect for creating intricate designs with enclosed patterns.
Key Advantages for Fretwork Projects
- Extremely tight radius curves—down to 0.5 inches.
- Clean, precise cuts with minimal tearout on both sides.
- Inside cuts possible without removing workpiece from table.
- Low vibration compared to other saws.
- Suitable for wood thicknesses from veneer to 2 inches.
- Excellent control and visibility during cutting.
The scroll saw’s precision makes it invaluable for creating decorative boxes, jewelry, architectural details, and artistic pieces. Its safety profile is superior to larger saws since the blade moves vertically with limited lateral force.
Key Takeaway: Scroll saws excel at fretwork because their narrow blades enable tight curves, inside cuts, and intricate detail work impossible with other tools.
How Do You Select the Right Blade for Fretwork?
Blade selection is critical for successful fretwork. Scroll saw blades come in various sizes, tooth configurations, and materials. The wrong blade leads to breakage, rough cuts, and frustration. Your choice depends on wood thickness, design complexity, and desired cut quality. Understanding blade specifications ensures professional results.

Blade sizes are numbered from 0 to 12, with lower numbers producing tighter curves and higher numbers cutting faster through thicker stock. For detailed fretwork, use sizes 0 to 5. Tooth count varies—more teeth create finer cuts in hardwoods, while fewer teeth work better in softwoods and cut faster.
Blade Selection Guide for Different Projects
- Size 0-2: Ultra-fine detail work, tight curves, hardwoods.
- Size 3-5: General fretwork, softwoods, moderate curves.
- Size 6-8: Thicker materials, faster cutting, larger curves.
- Spiral blades: Omnidirectional cutting, complex designs.
- Skip-tooth blades: Faster cutting, better for softwoods.
- Double-tooth blades: Smoother cuts, hardwood preference.
High-quality blades made from hardened steel or carbide last longer and produce cleaner cuts. Budget blades break easily and create rough edges. For fretwork in hardwoods like oak or maple, invest in quality double-tooth blades. Softwoods like pine work well with skip-tooth designs.
Blade tension is equally important. Too loose, and the blade wanders; too tight, and it breaks. Most scroll saws have tension adjustment mechanisms. Proper tension allows slight blade flex without excessive movement. Check your saw’s manual for specific tension specifications.
Key Takeaway: Select blades based on wood type and thickness—smaller sizes for intricate detail work, quality materials for longevity and clean cuts.
What Are the Essential Setup Steps Before Starting Fretwork?
Proper setup prevents accidents and ensures cutting accuracy. Before making your first cut, verify blade installation, adjust table angle, and secure your workpiece. Taking time with setup saves time and materials later. A well-prepared scroll saw operates smoothly and produces professional results.

Install the blade with teeth pointing downward, ensuring it’s centered in the blade guides. The blade should be perfectly vertical—use a square to verify alignment. Adjust the hold-down foot so it barely touches the wood without restricting movement. This prevents chatter while allowing proper feed control.
Pre-Cutting Setup Checklist
- Install blade correctly with teeth pointing downward.
- Verify blade is vertical using a carpenter’s square.
- Adjust tension until blade has slight flex, no more.
- Position hold-down foot 0.125 inches above workpiece.
- Ensure table is clean and free of debris.
- Test blade movement without wood—listen for smooth operation.
- Mark cutting lines clearly with pencil or marking knife.
- Verify workpiece is flat and secure on the table.
Transfer your design to the wood using carbon paper, tracing, or printing directly on the surface. Clear, visible lines guide your cuts and improve accuracy. For inside cuts, drill small starter holes at design entry points using a drill bit matching blade width.
Secure the workpiece using a clamp or vise if needed, but avoid over-tightening. The wood should not shift during cutting. Position your body comfortably with good visibility of the cutting line. Proper ergonomics reduce fatigue during long projects.
Key Takeaway: Meticulous setup—blade installation, tension adjustment, and workpiece securing—determines cutting success and safety.
How Do You Execute Proper Cutting Technique for Fretwork?
Cutting technique separates beautiful fretwork from mediocre results. The scroll saw does the cutting; your job is guiding the wood smoothly and steadily. Maintain consistent pressure without forcing the blade. Let the tool work at its designed speed—rushing causes breakage and rough cuts. Proper technique develops through practice and patience.

Feed the wood slowly and smoothly into the blade. Use gentle, even pressure—never force. The blade should cut through wood without resistance. If you feel the blade struggling, you’re feeding too fast. Conversely, if the blade seems to wander, you may be feeding too slowly, allowing excessive vibration.
Fundamental Cutting Techniques
- Maintain steady, moderate feed speed—let the blade cut.
- Keep hands clear of blade path for safety.
- Follow design lines as closely as possible.
- For curves, rotate the wood, not your hands.
- Make inside cuts by drilling starter holes first.
- Support the wood firmly without restricting movement.
- Listen to the blade—changes in sound indicate problems.
For curved sections, rotate the workpiece gradually while maintaining steady feed pressure. Don’t try to turn too sharply—let the blade’s radius capabilities guide your curves. Tight corners require patience; rushing causes blade breakage. If the blade binds, stop immediately and back the wood out slowly.
Inside cuts require a different approach. Drill a starter hole through the waste area, large enough for the blade to pass through. Disconnect the blade’s bottom end, thread it through the hole, reconnect, and cut the interior pattern. This technique enables enclosed designs impossible with other tools.
Maintain consistent blade speed throughout the project. Modern scroll saws have variable speed controls—typically 400 to 1,750 strokes per minute. Hardwoods benefit from slower speeds; softwoods work well at faster speeds. Experiment to find your optimal setting for each material.
Key Takeaway: Successful fretwork requires steady hand guidance, moderate feed speed, and patience—let the blade do the work without forcing.
What Practical Tips Improve Your Fretwork Results?
Experience brings mastery, but proven techniques accelerate your learning curve. Implement these practical strategies to elevate your fretwork quality immediately. Small adjustments in approach yield dramatic improvements in finished pieces.
Essential Tips for Professional-Quality Fretwork
- Use carbon paper to transfer designs accurately—prevents marking errors.
- Practice on scrap wood before cutting expensive materials.
- Keep blades sharp—dull blades cause rough cuts and break easily.
- Work in good lighting—use a magnifying lamp if needed.
- Change blades frequently; they dull quickly with use.
- Keep the table clean—sawdust buildup interferes with smooth feeding.
- Sand finished edges lightly with fine-grit sandpaper.
- Apply finish before final assembly for easier application.
Invest in quality blades and replace them regularly. A sharp blade cuts cleanly and breaks less frequently than a dull one. Keep several blade sizes on hand so you can match the tool to each project’s requirements. Store blades in a protective case to prevent damage.
Lighting is often overlooked but crucial for fretwork precision. Position a bright work light directly over the cutting area. A magnifying lamp helps with intricate details and reduces eye strain during extended sessions. Good visibility prevents mistakes and improves accuracy.
Practice makes perfect. Start with simple designs featuring gentle curves and larger openings. Gradually increase complexity as your skills develop. Keep a portfolio of completed projects to track your progress and identify areas for improvement.
Key Takeaway: Sharp blades, excellent lighting, regular practice, and quality materials transform fretwork from frustrating to rewarding.
How Does Fretwork Compare to Other Woodworking Techniques?
Understanding fretwork’s place in woodworking helps you choose the right tool for each project. Fretwork differs fundamentally from other decorative techniques in precision, material requirements, and aesthetic possibilities. Each method serves specific design goals and material types.
Unlike band saws that cut curves in thick wood, scroll saws create delicate detail work in thin materials. Routers, such as those used for inlay work with trim routers, remove material differently and work better for edge profiling. Fretwork stands alone for intricate pierced designs and decorative patterns.
Comparison of Decorative Woodworking Methods
- Fretwork: Intricate detail cuts, thin materials, pierced designs.
- Routing: Edge profiling, inlays, larger features, faster removal.
- Band saw work: Thick material curves, larger features, less detail.
- Hand carving: Artistic detail, time-intensive, requires skill.
- CNC machining: Precision production, high cost, requires software.
Fretwork excels when you want intricate, decorative pierced patterns. It’s ideal for creating architectural elements, decorative boxes, jewelry, and artistic pieces. The technique allows multiple interior cutouts and complex designs impossible with other methods. For projects requiring both wood removal and edge detail, combining fretwork with router work yields exceptional results.
Key Takeaway: Fretwork is the optimal technique for intricate pierced designs and decorative detail work in thin materials.
What Common Mistakes Should You Avoid in Fretwork?
Learning from others’ mistakes accelerates your progress. Common errors plague beginning fretwork enthusiasts, but awareness prevents most problems. Understanding what goes wrong helps you make better decisions throughout your projects.
Blade breakage is the most frequent problem, usually caused by forcing the feed, using dull blades, or incorrect tension. Forcing the blade through wood strains it beyond its strength limits. Dull blades require excessive pressure, leading to breakage. Improper tension creates excessive vibration, weakening the blade until it snaps.
Mistakes That Compromise Fretwork Quality
- Forcing the blade—let it cut at its natural pace.
- Using dull blades—replace frequently for clean cuts.
- Incorrect blade tension—follow manufacturer specifications.
- Poor design transfer—use carbon paper for accuracy.
- Inadequate lighting—invest in proper work lights.
- Rushing projects—fretwork requires patience.
- Skipping setup steps—proper preparation prevents problems.
- Cutting too fast—speed causes blade wandering and breakage.
Design transfer errors lead to misaligned cuts and wasted materials. Use carbon paper and trace carefully to ensure accurate pattern placement. Inadequate lighting causes eye strain and cutting mistakes. Rushing projects leads to sloppy work and safety hazards. Fretwork demands patience—each piece takes as long as it takes.
Material selection affects results significantly. Thin, even-grained woods like cherry and walnut work beautifully. Avoid highly figured woods that splinter easily. Plywood works well for practice projects but produces visible veneers on edges. Veneer allows ultra-thin, delicate designs.
Key Takeaway: Avoid blade breakage and rough cuts by maintaining proper tension, using sharp blades, and feeding steadily without forcing.
How Can You Master Advanced Fretwork Designs?
Once you’ve mastered basic techniques, advanced designs challenge your skills and expand creative possibilities. Complex patterns incorporate multiple interior cuts, varying line weights, and intricate details. Progression from simple to complex projects builds confidence and technical skill systematically.
Advanced fretwork often combines multiple techniques within a single piece. Pierced sections alternate with solid areas. Interior cutouts create negative space that defines the design. Layered elements add depth and dimension. These sophisticated approaches transform fretwork from simple decoration into fine art.
Strategies for Advancing Your Fretwork Skills
- Study historical fretwork designs for inspiration and technique.
- Practice inside cuts extensively before complex projects.
- Experiment with different wood species and thicknesses.
- Combine fretwork with other techniques like staining or carving.
- Create custom designs using design software.
- Document your process with photos for future reference.
- Join woodworking groups to learn from experienced crafters.
Advanced designers use computer software to create custom patterns, then print them at actual size for transfer. This approach enables complex designs impossible to draw by hand. Digital design also allows testing variations before committing to wood.
Layering multiple wood pieces creates stunning three-dimensional effects. Cut identical patterns from different wood species, then stack them with spacers. The resulting piece displays multiple colors and depths. This technique elevates fretwork from flat decoration to sculptural art.
Combining fretwork with hand carving, staining, and finishing creates gallery-quality pieces. Fretwork provides the basic design; carving adds detail; staining creates color variation; finishing enhances wood grain and provides protection. Integration of multiple techniques produces exceptional results.
Key Takeaway: Advanced fretwork combines pierced designs, interior cutouts, layering, and complementary techniques to create fine art pieces.
What Safety Precautions Are Essential for Scroll Saw Work?
Safety should never be compromised, regardless of project importance. Scroll saws are relatively safe compared to other power tools, but hazards exist. Understanding and implementing proper safety practices prevents injuries and creates a secure work environment. Protective equipment and mindful practices keep you safe.
The primary hazard is blade contact with fingers or hands. The blade moves rapidly—even brief contact causes cuts. Never reach near the blade while it’s operating. Maintain proper hand position away from the blade path. Use push sticks or wood blocks for small pieces.
Essential Safety Practices for Scroll Saw Operation
- Wear safety glasses to protect from flying debris.
- Keep hands clear of the blade path at all times.
- Never reach near the blade while it’s operating.
- Use push sticks for small workpieces.
- Disconnect power before changing blades.
- Maintain proper posture and balance while standing.
- Keep the work area clean and free of clutter.
- Never operate the saw when fatigued or distracted.
- Keep long hair tied back and avoid loose clothing.
- Ensure the blade is properly secured before operating.
Eye protection is non-negotiable. Flying wood particles and dust can cause serious eye injuries. Safety glasses with side shields provide optimal protection. Hearing protection is recommended for extended sessions, as the blade noise can cause fatigue.
Proper body positioning prevents fatigue and maintains control. Stand comfortably with feet shoulder-width apart, maintaining balance throughout the cut. Avoid awkward reaching that compromises stability. Good posture reduces errors and improves safety.
Always disconnect power before changing blades, adjusting tension, or performing maintenance. This simple practice prevents accidental startup injuries. Establish a routine of checking that the power switch is off before any tool interaction.
Key Takeaway: Consistent safety practices—eye protection, hand positioning, power control, and proper technique—prevent injuries and ensure enjoyable fretwork.
How Do You Finish and Display Your Fretwork Creations?
Finishing transforms raw fretwork into gallery-quality pieces. Proper finishing protects the wood, enhances grain and color, and provides visual appeal. Finishing technique depends on the piece’s purpose and desired aesthetic. Understanding finishing options completes your fretwork journey.
Sand all surfaces lightly with fine-grit sandpaper—220 grit or higher—to smooth edges and remove dust. Be gentle around delicate areas. Staining adds color and depth; choose stains that complement your wood species and design. Apply finish coats after staining to protect the wood and provide sheen.
Finishing Options for Fretwork Pieces
- Oil finish: Enhances grain, easy application, natural appearance.
- Lacquer: Fast drying, durable, professional appearance.
- Polyurethane: Protective, available in matte to gloss, water or oil-based.
- Wax: Soft sheen, easy maintenance, traditional appeal.
- Stain: Color enhancement, various tones available.
- Paint: Opaque finish, unlimited color options.
Apply finish in thin coats rather than one thick coat. Multiple thin coats dry more evenly and create better appearance than single heavy applications. Sand lightly between coats for adhesion. Follow product instructions regarding drying time and application method.
Display your finished fretwork to showcase your craftsmanship. Wall-mounted pieces benefit from proper lighting to highlight detail work. Framed designs look professional and protect the piece. Consider the piece’s function—decorative boxes need functional hardware; wall art needs secure mounting.
Key Takeaway: Proper finishing—sanding, staining, and protective coats—elevates fretwork from functional to beautiful while protecting the wood.
Conclusion: Mastering Scroll Saw Fretwork in 2026
Scroll saw fretwork is an accessible, rewarding woodworking skill that produces stunning decorative pieces. Success requires understanding your tool, selecting appropriate materials and blades, and developing proper technique through practice. The scroll saw’s precision capabilities unlock creative possibilities impossible with other tools. Your investment in learning this skill pays dividends through beautiful, functional art pieces.
Start with simple designs featuring gentle curves and larger openings. Progress gradually to complex patterns as your confidence grows. Invest in quality blades and maintain your equipment properly. Practice regularly, learn from mistakes, and celebrate successes. Join woodworking communities to share knowledge and inspiration with fellow craftspeople.
The fretwork tradition spans centuries, from Victorian furniture to contemporary art. By mastering scroll saw techniques, you join a community of craftspeople dedicated to creating beauty through precision and patience. Your fretwork pieces become heirlooms, gifts, and expressions of creativity. Start your journey today—the rewards are immeasurable.
Key Takeaway: Scroll saw fretwork combines accessible technique with unlimited creative potential, producing decorative pieces that blend functionality and fine art.
Frequently Asked Questions
What wood thickness works best for fretwork?
Fretwork typically uses wood between 0.25 and 0.5 inches thick. Thinner material—veneer or 0.125-inch stock—allows ultra-delicate designs. Thicker wood up to 2 inches works with appropriate blades but limits design intricacy. Hardwoods like walnut and cherry produce superior results compared to softwoods. Plywood is economical for practice projects but shows veneers on edges.
How often should you change scroll saw blades?
Change blades when they become dull, typically after 4-8 hours of cutting depending on material hardness and blade quality. Dull blades produce rough cuts, require excessive feed pressure, and break easily. A sharp blade cuts cleanly with minimal pressure. Keep several blade sizes on hand to match each project’s requirements. Quality blades cost more but last longer and produce better results.
Can you use a scroll saw for thick wood cutting?
Scroll saws handle wood up to 2 inches thick, but they’re not ideal for thick stock. A band saw works better for thick wood curves. Scroll saws excel at thin material detail work. For projects requiring both thick and thin cutting, use the appropriate tool for each section. Attempting thick cuts with a scroll saw strains the blade and produces poor results.
What’s the difference between inside and outside cuts?
Outside cuts follow the workpiece perimeter without removing it from the table. Inside cuts create interior openings and require drilling starter holes, threading the blade through, and cutting the interior pattern. Inside cuts enable pierced designs and enclosed shapes impossible with outside cuts alone. Both techniques are essential for complex fretwork designs featuring multiple interior elements.
How do you prevent blade breakage during fretwork?
Prevent breakage by maintaining proper blade tension, using sharp blades, avoiding forced feeding, and selecting appropriate blade sizes. Tension that’s too loose causes wandering; too tight causes breakage. Never force the blade through wood—let it cut naturally. Use smaller blades for intricate curves and larger blades for faster cutting. Replace dull blades immediately.
What design software works best for fretwork patterns?
CorelDRAW, Adobe Illustrator, and free options like Inkscape work well for fretwork design. Create patterns at actual size, then print for transfer to wood using carbon paper. Specialized woodworking software like DraftSight offers woodworking-specific features. Even simple programs like Microsoft Word suffice for basic designs. Digital design enables testing variations before committing materials.




Write Your Review
No reviews yet. Be the first to share your experience!