

How to Fit a Tool Belt for All-Day Comfort: Quick Answer
A properly fitted tool belt distributes weight evenly across your hips and waist, reducing strain and fatigue during long workdays. The key is selecting the right size, positioning the belt at your natural waistline, and balancing tool placement to avoid excessive pressure on any single area. Most professionals achieve all-day comfort by ensuring their belt sits snugly without restricting movement, keeping frequently used tools within easy reach, and adjusting the fit as they add or remove tools throughout the day.
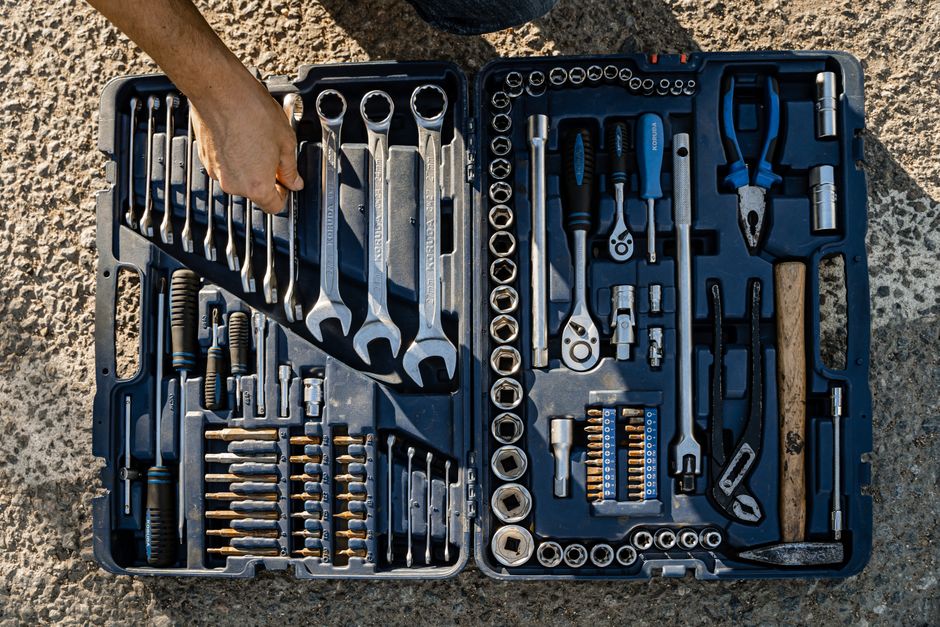
Tool belt comfort directly impacts your productivity and safety on the job. A poorly fitted belt can cause back pain, shoulder strain, and reduced mobility—all of which slow your work and increase injury risk. In September 2026, modern tool belts offer advanced ergonomic designs with padded waistbands, adjustable suspenders, and strategic pocket placement to enhance comfort. Understanding how to properly fit your belt transforms it from a cumbersome necessity into a reliable work partner that keeps you performing at your best.
Key Takeaway: Proper tool belt fitting starts with correct sizing, continues with strategic weight distribution, and succeeds through regular adjustment as your tool load changes.
How Do You Choose the Right Tool Belt Size?
Selecting the correct tool belt size is your foundation for all-day comfort. Most tool belts come in small, medium, large, and extra-large sizes, each designed for specific waist measurements. Measure your natural waistline—not your pants size—with a soft measuring tape placed directly against your skin. This measurement should be taken at the narrowest part of your torso, typically just above your hip bones.
Tool belt sizing differs from clothing sizing because the belt must fit securely without gaps while allowing room for adjustment. A belt that’s too large will shift during movement, creating pressure points and reducing tool accessibility. A belt that’s too small restricts breathing and causes discomfort within hours. Most manufacturers provide sizing charts that correlate waist measurements to belt sizes, typically ranging from 28 inches to 48 inches.
Understanding Measurement Standards
Tool belt manufacturers use different sizing conventions, so always consult the specific brand’s size chart before purchasing. Some brands measure the inner circumference of the belt, while others measure the outer diameter. The inner measurement is more relevant because it directly contacts your body. When in doubt, choose the size that accommodates your natural waist measurement with approximately one inch of adjustment room on either side.
- Measure your natural waistline at the narrowest point above hip bones.
- Check the manufacturer’s specific sizing chart—standards vary by brand.
- Allow one inch of adjustment room on either side of your measurement.
- Consider whether you’ll wear the belt over heavy jackets or multiple layers.
- Test the belt in-store if possible to verify comfort and fit.
Key Takeaway: Accurate waist measurement and consulting brand-specific sizing charts ensures you purchase a belt that fits your body properly.
How Should You Position Your Tool Belt on Your Body?
Positioning your tool belt correctly transforms comfort and functionality. The belt should sit at your natural waistline, not on your hips or stomach. This positioning allows the weight to rest on your pelvic bones and core muscles rather than creating strain on your lower back. When properly positioned, the belt feels like a natural extension of your body rather than an external burden.
Your belt should sit level and parallel to the ground. If one side hangs lower than the other, it indicates uneven weight distribution or improper sizing. Adjust the fit so the waistband sits snugly against your body without pinching or restricting your movement. You should be able to fit one finger between the belt and your body comfortably. This balance prevents the belt from rotating or shifting during active work.
Finding Your Ideal Vertical Position
The vertical position of your tool belt affects both comfort and accessibility. Positioning it too high restricts rib cage movement and breathing. Positioning it too low places excessive strain on your lower back and hip flexors. The optimal position is approximately one inch below your natural waistline, resting on the widest part of your hip bones. This placement distributes weight through your strongest skeletal support structure.
- Position the belt at your natural waistline, approximately one inch below hip bones.
- Ensure the belt sits level and parallel to the ground on both sides.
- Allow one finger’s width of space between the belt and your body.
- Adjust position if you feel restriction in breathing or rib cage movement.
- Reposition the belt when your clothing layers change.
Key Takeaway: Positioning your belt at the natural waistline on your hip bones ensures optimal weight distribution and comfort throughout the day.
How Do You Balance Tool Weight Distribution?
Even weight distribution across your tool belt prevents localized pain and fatigue. Placing all your heavy tools on one side creates an imbalance that strains your spine and hip muscles. The goal is to distribute the total weight evenly from left to right, with slightly more weight toward the back where your body naturally supports loads. This mimics how your body naturally carries weight when hiking with a backpack.
Analyze your tool usage patterns to determine optimal placement. Tools you use frequently should be positioned within easy reach at waist level. Heavier tools should be distributed toward the back and sides rather than the front. Lighter tools and frequently accessed items belong in front pockets for quick access. This strategic placement reduces the reaching and twisting movements that cause fatigue and injury.
Creating a Balanced Tool Configuration
Start by weighing your tools to understand the load distribution. Measure each tool’s weight and note which ones you use most frequently. Create a mental map of your belt with zones: front (frequent access), sides (medium weight), and back (heavier items). Distribute tools so no single area of your belt exceeds 40 percent of your total tool weight. This prevents the belt from tilting or creating pressure points during movement.
- Distribute total tool weight evenly from left to right across your belt.
- Place heavier tools toward the back and sides of your body.
- Keep frequently used tools within easy reach at waist level.
- Limit any single area to no more than 40 percent of total tool weight.
- Adjust placement as your job tasks change throughout the day.
Key Takeaway: Strategic weight distribution across your belt—heavier items toward the back, frequent tools in front—prevents pain and improves work efficiency.
How Do You Adjust Your Tool Belt for Extended Wear?
Long workdays require periodic belt adjustments to maintain comfort. Your body position changes as you move between standing, bending, and climbing, so your belt’s fit may shift. Check your belt position every two to three hours of work. If you notice it rotating, slipping, or creating pressure points, take a five-minute break to readjust. This proactive maintenance prevents cumulative discomfort from developing into pain.
Temperature and clothing changes throughout the day affect how your belt fits. Morning layers may feel snug, but as you warm up and remove clothing, the belt may become too loose. Conversely, if you add layers for protection or weather, you may need to loosen the belt to accommodate additional bulk. Keep your belt adjustment tools—typically a simple buckle or strap system—accessible so you can make quick modifications without removing your entire belt.
Monitoring Comfort During the Workday
Pay attention to your body’s signals throughout the day. Discomfort in your lower back suggests the belt is positioned too low or carrying too much weight. Shoulder or neck pain indicates uneven weight distribution. Numbness in your legs suggests the belt is too tight. Address these signals immediately by repositioning, redistributing tools, or loosening the belt. Ignoring early warning signs leads to chronic pain that persists long after the workday ends.
- Check belt position and fit every two to three hours of work.
- Adjust for clothing and temperature changes throughout the day.
- Address pain signals immediately—lower back, shoulders, or numbness.
- Redistribute tools if you notice uneven pressure or rotation.
- Tighten or loosen the belt as your body position changes during different tasks.
Key Takeaway: Regular adjustments and attention to comfort signals throughout the day maintain your belt fit and prevent cumulative fatigue.
What Role Do Suspenders Play in Tool Belt Comfort?
Suspenders transfer significant weight from your waist to your shoulders, dramatically improving comfort during extended wear. A quality suspender system distributes load across your entire torso rather than concentrating it on your hips. This is particularly valuable for workers carrying heavy tool loads or working long shifts. Modern suspender designs feature padded shoulder straps and adjustable attachment points to customize the load transfer to your body shape.
Not all work situations require suspenders. Light tool loads under 15 pounds may not benefit significantly from suspender support. Heavy loads exceeding 30 pounds benefit substantially from proper suspender use. If you experience lower back pain even with proper belt positioning, suspenders often provide immediate relief by reducing the downward force on your lumbar spine. Experiment with different suspender configurations to find what works best for your body and work style.
Selecting and Adjusting Suspenders
Quality suspenders feature padded shoulder straps to prevent digging into your shoulders. Adjustable attachment points allow you to customize how much weight transfers to your shoulders versus your waist. Start with a 50-50 weight distribution and adjust based on comfort feedback. Some workers prefer more weight on their shoulders to reduce hip and back strain, while others prefer minimal shoulder load for increased mobility.
- Choose suspenders with padded shoulder straps to prevent pressure points.
- Ensure attachment points are secure and won’t shift during movement.
- Start with 50-50 weight distribution between waist and shoulders.
- Adjust the distribution based on your comfort and work tasks.
- Remove suspenders if they restrict arm movement or climbing ability.
Key Takeaway: Quality suspenders reduce lower back strain by distributing tool weight to your shoulders, especially beneficial for heavy tool loads.
How Do You Prevent Common Tool Belt Discomfort Issues?
Understanding common discomfort sources helps you address them before they become problems. Back pain often results from belts positioned too low or carrying excessive weight at the front. Hip discomfort typically indicates uneven weight distribution or a belt that’s too tight. Shoulder pain suggests suspender straps are too tight or shoulder attachment points are misaligned. Addressing the root cause prevents the problem from recurring.
Prevention requires both proper fitting and smart tool management. Don’t carry tools you’re not using—remove them from your belt during tasks that don’t require them. This reduces unnecessary weight and improves mobility. Stretch your hip flexors, lower back, and shoulders during breaks to maintain flexibility and prevent tightness from developing. These simple practices combined with proper fitting create sustainable all-day comfort.
Addressing Specific Pain Points
Different discomfort locations indicate different problems. Lower back pain suggests repositioning the belt higher on your hips or redistributing weight toward the back. Numbness in your legs indicates the belt is too tight—loosen it immediately. Shoulder soreness from suspenders suggests adjusting strap tension or moving attachment points. Hip bone pressure suggests adding padding or repositioning the belt slightly higher. Each pain signal provides diagnostic information to guide your adjustments.
- Lower back pain: Reposition belt higher on hips or reduce front tool weight.
- Leg numbness: Loosen the belt immediately to restore circulation.
- Shoulder soreness: Adjust suspender strap tension or move attachment points.
- Hip bone pressure: Add padding or reposition the belt slightly higher.
- General fatigue: Reduce total tool weight or use suspenders for better distribution.
Key Takeaway: Pain signals indicate specific fitting problems that you can address through repositioning, redistribution, or equipment adjustments.
What Are Practical Tips for All-Day Tool Belt Comfort?
Achieving consistent all-day comfort requires implementing practical strategies beyond just proper fitting. These actionable tips transform your tool belt experience and reduce fatigue throughout your workday. Combine multiple strategies for maximum effectiveness and personalized comfort solutions.
Step-by-Step Comfort Optimization
- Start with accurate measurement: Measure your natural waist at the narrowest point above hip bones before purchasing.
- Position correctly: Sit the belt at your natural waistline, approximately one inch below hip bones, level on both sides.
- Distribute weight evenly: Place heavier tools toward the back and sides, keeping frequent tools in front pockets.
- Use quality suspenders: Add suspenders for loads exceeding 25 pounds to transfer weight to your shoulders.
- Check fit every two hours: Adjust position and tightness as your body position and clothing change.
- Minimize unnecessary weight: Remove tools you’re not actively using to reduce fatigue.
- Stretch during breaks: Perform hip flexor, lower back, and shoulder stretches every two hours.
- Wear supportive clothing: Use an undershirt with good support to prevent the belt from shifting.
- Invest in padding: Add foam padding to high-pressure areas where the belt contacts your body.
- Rotate tool placement: Change tool positions periodically to prevent repetitive pressure on specific areas.
Key Takeaway: Combining accurate fitting, regular adjustments, weight management, and body care creates sustainable all-day comfort.
How Does Tool Belt Comfort Impact Overall Work Performance?
Comfort directly affects your productivity, safety, and job satisfaction. Workers experiencing belt-related discomfort move slower, take more breaks, and make more mistakes due to reduced focus. Chronic pain from poorly fitted belts can lead to long-term injuries that end careers. Conversely, workers with properly fitted, comfortable belts maintain consistent productivity, experience fewer injuries, and report higher job satisfaction. This investment in proper fitting pays dividends throughout your career.
Professional tool users recognize that equipment comfort is not a luxury—it’s a necessity for sustainable work performance. The time spent learning proper fitting techniques and making adjustments yields significant returns through reduced fatigue, fewer injuries, and improved work quality. Whether you’re a professional contractor or a dedicated DIY enthusiast, proper tool belt fitting is foundational to your success.
Key Takeaway: Properly fitted tool belts improve productivity, reduce injury risk, and enhance overall work performance through sustained comfort.
Conclusion: How Can You Ensure Long-Term Tool Belt Comfort?
Fitting a tool belt for all-day comfort requires attention to measurement, positioning, weight distribution, and ongoing adjustment. Start by selecting the correct size based on your natural waist measurement and the manufacturer’s sizing chart. Position the belt at your natural waistline, ensuring it sits level and allows comfortable finger-width spacing. Distribute your tools strategically, keeping heavier items toward the back and frequently used tools in front pockets. Consider suspenders if you carry loads exceeding 25 pounds to transfer weight to your shoulders and reduce lower back strain.
Throughout your workday, monitor your comfort and make periodic adjustments every two to three hours. Address pain signals immediately by repositioning, redistributing tools, or loosening the belt. Combine proper fitting with practical strategies like stretching, minimizing unnecessary weight, and wearing supportive clothing. This comprehensive approach transforms your tool belt from a source of discomfort into a reliable work partner that supports your performance and protects your health. Invest the time in proper fitting today to enjoy comfortable, productive workdays throughout your career.
Key Takeaway: Long-term tool belt comfort results from proper initial fitting combined with regular adjustments and practical daily strategies.
Frequently Asked Questions
How tight should a tool belt fit?
A tool belt should fit snugly enough to prevent rotation or shifting during movement, but loose enough to allow one finger to fit comfortably between the belt and your body. You should be able to breathe normally and move freely without restriction. If you feel pressure points or can’t fit your finger under the belt, it’s too tight. Loosen it immediately to prevent circulation problems and discomfort.
Can you wear a tool belt over heavy clothing?
Yes, but you may need to adjust your belt size or positioning. Measure your waist while wearing the clothing layers you’ll typically use during work. Heavy jackets or multiple layers increase your effective waist circumference by one to three inches. Consider purchasing a slightly larger belt size if you regularly work in heavy clothing, or plan to adjust the fit seasonally based on your clothing choices.
How often should you replace your tool belt?
A quality tool belt lasts three to five years with regular use, depending on work intensity and maintenance. Replace your belt if straps tear, buckles break, padding deteriorates, or the material no longer holds its shape. Regular inspection during your monthly maintenance routine helps identify wear early. Replacing a worn belt prevents unexpected failures and maintains the comfort and functionality you’ve worked to achieve.
Are heavier tool belts more durable?
Heavier tool belts typically use thicker materials and stronger construction, which increases durability but also increases weight. A well-constructed lighter belt may outlast a poorly made heavy belt. Focus on material quality, stitching integrity, and buckle strength rather than total weight. The best belt balances durability with comfort—heavy enough to withstand your work but light enough to minimize fatigue.
Should you wear a tool belt every day?
Professional tool users typically wear their belts five to six days per week. Taking one or two rest days per week allows your back and hip muscles to recover from the sustained load. If you experience chronic pain despite proper fitting, consider alternating between two different belts or reducing daily wear time. Your body’s recovery is essential for long-term health and career sustainability.
What’s the best way to clean and maintain your tool belt?
Clean your tool belt monthly with a soft brush to remove dust and debris. Wipe leather belts with a damp cloth and allow them to air dry completely. Check all stitching, buckles, and attachment points for damage. Store your belt in a cool, dry location away from direct sunlight. Proper maintenance extends belt life and ensures all components function correctly for optimal comfort and safety.






Write Your Review
No reviews yet. Be the first to share your experience!