

How to Use a Pocket Hole Jig for Face Frame Cabinets: Quick Answer
Pocket hole joinery creates strong, hidden joints perfect for cabinet face frames. A pocket hole jig clamps your workpiece, guides drill bits at 15 degrees, and produces angled holes for screws that pull boards together invisibly. Setup takes minutes: secure the jig to your bench, align boards, clamp them, drill pocket holes using the jig’s guide, then drive pocket hole screws through the angled holes into the adjoining board. This method produces professional-quality cabinets without visible fasteners, making it ideal for both beginners and experienced woodworkers building face frames in 2026.

Face frame cabinets require precise joinery that remains hidden from view. Pocket hole joinery has revolutionized cabinet construction by eliminating the need for mortise-and-tenon joints or dowels. The technique works by drilling angled holes that allow screws to be driven through one board and into an adjacent board at an angle. When properly executed, these joints are incredibly strong and completely invisible from the front. Understanding the fundamentals of pocket hole jig usage ensures your cabinet projects achieve professional results.
What Is a Pocket Hole Jig and How Does It Work?
A pocket hole jig is a specialized clamping guide that holds your workpiece steady while drilling precisely angled holes. The jig contains hardened steel bushings that guide your drill bit at exactly 15 degrees, creating the signature angled pocket hole. Most jigs accommodate boards ranging from 1/2 inch to 1.5 inches thick, with adjustable clamps that apply consistent pressure. The jig’s design ensures repeatability—every hole drilled is identical in angle and depth.

The pocket hole system relies on simple physics. When you drive a pocket hole screw through the angled hole and into the adjoining board, the screw’s trajectory pulls the two boards together with tremendous force. The screw head remains hidden inside the pocket hole, which is later concealed with a wooden plug or left exposed depending on your design preference. This creates an essentially invisible joint from the front face of your cabinet.
Key Components of a Pocket Hole Jig
- Clamp mechanism: holds workpiece firmly in place during drilling.
- Steel guide bushings: direct drill bit at precise 15-degree angle.
- Depth stop: prevents drilling completely through the board.
- Adjustable fence: aligns boards consistently for repeatable results.
- Pocket hole screws: specially designed fasteners with countersunk heads.
Key Takeaway: Pocket hole jigs use angled guide bushings and spring clamps to create repeatable, strong hidden joints ideal for cabinet face frames.
How Do You Prepare Your Materials for Pocket Hole Joinery?
Proper material preparation is essential for successful pocket hole joinery. Begin by milling all your face frame components to consistent thickness using a thickness planer if needed. Uneven boards will sit improperly in the jig and produce misaligned joints. For detailed guidance on milling techniques, check our complete thickness planer guide. All boards should be straight and flat before assembly to ensure tight-fitting cabinets.
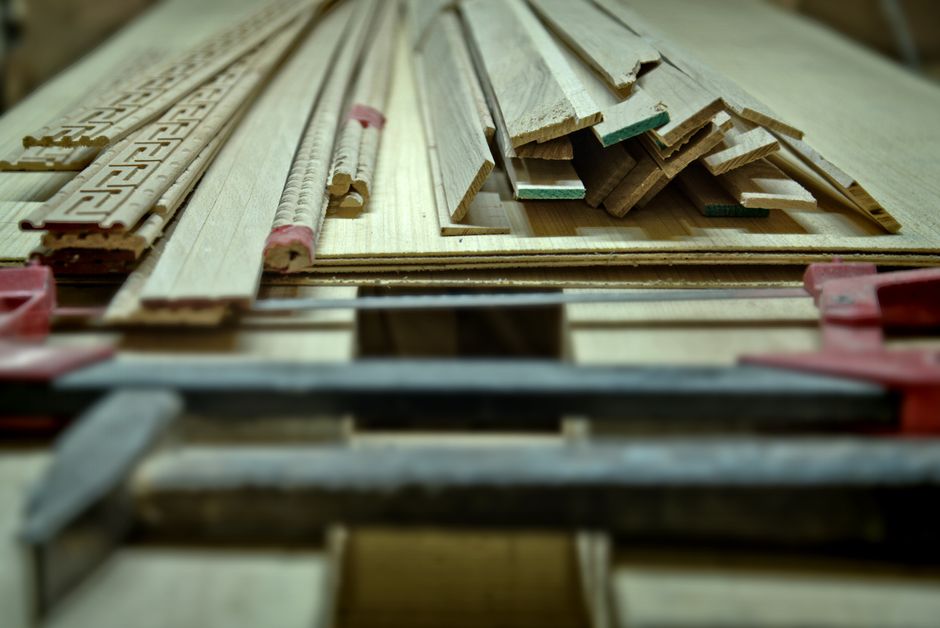
Cut all face frame pieces to exact length before drilling. Measure twice, cut once—this old adage applies perfectly here. Pocket hole joinery works best when boards are cut square at both ends. Use a miter saw or table saw with a stop block to ensure consistency across multiple pieces. Sand all components to your desired smoothness before assembly, as sanding becomes difficult after the frame is assembled.
Material Selection and Preparation Steps
- Mill all boards to uniform thickness (within 1/32 inch tolerance).
- Cut pieces to exact length with square ends.
- Sand all surfaces before assembly for best results.
- Verify boards are flat and straight using a straightedge.
- Select pocket hole screws matching your board thickness.
For cabinet face frames, hardwoods like oak, maple, and cherry are popular choices. Softwoods like pine work well for painted cabinets. Plywood with solid wood edge banding also works effectively. Ensure your wood has acclimated to your shop’s humidity for at least one week before milling, as wood movement after assembly can stress pocket hole joints.
Key Takeaway: Prepare materials by milling to uniform thickness, cutting to exact length, and sanding before drilling pocket holes.
How Do You Set Up and Use Your Pocket Hole Jig Correctly?
Setting up your pocket hole jig properly determines the quality of your entire cabinet project. Secure the jig firmly to a sturdy work surface using clamps or bolts. Many woodworkers dedicate a bench space to their jig, leaving it permanently installed. Ensure the jig is level and stable—any movement during drilling will compromise hole accuracy. Check the jig’s clamping surfaces for sawdust or debris that might prevent boards from seating properly.

Adjust the jig’s fence to match your board thickness. Most jigs feature easy-to-read thickness settings marked on the body. Position the adjustable clamp so it applies firm, even pressure without crushing the wood. The clamp should hold the board securely but not require excessive force to engage. Test the setup with a scrap board before drilling your actual cabinet components.
Step-by-Step Jig Setup Process
- Secure jig to bench with clamps, ensuring it cannot shift.
- Set thickness dial to match your board thickness.
- Adjust clamp tension for firm hold without crushing wood.
- Place test board in jig and verify proper seating.
- Check that drill guide bushings are clear of debris.
Insert your first board into the jig with the edge you want to drill facing the clamping mechanism. The board should sit flush against the fence. Apply firm pressure to the clamp handle until the board is held securely. For face frame cabinets, you’ll typically drill pocket holes on the rails (horizontal pieces) that will join to the stiles (vertical pieces). Mark your drilling locations with a pencil before clamping to ensure accuracy.
Key Takeaway: Proper jig setup requires secure mounting, correct thickness adjustment, and consistent clamping pressure for reliable results.
What Is the Correct Drilling Technique for Pocket Holes?
Using the correct drilling technique ensures clean, properly positioned pocket holes every time. Select a pocket hole drill bit matching your jig’s guide bushings—typically 3/8 inch diameter for most applications. Insert the bit fully into the guide bushing, ensuring it seats completely. The guide bushing directs the bit at the precise 15-degree angle required for proper screw engagement. Never force the drill or use excessive speed, as this can strip the holes or damage the guide bushings.

Start your drill at low speed to establish the hole, then increase speed gradually. Apply steady, moderate pressure—let the bit do the work. The jig’s depth stop will prevent you from drilling completely through the board. Listen for the distinctive sound change when the depth stop engages, indicating you’ve reached the proper drilling depth. Once you hear this change, back the drill out slowly while maintaining slight downward pressure.
Drilling Best Practices
- Use proper pocket hole drill bits designed for your jig model.
- Start at low speed, then increase to medium-high speed gradually.
- Apply steady, moderate pressure without forcing.
- Listen for depth stop engagement to know when to stop.
- Back out slowly while maintaining slight downward pressure.
For face frame cabinets, you’ll typically drill two pocket holes per joint—one near the top and one near the bottom of each rail-to-stile connection. Drilling two holes per joint creates much stronger cabinets than single-hole connections. Space the holes evenly, typically 1 to 1.5 inches from the board’s edge. Mark drilling locations before clamping to ensure consistent placement across all similar joints.
Key Takeaway: Proper drilling uses the correct bit, moderate pressure, and consistent speed while listening for the depth stop engagement.
How Do You Assemble Face Frame Cabinets with Pocket Hole Screws?
Assembly with pocket hole screws is straightforward once your holes are drilled. Gather all your drilled components and pocket hole screws in the correct size—typically 1.25 inches for standard cabinet face frames. Dry-fit your entire frame first without screws to verify all pieces fit correctly and square up properly. This test assembly catches any mistakes before permanent fastening. Use a carpenter’s square to verify the frame is perfectly square before driving any screws.
Apply wood glue to the joint areas where two boards will meet. Use a thin, even coat—excess glue creates cleanup work and can weaken joints. Position the first rail against the stile with the pocket holes facing the inside of the frame. Insert the pocket hole screw into the hole and drive it firmly using a pocket hole screw driver or power drill. The screw will pull the two boards together as it drives in, creating a tight joint. You’ll feel resistance as the screw tightens—this is normal and indicates proper engagement.
Assembly Sequence for Face Frames
- Dry-fit entire frame without screws to verify fit.
- Apply thin, even coat of wood glue to joint areas.
- Position rails and stiles with pocket holes facing inward.
- Drive pocket hole screws firmly until resistance increases significantly.
- Check for square using carpenter’s square or diagonal measurements.
After driving the first screw, check that the joint is tight and the boards sit flush. If gaps appear, tighten the screw slightly more. Drive all remaining screws in a similar manner, working systematically around the frame. Clamp your assembled frame while the glue dries to ensure joints remain tight. Consider using parallel jaw clamps for optimal pressure distribution during this crucial glue-up stage. Allow glue to cure for the time recommended by the manufacturer before removing clamps.
Key Takeaway: Successful assembly requires dry-fitting, applying glue, driving screws firmly, and clamping while glue cures.
How Do You Finish and Conceal Pocket Holes in Cabinet Face Frames?
Finishing pocket holes professionally improves the appearance of your cabinet face frames significantly. The most common approach is using wooden pocket hole plugs that match your cabinet wood species. These plugs are glued into the pocket holes and sanded flush with the surrounding surface. Select plugs made from the same wood as your cabinet for seamless appearance. Many woodworkers make their own plugs using a plug cutter on the drill press, ensuring a perfect match to their specific wood.
Apply glue to the plug and tap it into the pocket hole using a small hammer. Ensure the plug sits slightly proud of the surface—you’ll sand it flush once the glue dries. After glue cures, sand the plugs level with 120-grit sandpaper, then progress to 150-grit and 180-grit for a smooth finish. This approach creates an essentially invisible joint that looks like traditional mortise-and-tenon construction. For painted cabinets, you can use paintable caulk or spackling compound to fill pocket holes, sanding smooth before painting.
Pocket Hole Finishing Options
- Wooden plugs: glue in and sand flush for natural wood finish.
- Paintable caulk: fill holes before painting for seamless appearance.
- Spackling compound: quick option for painted cabinets.
- Leave exposed: acceptable for some contemporary cabinet designs.
- Homemade plugs: cut from same wood using plug cutter for perfect match.
After finishing the pocket holes, proceed with your chosen cabinet finish. Sand the entire face frame with 180-grit sandpaper before staining or painting. Apply stain, paint, or clear coat according to your design plan. The pocket hole joints will be completely invisible once finishing is complete, creating the appearance of traditionally jointed cabinetry. This professional appearance justifies the time invested in proper pocket hole technique.
Key Takeaway: Conceal pocket holes with wooden plugs for natural finishes or caulk for painted cabinets, then finish the entire frame.
What Are Practical Tips for Pocket Hole Success in Cabinet Building?
Successful pocket hole cabinet building requires attention to detail and consistent technique. Develop a systematic approach to your work: prepare materials, set up the jig, drill all holes, assemble components, and finish the frame. This methodical process prevents mistakes and ensures quality results. Keep your pocket hole jig clean and well-maintained, checking guide bushings regularly for wear. Worn bushings produce angled holes that don’t engage screws properly, resulting in weak joints.
Pro Tips for Pocket Hole Mastery
- Organize materials in logical sequence before beginning work.
- Use a pencil to mark drilling locations for consistency.
- Test your setup on scrap wood before drilling actual cabinet pieces.
- Keep pocket hole screws organized by size in labeled containers.
- Maintain your jig with regular cleaning and occasional lubrication.
- Invest in quality pocket hole screws—cheap screws strip easily.
- Use a pocket hole screw driver bit for easier, more controlled driving.
Track your screw usage carefully—it’s easy to lose count during assembly. Calculate your screw needs before starting: multiply the number of joints by two (for typical dual-screw joints), then add 10 percent for mistakes or future adjustments. This ensures you have adequate fasteners without running short mid-project. Store extra screws in your shop for future projects, as they’re inexpensive insurance against frustrating delays.
Consider building a simple jig storage solution that keeps your pocket hole jig accessible and protected. Many woodworkers mount their jigs on mobile bases or wall-mounted stands, making them easy to position and remove as needed. This setup encourages regular use and ensures your jig remains in optimal condition for years of reliable service.
Key Takeaway: Success comes from systematic approach, proper tool maintenance, quality materials, and organized workflow.
Frequently Asked Questions
What size pocket hole screws should I use for cabinet face frames?
Standard cabinet face frames use 1.25-inch pocket hole screws for boards up to 1 inch thick. If your boards are thicker, use 1.5-inch screws. Always verify your screw length matches your board thickness plus the thickness of the adjoining board. Pocket Hole Screws are specifically designed with countersunk heads that seat flush in pocket holes, creating clean joints. Never substitute regular wood screws, as they won’t engage properly in pocket holes.
Can you use pocket holes for cabinet sides and back panels?
Pocket hole joinery works best for face frames and internal structure, but isn’t ideal for cabinet sides and back panels that need maximum strength. For sides, consider using dowels, biscuits, or mortise-and-tenon joints. Back panels typically use rabbet joints or are set into grooves. Pocket holes work for lighter-duty applications, but traditional joinery provides superior strength for load-bearing cabinet components. Face frames are the perfect application for pocket hole joinery.
How do you square a face frame after assembly with pocket holes?
Check squareness by measuring diagonals from corner to corner—equal measurements indicate a square frame. If diagonals differ, apply clamping pressure to the longer diagonal to pull the frame square. Pocket hole joints allow some adjustment before glue fully cures, so work quickly. Use cauls (straight boards) clamped across the frame to maintain squareness while glue dries. Once glue cures completely, the frame remains square permanently.
What’s the difference between pocket holes and dowel joinery for cabinets?
Pocket holes are faster and require less skill than dowel joinery, making them ideal for beginners. Dowel joints are invisible from both sides and arguably stronger, but require precise hole alignment and more setup time. Pocket holes are hidden on one side only, which works perfectly for face frames. Dowel joinery works better for visible joints where appearance matters on both sides. For cabinet face frames, pocket holes offer the best balance of strength, speed, and appearance.
Can pocket hole joinery be used with plywood face frames?
Yes, pocket hole joinery works well with plywood when you use solid wood edge banding on visible edges. Drill pocket holes through the plywood just as you would solid wood. The edge banding provides a professional appearance and allows you to use wooden plugs for finishing. Ensure your edge banding is securely glued before drilling, as loose banding can shift during clamping. Pocket holes in plywood create strong, reliable joints suitable for cabinet construction.
How deep should pocket holes be drilled in cabinet face frames?
Your pocket hole jig’s depth stop determines drilling depth automatically, typically producing holes that extend approximately 1.5 inches into the board. This depth provides adequate length for the screw to engage both boards securely. Never manually adjust depth stops or disable them—they exist to prevent drilling through the board entirely. The jig’s design ensures proper depth every time, so trust the manufacturer’s specifications for optimal results.
How Can You Master Pocket Hole Joinery for Professional Cabinet Results?
Mastering pocket hole joinery opens doors to efficient, professional cabinet building. The technique combines simplicity with strength, producing results that rival traditional joinery methods. Start with straightforward face frame projects to build confidence and develop consistent technique. As your skills grow, tackle more complex cabinet designs with confidence. The fundamentals remain constant: proper setup, accurate drilling, careful assembly, and appropriate finishing.
Invest in quality tools and materials—a good pocket hole jig, sharp drill bits, and quality screws make a substantial difference in results. Your jig will serve you for decades if properly maintained, making it a worthwhile investment. Complement your pocket hole skills with knowledge of other woodworking techniques. Understanding proper board milling techniques and preventing planer snipe ensures your materials are perfectly prepared before pocket hole assembly begins.
Join the community of woodworkers who have embraced pocket hole joinery for efficient, professional cabinet building. Share your projects, learn from others’ experiences, and continuously refine your techniques. The satisfaction of building beautiful cabinets with invisible, rock-solid joints is deeply rewarding. Whether you’re building kitchen cabinets, bathroom vanities, or storage solutions, pocket hole joinery provides the foundation for success in 2026 and beyond.
Key Takeaway: Master pocket hole joinery through systematic practice, quality tools, and continuous skill development for professional cabinet results.







Write Your Review
No reviews yet. Be the first to share your experience!