

What Is the Best Way to Sharpen Drill Bits at Home?
Sharpening drill bits at home is an essential skill that extends tool life and improves drilling accuracy. A sharp drill bit cuts cleanly, requires less pressure, and produces professional results without burning or binding. Most home workshops can sharpen bits using a bench grinder, whetstone, or specialized sharpening jigs. The process takes just minutes per bit and costs far less than replacement. With proper technique, you’ll restore dull bits to like-new condition and save money while improving your workshop efficiency.
Dull drill bits are one of the most common frustrations in woodworking and metalworking. They overheat, wander off center, and create rough holes that require finishing work. Many DIYers simply replace worn bits rather than sharpening them, wasting money and materials. Learning to sharpen at home puts you in control of your tool maintenance. You’ll notice immediate improvements in hole quality, drilling speed, and overall project results.
Key Takeaway: Home drill bit sharpening saves money, improves performance, and is achievable with basic tools and practice.
What Tools Do You Need to Sharpen Drill Bits Effectively?
The right tools make drill bit sharpening faster and more consistent. A bench grinder is the most popular choice for home workshops because it’s affordable, versatile, and produces professional results. Most bench grinders run at 3,450 RPM, which is ideal for maintaining the proper angle on twist drill bits. You’ll also need safety equipment including eye protection and a dust mask. A grinding wheel specifically designed for metal works best and lasts longer than general-purpose wheels.
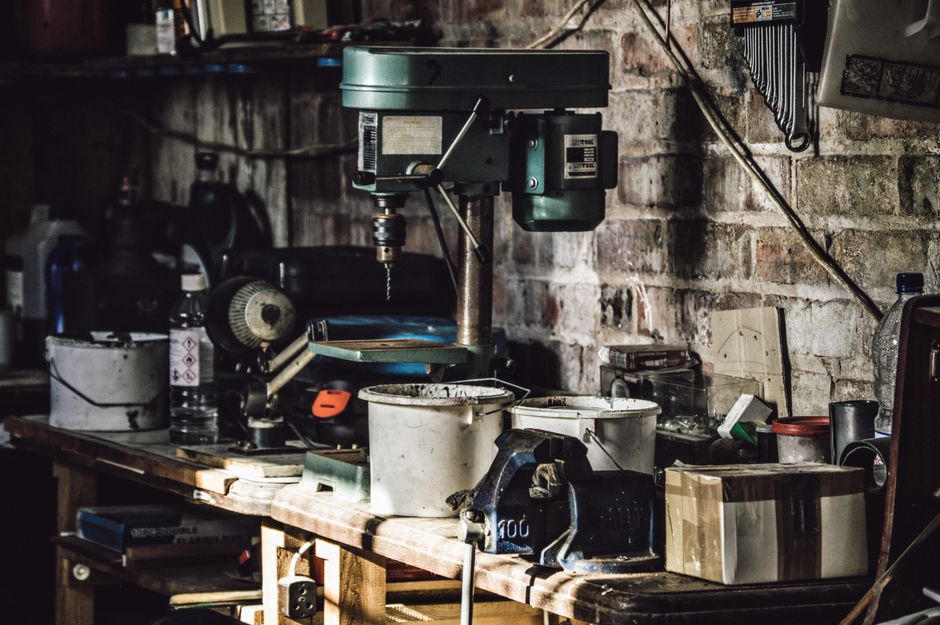
Beyond the grinder, several supporting tools improve accuracy and safety:
- Bench vise or magnetic holder to secure the bit during sharpening.
- Angle guide or jig to maintain consistent flute angles (typically 59 degrees).
- Wire brush to clean away metal debris and coolant residue.
- Cooling water or cutting fluid to prevent overheating during grinding.
- Calipers to measure bit diameter and verify symmetry after sharpening.
- Safety glasses and a dust mask for protection.
If you don’t own a bench grinder, consider investing in one. Quality grinders cost between $100 and $300 and handle dozens of sharpening tasks beyond drill bits. Alternatively, some woodworkers use a hand-sharpening approach with whetstones, though this requires more skill and patience.
Key Takeaway: A bench grinder, safety gear, and a simple angle guide are the core tools needed for reliable home sharpening.
How Do You Identify When Drill Bits Need Sharpening?
Recognizing dull bits saves time and prevents poor drilling results. Sharp bits cut smoothly and produce clean chips, while dull bits generate heat, smoke, and rough hole edges. Listen and feel for telltale signs during drilling. A dull bit requires excessive downward pressure and may squeal or bind. The hole edges will appear rough, and the bit may wander off center, especially in metal.
Visual inspection reveals sharpness quickly:
- Examine the cutting edges under bright light for rounded or flat spots.
- Look for discoloration or heat damage on the flutes (usually blue or black).
- Check the chisel edge (center point) for sharpness using your thumbnail carefully.
- Test on scrap material—sharp bits cut instantly with light pressure.
Temperature is another indicator. If a bit becomes too hot to touch during drilling, it’s time to sharpen. Overheated bits lose their temper and become permanently dull. Developing a habit of checking bits before major projects ensures consistent hole quality and prevents frustration.
Key Takeaway: Rough hole edges, excessive heat, and binding are clear signs that sharpening is needed.
What Is the Step-by-Step Process for Sharpening Drill Bits?
Preparation and Setup
Begin by securing your workstation properly. Mount your bench grinder firmly to a sturdy workbench or stand—a loose grinder creates vibration that ruins your sharpening work. Consult our guide on mounting a bench vise to a workbench for secure setup principles. Ensure adequate lighting so you can see the bit clearly. Wear safety glasses and a dust mask before starting. Allow the grinder to run for 30 seconds to clear any debris.
Clean the drill bit thoroughly with a wire brush and degreaser. Remove any rust, coolant, or buildup that might interfere with sharpening. Inspect the bit for cracks or severe damage—damaged bits should be discarded rather than sharpened. Mark your bits with tape or paint pen if you’re sharpening multiple sizes to avoid confusion.
Grinding the Flutes
Position the bit at a 59-degree angle to the grinding wheel—this is the standard angle for most twist drill bits. Hold the bit firmly with both hands, using a light grip to avoid binding. Bring the cutting edge into light contact with the wheel, moving smoothly from the center toward the outer edge of the flute. Use short, controlled strokes rather than aggressive pressure.
The grinding process follows this sequence:
- Grind the first flute with 3–4 light passes until the edge sharpens.
- Cool the bit in water between passes to prevent overheating.
- Flip the bit and grind the opposite flute using identical pressure and angle.
- Maintain symmetry—both flutes must be equally sharp for straight drilling.
- Check your work frequently to avoid over-grinding and reducing bit diameter.
Watch for a consistent, thin line of bright metal along the cutting edge. This indicates proper sharpening. If you see blue discoloration, the bit is overheating—cool it immediately and reduce pressure.
Sharpening the Chisel Edge
The chisel edge (the small flat area at the bit’s center point) is critical for proper drilling. Many DIYers skip this step, but it dramatically improves performance. Angle the bit at approximately 45 degrees and carefully grind a slight bevel on the chisel edge. Use minimal pressure—this is the most delicate part of the sharpening process.
The chisel edge should form a small point at the very center of the bit. Avoid grinding it completely flat, as this creates a dull center that causes binding. A properly sharpened chisel edge allows the bit to start drilling without walking or slipping on the surface.
Final Inspection and Testing
After sharpening, inspect both flutes under bright light. They should be symmetrical, sharp, and free of flat spots. Use calipers to verify that both sides of the bit are equal in diameter. An asymmetrical bit will drill off-center holes no matter how sharp it is. Test the bit on scrap wood or metal before using it on your project. A sharp bit should cut cleanly with minimal pressure.
Key Takeaway: Maintain a 59-degree angle, grind symmetrically, and always cool the bit to achieve professional sharpening results.
What Common Mistakes Should You Avoid When Sharpening?
Sharpening mistakes can ruin bits or create safety hazards. Overheating is the most common error—excessive heat removes the hardness from the steel, making the bit permanently dull and brittle. Always cool bits in water between grinding passes. Never let the bit turn blue or black, as this indicates permanent damage. A properly sharpened bit should remain silver or light gray.

Other critical mistakes to avoid:
- Grinding at the wrong angle—accuracy matters for straight, clean holes.
- Creating asymmetrical flutes—both sides must be equally sharp and sized.
- Removing too much material—this reduces bit diameter and shortens bit life.
- Neglecting the chisel edge—a dull center causes binding and walking.
- Using a worn or damaged grinding wheel—replace wheels regularly for safety.
- Failing to wear safety equipment—metal debris and sparks cause serious injuries.
Practice on old or cheap bits before sharpening your quality tools. This builds muscle memory and prevents costly mistakes. Many experienced woodworkers recommend sharpening bits regularly in small batches rather than waiting until they’re completely dull. This maintains consistency and prevents frustration.
Key Takeaway: Avoid overheating, maintain symmetry, and practice on scrap bits before perfecting your technique.
How Do You Maintain Sharpened Drill Bits for Longevity?
Proper maintenance extends the time between sharpenings and keeps bits performing well. Store bits in a dry location away from moisture and humidity. Rust accelerates dulling and makes sharpening more difficult. Use a dedicated bit organizer or storage box rather than loose drawers. Label bits by size and material type so you grab the right tool for each job.
During use, follow these best practices:
- Use appropriate speed settings—slower speeds for metal, faster for wood.
- Apply steady, even pressure without forcing the bit through the material.
- Use cutting fluid or coolant when drilling metal to reduce heat buildup.
- Withdraw the bit periodically to clear chips and prevent binding.
- Stop immediately if the bit becomes too hot to touch.
- Clean bits after each use to prevent rust and buildup.
Inspect bits before every use. A quick visual check takes seconds and prevents problems. If you notice any wobbling or unusual vibration during drilling, stop and inspect the chuck and bit. Worn chucks can cause runout that makes even sharp bits perform poorly. Consider upgrading to a quality drill chuck if yours is damaged.
Key Takeaway: Proper storage, appropriate speeds, and regular inspection keep sharpened bits in top condition for years.
What Are Practical Tips for Home Sharpening Success?
Create a Dedicated Sharpening Station
Designate a specific area of your workshop for sharpening tasks. This might be a corner of your workbench or a small portable setup. Having everything organized reduces frustration and improves safety. Keep your bench grinder, safety gear, cleaning supplies, and storage containers in one place. This setup saves time and ensures you’re ready to sharpen whenever needed.
Use Angle Guides for Consistency
Invest in a drill bit sharpening jig or angle guide. These inexpensive tools ($20–$50) hold the bit at the correct angle automatically, eliminating guesswork. Jigs make sharpening faster and more consistent, especially for beginners. Many experienced users prefer freehand sharpening once skilled, but jigs are invaluable for learning proper technique.
Keep Detailed Records
Track which bits you’ve sharpened and when. This helps you identify patterns—if certain bits dull quickly, you might be using wrong speeds or materials. Recording your process also helps you remember successful techniques. A simple notebook or spreadsheet works perfectly for this purpose.
Practice on Inexpensive Bits First
Before sharpening your quality bits, practice on cheap bits from discount stores. This builds confidence and lets you experiment with angles and pressure without risking expensive tools. Once you’ve successfully sharpened 10–15 cheap bits, you’ll have the skill to handle premium bits confidently.
Key Takeaway: Organization, angle guides, and practice transform sharpening from intimidating to routine.
Frequently Asked Questions
Can you sharpen drill bits with a whetstone instead of a grinder?
Yes, whetstones work for sharpening drill bits, but they require significant skill and patience. The process is slower than grinding and produces less consistent results for beginners. Whetstones excel for touching up slightly dull bits but struggle with heavily dulled bits. Most home workshops find bench grinders more practical and efficient for regular sharpening.
What angle should drill bits be sharpened to?
Standard twist drill bits are sharpened to a 59-degree angle, which is the point angle at the tip. This angle balances cutting efficiency with durability for general-purpose drilling in wood and metal. Some specialty bits use different angles—check your bit’s specifications. Maintaining the correct angle is crucial for straight holes and proper performance.
How often should you sharpen drill bits?
Sharpening frequency depends on usage intensity and materials drilled. Casual users might sharpen bits every few months, while professionals sharpen weekly. Sharp bits should be your goal—sharpen whenever you notice performance decline. Regular light sharpening is better than waiting until bits are completely dull and damaged.
Can you sharpen damaged or broken drill bits?
Slightly damaged bits may be salvageable through careful sharpening, but severely cracked or broken bits should be discarded. Attempting to sharpen a broken bit risks flying debris and safety hazards. If a bit has lost a large section of flute or has deep cracks, replacement is safer and more economical than repair.
What’s the difference between sharpening wood bits and metal bits?
Wood and metal bits have similar basic geometry, so sharpening technique is largely the same. The key difference is material hardness—metal bits are harder and require sharper wheels and more patience. Metal bits also need cooling more frequently. Both types benefit from identical angle maintenance and symmetry principles.
Is it worth sharpening old or cheap drill bits?
Sharpening cheap bits is worthwhile if they’re in good structural condition. A $2 bit sharpened to like-new condition costs just a few minutes of work. However, if a cheap bit is cracked, bent, or severely worn, replacement is more practical. Quality bits from reputable manufacturers are always worth sharpening due to their superior steel and longevity.
How Can You Master Drill Bit Sharpening and Improve Your Workshop Skills?
Mastering drill bit sharpening opens doors to broader tool maintenance skills. Once comfortable with sharpening, you’ll tackle other maintenance tasks with confidence. Your workshop becomes more self-sufficient, and you’ll save money on tool replacement. The skill also deepens your understanding of how tools work, making you a more capable craftsperson overall. Start with cheap bits and practice consistently until the process feels natural.
Sharpening connects to other essential workshop skills. Proper workbench setup, as described in our guide to building a simple workbench for a small garage, provides the stable foundation you need. Quality tools like Forstner bits for flat-bottomed holes also benefit from proper sharpening. Investing time in tool maintenance elevates every project you undertake.
Join online communities and watch instructional videos to see different sharpening approaches. Experienced woodworkers often share variations that work better for specific bit types or materials. Attend local woodworking workshops if available—hands-on instruction accelerates your learning curve. The investment in skill pays dividends throughout your crafting journey.
Key Takeaway: Consistent practice, quality instruction, and community engagement transform drill bit sharpening from a chore into a valuable lifetime skill.






Write Your Review
No reviews yet. Be the first to share your experience!