

What Are Parallel Jaw Clamps and Why Do They Matter for Glue-ups?
Parallel jaw clamps are essential woodworking tools that apply even pressure across entire workpiece surfaces during glue-ups. Unlike traditional bar clamps, they maintain consistent jaw alignment and prevent twisting or racking. These clamps distribute clamping force uniformly, which is critical for creating strong, flat joints. In August 2026, parallel jaw clamps remain the gold standard for furniture makers, cabinetmakers, and serious hobbyists. They excel at holding wide panels, edge joints, and frame assemblies without deflecting the workpiece.
Proper glue-up technique directly affects joint strength and final finish quality. Misaligned clamps create uneven pressure, leading to gaps, weak bonds, and surface irregularities. Parallel jaw clamps eliminate these problems by keeping jaw faces parallel throughout the clamping stroke. This precision is especially valuable when gluing large surfaces or multiple pieces simultaneously. Understanding how to use them correctly transforms your woodworking results from acceptable to professional-grade.
Key Takeaway: Parallel jaw clamps deliver uniform pressure and maintain jaw alignment, making them indispensable for reliable, strong glue-ups.
How Do You Choose the Right Parallel Jaw Clamps for Your Projects?
Selecting appropriate clamps depends on your project size, clamping force requirements, and frequency of use. Clamp capacity ranges from 12 inches to over 36 inches, so measure your typical workpieces first. Consider the throat depth—the distance from the screw to the back jaw—which limits how far from an edge you can clamp. Budget matters too; quality clamps cost more upfront but deliver years of reliable service.
Several key factors separate quality parallel jaw clamps from budget options:
- Clamping force: measured in pounds or kilograms; higher force needed for dense hardwoods.
- Throat depth: determines how far from the edge you can position the clamp.
- Jaw face material: smooth metal or rubber-lined pads prevent workpiece marring.
- Screw mechanism: all-metal screws resist stripping; plastic screws wear faster.
- Portability: lightweight aluminum bodies are easier to handle during assembly.
Capacity and Reach Considerations
Capacity refers to the maximum width the clamp can hold. A 12-inch clamp closes on pieces up to 12 inches wide, while 24-inch clamps handle larger panels. Throat depth—typically 3 to 5 inches—limits how far from an edge you can reach. For edge-gluing boards, shallower throat depths work fine. For wide panel glue-ups, deeper throats provide flexibility in clamp placement.
Measure your most common project dimensions before purchasing. If you typically glue panels wider than 18 inches, invest in clamps with at least 24-inch capacity. For frame-and-panel doors, smaller 12-inch clamps often suffice. Having multiple sizes provides flexibility for different projects.
Key Takeaway: Match clamp capacity and throat depth to your typical project dimensions for maximum versatility.
What Is the Proper Setup Process for Parallel Jaw Clamps?
Correct setup ensures even pressure distribution and prevents workpiece damage. Start by laying out your glue-up on a flat work surface, such as a table or assembly jig. Position the clamps perpendicular to the glue joint, spacing them 12 to 18 inches apart along the joint length. Uneven spacing causes uneven pressure and potential racking. Always use caution pads or protective blocks under clamp jaws to prevent marring wood surfaces.
Setup follows these essential steps:
- Place protective cauls or pads under each clamp jaw to prevent surface damage.
- Position clamps perpendicular to the joint for maximum pressure effectiveness.
- Space clamps evenly—typically 12 to 18 inches apart along the joint.
- Align jaw faces parallel to the workpiece surface before tightening.
- Check that the workpiece sits flat on your assembly surface throughout setup.
Protective Cauls and Pad Selection
Protective cauls are thin wood strips placed between clamp jaws and your workpiece. They distribute pressure over a wider area and prevent jaw marks on finished surfaces. Use softwood cauls like pine or spruce—harder woods can dent your project. Cauls should be at least 1 inch wide and slightly longer than your clamp jaw width. For expensive hardwoods, using cauls is non-negotiable.
Some clamps come with rubber-lined jaw faces that reduce marring. These are excellent for expensive projects. However, hardwood cauls provide superior protection and work with any clamp type. Keep a supply of cauls in various widths on hand. Reuse them across multiple projects—they’re inexpensive insurance against costly mistakes.
Key Takeaway: Always use protective cauls to prevent jaw marks and distribute clamping pressure evenly.
How Do You Apply Correct Clamping Pressure Without Damaging the Workpiece?
Applying proper pressure is an art that improves with practice. Too little pressure creates weak joints; too much damages wood fibers or causes glue starvation. The goal is to achieve what woodworkers call “just snug”—enough pressure to close the joint and squeeze out excess glue. Most modern woodworking glues require minimal pressure compared to older hide glues. Modern polyurethane and yellow glues typically need only 50 to 100 pounds per square inch.
Pressure application requires careful technique:
- Start by hand-tightening all clamps evenly—never fully tighten one clamp first.
- Tighten in a crisscross pattern to distribute pressure uniformly across the assembly.
- Stop when you see glue squeeze-out along the entire joint line.
- Check that the workpiece remains flat and properly aligned during tightening.
- Avoid over-tightening; this can cause wood compression or joint starvation.
Recognizing Adequate Clamping Pressure
Visible glue squeeze-out is your primary indicator of adequate pressure. When you see a bead of glue along the joint, you’ve achieved sufficient clamping force. However, glue type matters—some premium glues require less squeeze-out than others. If you’re unsure about your specific adhesive, consult the manufacturer’s recommendations. Most modern glues perform well with moderate pressure and minimal squeeze-out.
Over-tightening creates several problems worth avoiding. Excessive pressure can compress wood fibers, weakening the joint and creating permanent surface depressions. Glue starvation occurs when too much pressure squeezes out all the adhesive, leaving a dry joint. The wood also becomes harder to sand smooth after over-compression. Developing a feel for “just right” pressure takes experience—start conservatively and gradually increase pressure as your confidence grows.
Key Takeaway: Apply pressure until glue appears along the joint line, then stop—avoid over-tightening.
What Practical Tips Improve Your Parallel Jaw Clamp Technique?
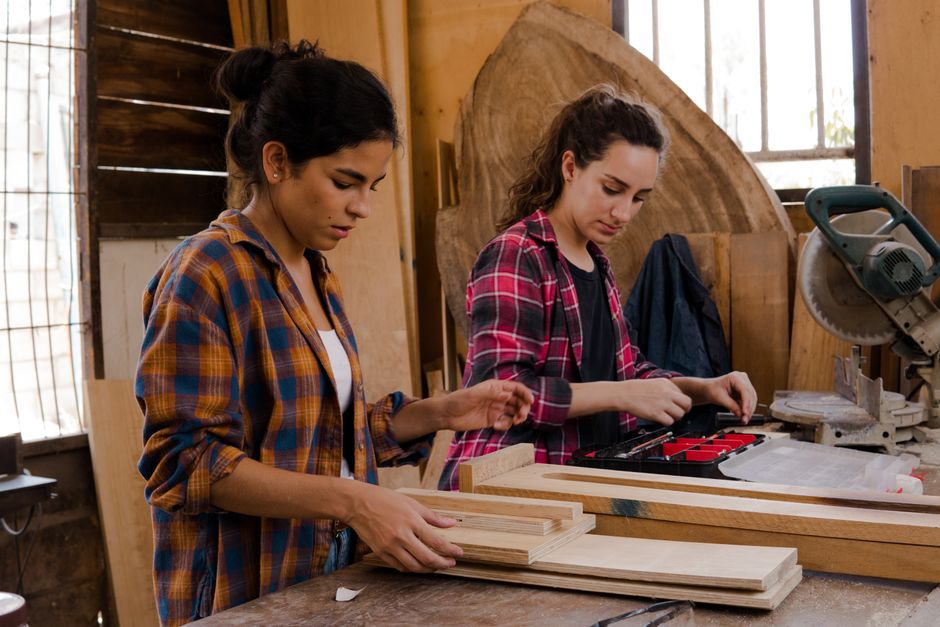
Professional woodworkers employ several proven strategies to maximize clamp effectiveness. First, always dry-fit your assembly before applying glue. This allows you to position clamps optimally and identify any alignment issues. Dry-fitting saves time and prevents glue-related disasters. Second, prepare all materials before starting—have glue, cauls, and clamps ready. Glue dries fast, so you need everything positioned before applying adhesive.
Key practical techniques for successful glue-ups:
- Dry-fit the entire assembly first to verify fit and plan clamp placement.
- Prepare all materials, cauls, and clamps before applying glue.
- Use a glue brush or roller to apply even adhesive coverage across joint surfaces.
- Clamp in stages—first lightly, then progressively tighter in crisscross pattern.
- Place a straightedge across the assembly to verify flatness during clamping.
- Allow adequate cure time before removing clamps—typically 24 hours for yellow glue.
Clamp Management During Extended Glue-ups
Large assemblies like tabletops or cabinet boxes require managing multiple clamps simultaneously. Create a clamping sequence—a planned order for tightening clamps that minimizes stress and racking. Number your clamps and tighten them in sequence rather than randomly. This systematic approach prevents one clamp from pulling the assembly out of square. For very large projects, consider using a clamping caul—a long, straight board that distributes pressure across multiple clamps.
Monitor your assembly throughout the glue-up process. Check flatness every few minutes using a straightedge. If the assembly rocks or shows signs of racking, loosen clamps slightly and reposition them. Temperature and humidity affect glue cure time—warmer, drier conditions speed curing, while cold or humid conditions slow it. Always follow your adhesive manufacturer’s cure time recommendations before removing clamps or applying stress to the joint.
Key Takeaway: Use a systematic clamping sequence and monitor flatness throughout the glue-up to ensure perfect results.
How Do You Troubleshoot Common Parallel Jaw Clamp Problems?
Even experienced woodworkers encounter clamp-related issues. Uneven pressure often results from misaligned clamp jaws or uneven caul thickness. Check that jaw faces are parallel before tightening—sight along them from the side. If jaws don’t align, the clamp mechanism may be damaged or bent. Racking—when the assembly twists out of square—typically indicates uneven clamping force or inadequate cauls. Always use cauls of consistent thickness to prevent this problem.
Common issues and solutions:
- Uneven pressure: Check jaw alignment and caul thickness; replace damaged clamps.
- Racking or twisting: Use thicker cauls and space clamps more closely.
- Glue starvation: Reduce clamping pressure and use slightly more adhesive.
- Jaw slippage: Ensure cauls have good contact; consider adding rubber pads.
- Difficult screw operation: Clean threads and apply light machine oil to smooth operation.
Maintenance for Long Clamp Life
Proper maintenance extends clamp lifespan and ensures reliable performance. After each use, wipe clamps clean with a dry cloth to remove glue residue. Dried glue accumulation prevents smooth jaw closure and damages the mechanism. For stubborn glue, use a plastic scraper—never use metal scrapers that can scratch precision surfaces. Store clamps horizontally in a dry location to prevent rust and warping.
Periodically inspect clamp screws and threads for damage. Apply light machine oil to screw threads once yearly to maintain smooth operation. Check that jaw faces remain flat and parallel. If a clamp develops play or doesn’t maintain pressure, it’s time for professional repair or replacement. Quality clamps are worth maintaining—they’ll provide decades of reliable service with minimal care.
Key Takeaway: Clean clamps after each use and maintain threads with light oil for long-term reliability.
What Advanced Techniques Elevate Your Glue-up Results?
Advanced woodworkers employ specialized techniques for challenging projects. Caul bending—deliberately using curved cauls—can flatten slightly warped boards during glue-up. The caul’s curve compresses against the high spots, forcing the assembly flat. This technique works best with moderately warped boards and requires careful pressure management. Another advanced method is pressure equalization, where you use shims under clamps to ensure all clamps apply identical pressure regardless of surface irregularities.
For edge-gluing multiple boards into wider panels, a dedicated edge-gluing jig provides superior results. These jigs hold boards perfectly aligned while distributing clamp pressure evenly. They’re particularly valuable for gluing figured or unstable wood species. Consider building or purchasing a jig if you regularly create wide panels. For frame assemblies, corner clamps combined with parallel jaw clamps provide perfect 90-degree angles without manual adjustment.
Key Takeaway: Advanced techniques like caul bending and specialized jigs unlock professional-quality results for complex glue-ups.
Frequently Asked Questions
How many parallel jaw clamps do I need for a typical glue-up?
Most projects require at least four to six clamps for adequate pressure distribution. Larger assemblies may need eight to twelve clamps or more. The rule of thumb is one clamp every 12 to 18 inches along the joint length. For edge-gluing two boards, four clamps suffice. For tabletops or cabinet assemblies, eight to twelve clamps ensure uniform pressure across the entire surface.
Can I use parallel jaw clamps for edge-gluing boards?
Yes, parallel jaw clamps excel at edge-gluing. Position them perpendicular to the joint with protective cauls underneath. Space clamps 12 to 18 inches apart along the joint for even pressure. Alternate clamps above and below the assembly to prevent racking. This technique creates strong, flat edge joints that require minimal sanding after cure.
What’s the difference between parallel jaw clamps and bar clamps?
Parallel jaw clamps maintain constant jaw alignment throughout the clamping stroke, while bar clamps can rack or twist. Parallel jaws distribute pressure more evenly and prevent workpiece deflection. Bar clamps are lighter and less expensive but require more skill to use effectively. For precision work and large panels, parallel jaw clamps deliver superior results.
How long should I leave clamps on after glue application?
Follow your adhesive manufacturer’s recommendations—typically 24 hours for yellow glue at room temperature. Warmer conditions accelerate curing; cooler conditions slow it. Some premium glues cure in 12 hours, while others need 48 hours. Don’t remove clamps early; premature removal compromises joint strength. When in doubt, leave clamps on longer rather than removing them too soon.
Should I use cauls on all parallel jaw clamp projects?
Yes, protective cauls are essential for preventing jaw marks on visible surfaces. Even clamps with rubber-lined jaws benefit from cauls, which distribute pressure more effectively. For hidden surfaces, cauls are less critical but still recommended to prevent permanent compression marks. Cauls are inexpensive insurance against expensive mistakes—always use them.
What pressure should I apply when using parallel jaw clamps?
Apply enough pressure to create visible glue squeeze-out along the entire joint, then stop. Most modern adhesives require only 50 to 100 pounds per square inch. Hand-tighten clamps progressively in a crisscross pattern rather than fully tightening one clamp first. Stop when glue appears along the joint—over-tightening causes compression damage and glue starvation.
How Can You Master Parallel Jaw Clamps for Professional-Quality Glue-ups?
Mastering parallel jaw clamps transforms your woodworking from amateur to professional quality. The key is understanding that clamping isn’t about maximum force—it’s about even, controlled pressure applied systematically. Start with dry-fits to plan clamp placement, use protective cauls consistently, and apply pressure progressively in crisscross patterns. These fundamentals apply to every project, from simple edge-gluing to complex frame assemblies.
Practice builds confidence and develops the tactile feel necessary for perfect results. Begin with small projects where mistakes are forgiving, then progress to larger assemblies. Pay attention to glue squeeze-out, workpiece flatness, and clamp alignment. Keep your clamps clean and well-maintained—they’re investments that pay dividends across decades of projects. By August 2026, parallel jaw clamps remain essential tools for any serious woodworker, and mastering their use elevates every project you undertake.
For related woodworking techniques, explore how to flatten a board on a jointer or use a thickness planer for flattening wood. These complementary skills ensure your glued assemblies start with perfectly prepared materials. Additionally, understanding how to use a router table for raised panel doors helps you create components that glue together seamlessly.
Key Takeaway: Master parallel jaw clamps through systematic technique, consistent caul use, and progressive pressure application for professional results.







Write Your Review
No reviews yet. Be the first to share your experience!