

How to Flatten a Board on a Jointer? Quick Answer and Overview
Flattening a board on a jointer requires passing the concave side over the cutting head first, then the convex side, repeating until both faces are flat and parallel. The process takes patience and proper technique—most woodworkers complete a typical board in 4-6 passes per side. A jointer removes wood gradually, typically 1/32 inch per pass on hardwoods. You must understand grain direction, fence alignment, and feed speed to achieve professional results. This fundamental skill separates amateur projects from quality craftsmanship in 2026 woodworking shops.
The jointer is essential for milling rough lumber into workable stock. Unlike a thickness planer, which requires one flat reference face, a jointer creates that initial flat surface. Understanding the four-square method—flattening face one, edge one, face two, then edge two—ensures dimensional accuracy. Proper setup prevents snipe marks and tearout. Many beginners skip jointing and move straight to planing, resulting in uneven stock and poor project outcomes.
Key Takeaway: Master the four-square milling sequence and grain direction to flatten boards consistently on a jointer.
What Are the Essential Setup Steps Before Jointing?
Proper jointer setup determines success or failure before you feed a single board. Check that the outfeed table aligns perfectly with the cutting knives at their highest point. Misalignment causes snipe or prevents full flattening. The infeed table should sit slightly lower—typically 1/32 inch—to create the cutting action. Inspect all three tables for debris, rust, or warping using a straightedge.

Knife sharpness matters enormously. Dull knives tear grain, require excessive feed pressure, and slow production. Replace or sharpen blades when you notice fuzzy edges or burning on the wood. Check that knives are set to identical heights; even slight variations cause uneven surfaces.
Essential setup tasks include:
- Verify outfeed table height matches knife tips using a straightedge.
- Set infeed table 1/32 inch lower than outfeed table.
- Inspect all tables for flatness and remove any debris.
- Sharpen or replace dull cutting knives.
- Check fence is square to both tables with a combination square.
- Test emergency stop and dust collection before starting.
Key Takeaway: Precise table alignment and sharp knives are non-negotiable for flat, safe results.
Understanding Jointer Table Alignment
The infeed and outfeed tables must work together seamlessly. The outfeed table supports wood as it passes over the cutting head, preventing snipe at the exit. If the outfeed table is too low, the board tips downward after the knives, creating a dip at the end. Too high, and the board lifts prematurely, leaving high spots.
Use a precision straightedge or laser alignment tool to check table height. Place it across both tables and observe gaps. Modern jointers in 2026 often include digital readouts for easier setup. Take time during initial setup—adjustments pay dividends across hundreds of boards.
How Do You Identify Grain Direction and Prevent Tearout?
Grain direction determines whether your jointer produces clean surfaces or fuzzy, splintered edges. Wood grain has a direction—imagine stroking a cat from head to tail versus backward. Planing with the grain feels smooth; against it causes tearout. Always examine the board end to identify grain slope. The grain “slopes” toward one end; feed the board so you’re moving uphill into the grain.

Visual inspection reveals grain direction easily. Look at the wood end grain and note which way the growth rings angle. Alternatively, run your hand along the edge; smoothness indicates correct direction. When in doubt, make a light test pass on scrap wood matching your project stock.
Grain direction strategies:
- Examine end grain to determine which way grain slopes.
- Feed boards so you move “uphill” into the grain slope.
- Reverse direction if tearout occurs on test passes.
- Use lower feed speed (slower) for difficult grain.
- Take lighter cuts (1/32 inch or less) on figured or reversing grain.
- Consider a jointer plane or hand planing for stubborn grain.
Tearout happens when grain lifts ahead of the cutting knife. Reducing feed speed and cut depth minimizes this. Some woods like figured maple resist all jointing; hand planing or careful planer techniques work better. Patience prevents ruined boards.
Key Takeaway: Correct grain direction eliminates tearout and produces surfaces ready for finishing.
Handling Reversing and Figured Grain
Some boards have grain that changes direction within the same piece. Figured walnut, curly maple, and spalted wood challenge even experienced woodworkers. These boards require extra care: lighter cuts, slower feed speed, and sometimes alternating direction mid-board. Some woodworkers use a jointer plane or card scraper for final cleanup instead of relying solely on machine jointing.
What Is the Four-Square Milling Method?
The four-square method is the professional standard for milling rough lumber into dimensionally accurate stock. This sequence ensures that all four sides end up flat and parallel. Step one: flatten the first face (best side). Step two: joint one edge square to that face. Step three: plane the opposite face parallel to the first. Step four: rip the final edge parallel to the first edge. This order guarantees accuracy because each step references the previous one.
Most woodworkers call the first flattened face the “reference face.” Everything else references this surface. Mark it with a pencil triangle so you don’t confuse it with other surfaces. The first edge becomes the “reference edge,” also marked clearly. This simple marking system prevents costly mistakes.
Four-square sequence breakdown:
- Face One: Flatten the best side on the jointer until completely flat.
- Edge One: Joint one edge square to face one using the jointer fence.
- Face Two: Plane the opposite face parallel to face one using a thickness planer.
- Edge Two: Rip the final edge parallel to edge one on a table saw.
This method eliminates guesswork. Each surface is flat, parallel, or square to the previous one. Your projects fit together perfectly because your stock is dimensionally accurate.
Key Takeaway: Follow the four-square sequence religiously for professional-grade milled lumber.
Flattening Face One on the Jointer
Face one requires the most passes because you’re removing the most material. Place the board’s cupped or warped side down on the infeed table. The high points contact the knives first. Feed the board slowly and steadily, using consistent hand pressure. Never stop mid-pass or the knives will leave a mark.
Continue passes until the entire face touches the knives—you’ll see a continuous shaving line across the board width. This typically takes 4-8 passes depending on initial warp severity. Check progress with a straightedge. Once face one is flat, mark it and move to edge one.
Jointing Edge One Square to Face One
After flattening face one, joint edge one perpendicular to it. Place face one flat on the jointer table and the edge against the fence. The fence must be perfectly square to the table—check this before starting. Feed the board edge-first, keeping consistent pressure against both table and fence. One or two passes usually suffice because the edge is narrower than the face.
How Do You Execute Proper Feeding Technique and Safety?
Feeding technique directly affects surface quality and personal safety. Always feed boards in the direction that prevents kickback and tearout. Use consistent, moderate speed—never force a board through. If the jointer bogs down, you’re feeding too fast or the knives are dull. Let the machine do the work; your job is guiding the board.
Hand position matters critically. Keep hands well away from the cutting head. Use featherboards or push blocks to maintain board position without reaching near the knives. Never reach over the cutting head or try to pull a board backward. If something goes wrong, release the board immediately and step back.
Critical feeding safety rules:
- Never feed a board shorter than 12 inches; use a push block instead.
- Keep hands at least 6 inches from the cutting head at all times.
- Use featherboards to hold the board against the fence.
- Maintain consistent, moderate feed speed without forcing.
- Stop immediately if the board binds or the motor struggles.
- Never reach over the cutting head or attempt to reverse direction.
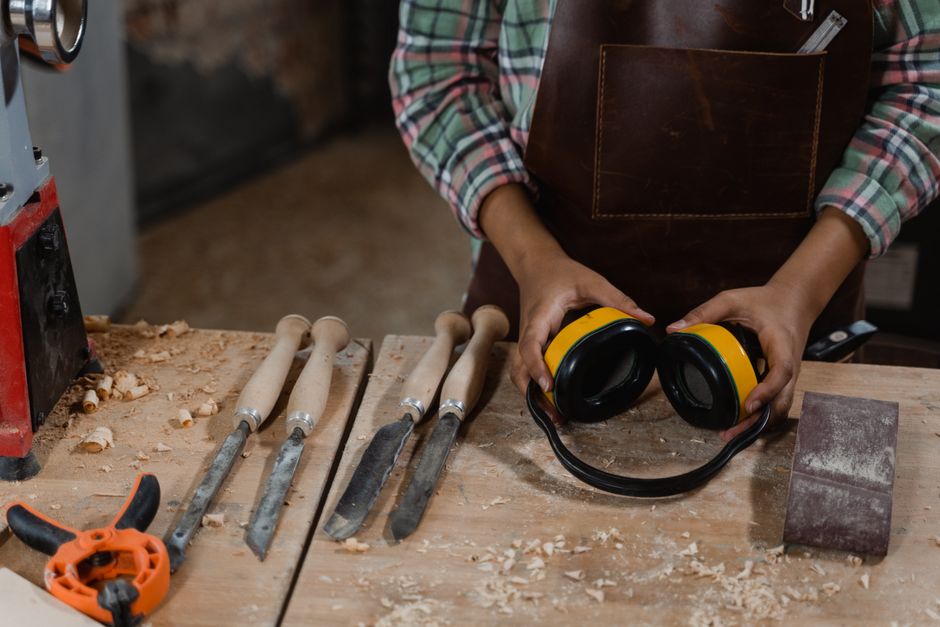
- Wear safety glasses and hearing protection during all operations.
Jointers cause serious injuries when operators ignore safety protocols. Respect the machine. Modern 2026 jointers include safety features like blade guards and emergency stops—use them every time.
Key Takeaway: Consistent feed speed, proper hand position, and safety equipment prevent accidents and produce quality surfaces.
Using Push Blocks and Featherboards
Push blocks keep your hands safe while maintaining board control. Commercial push blocks cost $15-40 and last for years. Featherboards—thin strips of wood with fingers that flex—hold boards against the fence without requiring hand pressure. Set featherboards at a slight angle so they push the board toward the fence rather than lifting it. Together, these tools let you joint safely without ever approaching the cutting head.
What Practical Steps Ensure Consistent Flattening Results?
Consistency separates hobbyists from professionals. Develop a routine: inspect the board, identify grain direction, set up the machine, make the first pass, check progress, and adjust as needed. Document your process. Track how many passes typical boards require. This data helps you estimate time and spot when knives need sharpening.
Test passes on scrap wood save expensive mistakes. If you’re unsure about grain direction or machine settings, practice on similar scrap first. This costs nothing but prevents ruined project wood.
Practical workflow steps:
- Inspect the board for defects, debris, and grain direction.
- Mark the reference face and edge with pencil triangles.
- Make a light test pass to confirm grain direction is correct.
- Increase depth gradually—start at 1/32 inch per pass.
- Check progress every 2-3 passes with a straightedge.
- Stop when the entire surface is flat and uniform shavings appear.
- Document the number of passes for future reference.
Consistency builds skill and confidence. You’ll develop intuition about how your specific jointer performs. In 2026, many woodworkers video-document their setup and process for future reference or teaching others.
Key Takeaway: Systematic approach and documentation create repeatable, professional results.
Checking Your Progress Accurately
A straightedge reveals whether the board is truly flat or just appears flat. Place the straightedge across the board at multiple angles—lengthwise, widthwise, and diagonally. Any gap between the straightedge and board indicates remaining high or low spots. Continue jointing until the straightedge sits flush across the entire surface. This takes practice to judge accurately.
How Should You Maintain Your Jointer for Peak Performance?
Regular maintenance keeps your jointer accurate and safe. Clean the tables after each use, removing wood dust and debris. Dust buildup affects table flatness and causes rust on cast iron surfaces. Use a brush and compressed air, not water—water causes rust. Wipe tables with a light machine oil monthly to prevent corrosion.
Knife maintenance is critical. Dull knives require more feed pressure, produce tearout, and slow production. Most jointers have 2-4 knives that should be sharpened or replaced annually depending on usage. In 2026, many shops use disposable knife inserts that snap in and out—this eliminates sharpening hassles. Check knife height regularly; even slight variations cause uneven surfaces.
Essential maintenance tasks:
- Clean tables daily with brush and compressed air.
- Wipe cast iron surfaces with light machine oil monthly.
- Sharpen or replace knives annually or when tearout appears.
- Check outfeed table alignment quarterly using a straightedge.
- Inspect fence for square alignment before each session.
- Test emergency stop and dust collection weekly.
- Lubricate any moving parts per manufacturer specifications.
A well-maintained jointer lasts decades. Poor maintenance leads to frustration, poor results, and eventual replacement. Invest 15 minutes weekly in maintenance to protect your investment.
Key Takeaway: Regular cleaning and knife maintenance ensure accuracy and safety throughout the jointer’s life.
What Common Mistakes Should You Avoid When Flattening Boards?
Beginners make predictable mistakes that damage boards and frustrate learning. The most common error is skipping the four-square method and trying to flatten all sides on the jointer. This produces uneven stock because you lack a reference face. Another mistake is ignoring grain direction, resulting in tearout that destroys the surface. Dull knives frustrate new users—they assume the machine is broken when actually the knives need sharpening.
Feeding too fast or too aggressively removes too much material and causes snipe. Some woodworkers make excessive passes, wasting wood unnecessarily. Others skip the straightedge check and assume the board is flat when it’s not. These mistakes accumulate, producing poor projects.
Common flattening mistakes to avoid:
- Attempting to flatten all four sides on the jointer instead of following four-square.
- Ignoring grain direction and experiencing tearout.
- Using dull knives and assuming the machine is faulty.
- Feeding too fast or taking cuts deeper than 1/32 inch.
- Skipping the straightedge check and trusting visual inspection only.
- Jointing boards shorter than 12 inches without push blocks.
- Stopping mid-pass, which leaves visible knife marks on the surface.
Learning from these mistakes accelerates skill development. Watch experienced woodworkers, ask questions, and practice on inexpensive softwoods before tackling expensive hardwoods. In 2026, online woodworking communities share videos demonstrating correct technique—use these resources.
Key Takeaway: Avoid common mistakes by understanding the four-square method, grain direction, and proper feed technique.
How Does Jointing Connect to Your Overall Milling Strategy?
Jointing is step one of the milling sequence, but it connects to your entire woodworking process. After jointing face one and edge one, you move to the thickness planer to flatten face two. The planer requires one flat reference face—this is why jointing comes first. Without a flat face one, the planer can’t work properly and produces uneven stock.
Understanding this connection helps you appreciate why jointing matters. Some woodworkers think they can skip jointing and use only a planer. This produces wedge-shaped stock that won’t fit together properly. Projects fail because stock dimensions are inconsistent. Jointing is the foundation; everything else builds on it.
Your milling workflow should include:
- Jointer: Flatten face one and square edge one.
- Thickness planer: Create face two parallel to face one.
- Table saw: Rip edge two parallel to edge one.
- Miter saw or table saw: Cut length to final dimension.
This sequence ensures every piece of stock is flat, parallel, and square. Your projects assemble perfectly because your material is accurate. This is why professional woodworkers obsess over milling—it determines project success.
Key Takeaway: Jointing is the critical first step in the four-square milling sequence that ensures dimensional accuracy throughout your project.
What Are Frequently Asked Questions About Board Flattening?
Can you flatten a warped board completely on a jointer?
Yes, but it depends on warp severity. Slight cupping or bowing flattens easily in 4-8 passes. Severe twisting or cupping may require removing significant material—sometimes 1/4 inch or more. Very badly warped boards become waste because you’d remove too much usable wood. Always inspect boards before purchasing and select the flattest stock available to minimize jointing work.
How many passes does it typically take to flatten a board?
Most boards require 4-6 passes on the first face, then 1-2 passes on the reference edge. This assumes moderate warp and sharp knives. Severely warped boards need 8-12 passes. Each pass removes 1/32 inch on hardwoods, slightly more on softwoods. Dull knives require additional passes. Track your results to predict time for future projects.
What should you do if tearout occurs during jointing?
Stop immediately and reverse the board direction. Tearout indicates you’re planing against the grain. Slow your feed speed and reduce cut depth to 1/32 inch or less. Consider using a jointer plane or hand plane for final cleanup if tearout persists. Some figured woods resist all machine jointing—accept this limitation rather than destroying the board.
Can you joint boards with knots or defects?
Proceed carefully. Hard knots can dull knives quickly and may cause the board to shift during jointing. Loose knots should be avoided—they’ll fall out during jointing or later in your project. Skip boards with significant defects unless you plan to work around them intentionally. Quality lumber selection prevents problems downstream.
What’s the difference between a jointer and a planer?
A jointer creates the first flat surface; a planer creates parallel surfaces. Jointers have an open design with a fence for edge jointing. Planers are fully enclosed and work best when fed one flat reference face. You need both tools for professional milling. Using only a planer produces uneven stock because it can’t flatten a warped face.
How do you know when jointer knives need replacing?
Dull knives produce fuzzy, torn surfaces instead of clean shavings. You’ll notice the motor struggling and the board heating up during jointing. Feed speed slows significantly. Some knives show visible nicks or chips. Sharpening extends knife life, but eventually replacement is necessary. Modern jointers with disposable knife inserts simplify this process—just snap out old inserts and snap in new ones.
What Final Tips Will Improve Your Jointing Success in 2026?
Jointing skill develops through consistent practice and attention to detail. Start with softwoods like pine to build confidence, then progress to hardwoods. Join a local woodworking club where experienced craftspeople can observe your technique and offer feedback. In 2026, online courses and video tutorials provide detailed instruction—use these resources to supplement hands-on learning.
Invest in quality tools and maintain them properly. A well-maintained jointer with sharp knives produces results that make woodworking enjoyable. Poor equipment frustrates learning and produces disappointing results. Budget for tool maintenance as part of your woodworking investment.
Remember that milling lumber is foundational to all woodworking. Every professional woodworker spent hours learning this skill. Your patience now pays dividends in project quality for years to come. Embrace the learning process, document your progress, and celebrate improvements. In 2026, woodworking communities are more connected than ever—share your work, ask questions, and grow with other craftspeople.
Key Takeaway: Consistent practice, proper maintenance, and community engagement transform jointing from intimidating to intuitive.







Write Your Review
No reviews yet. Be the first to share your experience!