

How to Use Chisels for Mortise and Tenon Joints: Quick Answer
Mortise and tenon joints are woodworking’s strongest connections, and chisels are essential for cutting them precisely. Start by marking your mortise outline with a knife, drill pilot holes to remove bulk material, then use appropriately sized chisels to pare the walls flat and square. The key is maintaining sharp chisels, applying controlled mallet strikes, and finishing with hand pressure for accuracy. This ancient joinery method requires patience and proper technique but creates joints that last centuries without glue.

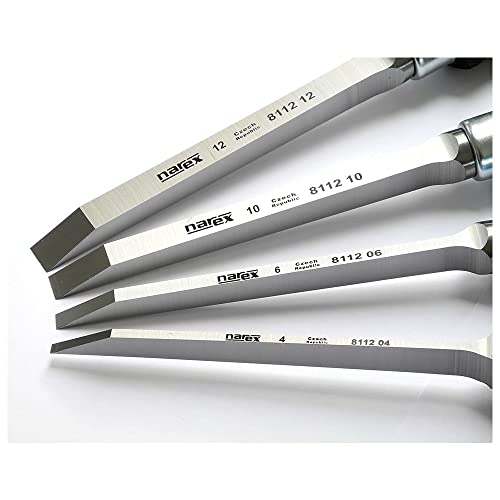
Narex 863600Chisel / Mortise Chisel Set - 4/6 / 10/12 mm - for Mortises
- Robust tool used for chopping out joints as well as cutting mortises
- Excellent cutting performance is reached by side tapering in height and length from tip to shoulder for sidewall clearance
- The blade is forged from Cr-Mn steel and heat treated up to 59 HRc
- The handle is made of dark stained and waxed beech wood with steel ferrule and hoop



As an Amazon Associate we earn from qualifying purchases. Product prices and availability are accurate as of the date/time indicated.
These joints appear in fine furniture, doors, and structural timber frames because they distribute stress evenly across large surface areas. Unlike modern fasteners, mortise and tenon joints rely on wood-to-wood contact for strength. Learning to cut them with chisels connects you to traditional craftsmanship while producing furniture that outperforms modern construction methods. Whether you’re building a table, cabinet, or frame, mastering this skill transforms your woodworking capabilities.
What Are Mortise and Tenon Joints and Why Use Chisels?
A mortise is a rectangular cavity cut into one piece of wood. A tenon is a protruding rectangular projection on another piece that fits into the mortise. Together they create one of woodworking’s strongest connections, used for thousands of years in furniture and building construction.

Chisels excel at mortise work because they provide direct control over wood removal. Unlike power tools, chisels let you feel the wood grain, adjust pressure instantly, and make micro-adjustments. You can pare walls perfectly square, create sharp internal corners, and match tenon dimensions exactly. Keeping your chisels sharp ensures clean cuts and reduces the force needed, making the work safer and more precise.
- Mortises require flat, square walls for tight-fitting tenons.
- Chisels provide superior control compared to drill bits or routers.
- Hand tool work develops the feel and judgment essential for fine joinery.
- Sharp chisels cut cleaner and require less physical effort.
Key Takeaway: Chisels are the traditional and most effective tool for mortise work because they give you complete control over wood removal and wall flatness.
Which Chisels Do You Need for Mortise and Tenon Joints?
The right chisel selection depends on mortise size and your working style. Most woodworkers need a range of widths to handle different joint sizes efficiently. A typical mortise set includes chisels from 1/4 inch to 1 inch wide, though you can start with fewer tools and expand your collection.
Essential Chisel Types and Widths
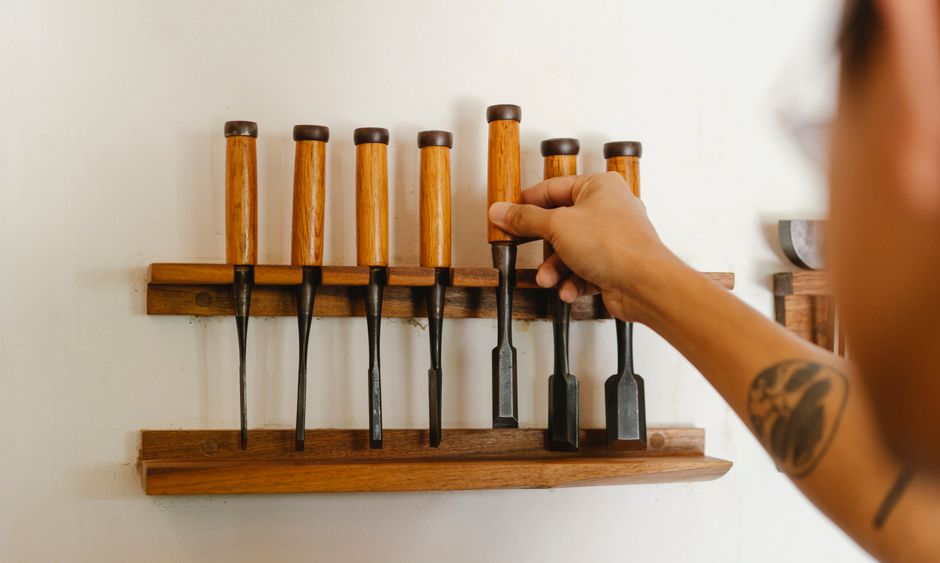
Bench chisels (also called paring chisels) are the standard choice for mortise work. Their flat backs and sturdy construction handle mallet strikes and prying forces. Mortise chisels, with thicker blades and reinforced handles, withstand harder impacts when struck with mallets. Japanese chisels offer excellent edge retention and lighter weight but require different technique.
- 1/4-inch chisel: Detail work and narrow mortises.
- 1/2-inch chisel: Most common size for general mortise work.
- 3/4-inch chisel: Medium-sized mortises and wall finishing.
- 1-inch chisel: Large mortises and bulk material removal.
Quality and Materials Matter
High-carbon steel chisels hold edges longer than stainless steel but require more maintenance. Cast steel offers a middle ground. Avoid cheap chisels with poorly fitted handles—they waste energy and frustrate you. Invest in at least one quality mortise chisel; it will outlast your career.
Key Takeaway: Start with 1/2-inch and 3/4-inch quality bench chisels, then expand your set as projects demand different mortise sizes.
How Do You Mark and Prepare a Mortise Before Chiseling?
Accurate marking determines chisel work quality. A poorly marked mortise wastes hours correcting mistakes. Use a sharp marking knife to score your layout lines deeply into the wood surface, creating a physical barrier that prevents the chisel from wandering during initial cuts.
Step-by-Step Marking Process
Start by measuring your tenon dimensions precisely. Transfer these measurements to the mortise location using a combination square or sliding bevel. Mark the mortise outline with a sharp knife, making multiple passes to create a deep, clear line. The knife score prevents wood fibers from splintering when the chisel enters.
- Measure tenon width and length with calipers for accuracy.
- Use a marking knife (not pencil) to score layout lines.
- Make multiple knife passes to deepen the scored line.
- Mark the mortise depth on the wood edge with a marking gauge.
Preparing the Workpiece
Secure your workpiece firmly in a vise or clamp. The wood must not move during chiseling—any shift ruins your accuracy and risks injury. Position the mortise location at a comfortable working height, roughly at your elbow when standing. If the mortise is deep, drill pilot holes first to remove bulk material quickly.
Key Takeaway: Deep knife scoring and firm workpiece securing prevent chiseling errors and make the actual cutting faster and cleaner.
What’s the Correct Technique for Chiseling Out a Mortise?
Mortise chiseling follows a specific sequence: establish the outline, remove bulk material, then refine walls. Rushing these steps produces loose joints. Patient, methodical work creates mortises that require minimal fitting adjustments.
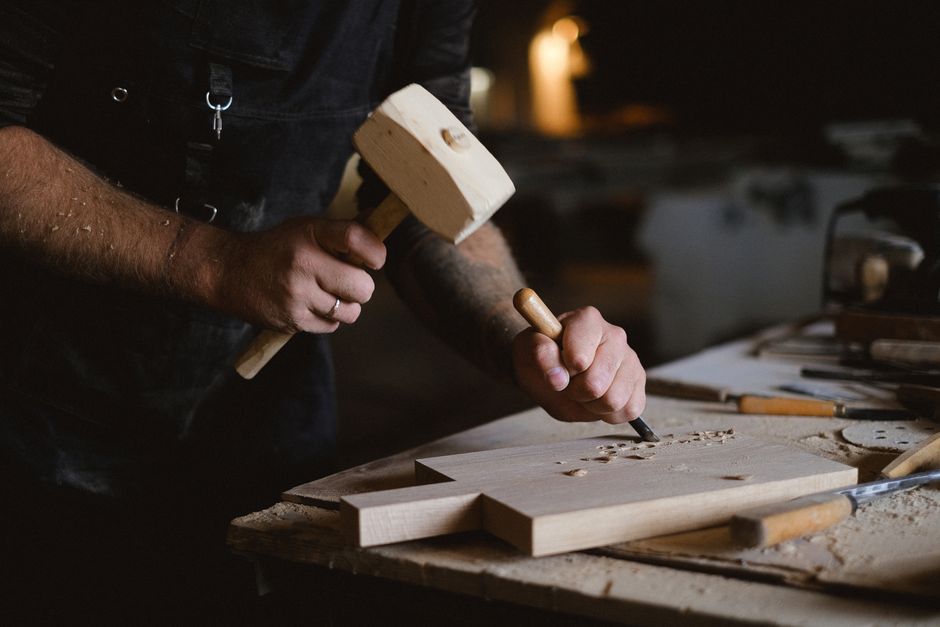
Establishing the Outline and Initial Cuts
Begin by tapping the chisel along the mortise outline with a wooden mallet. Strike firmly but not violently—let the tool and gravity do most of the work. Make cuts perpendicular to the wood surface, keeping the chisel vertical. Work from both ends toward the middle, taking thin shavings (roughly 1/16 inch) with each pass.
- Position chisel on the knife line with the bevel facing the mortise interior.
- Strike with controlled mallet blows, not wild swings.
- Work from both ends, meeting in the middle for safety.
- Keep the chisel vertical to maintain square walls.
Removing Bulk Material
Once you’ve established the outline, angle the chisel at 45 degrees to remove material from the mortise center. Work methodically, making diagonal cuts across the width. This removes chips quickly without straining the tool. Periodically check depth with your marking gauge to avoid cutting too deep.
After removing bulk material, switch to vertical cuts again. Work slowly, taking thin shavings. The final cuts should be hand-pressure only—no mallet strikes. This produces smooth walls that require minimal fitting work.
Finishing the Walls
The final mortise quality depends on wall flatness and squareness. Use a chisel slightly smaller than the mortise width to pare the side walls. Work from the ends inward, using hand pressure only. Check frequently with a straightedge to ensure walls are perfectly flat and parallel.
Key Takeaway: Progress from outline establishment to bulk removal to final wall paring, using mallet strikes only for the heavy work and hand pressure for precision.
How Do You Cut and Fit the Tenon to Match Your Mortise?
The tenon must fit your mortise precisely. Loose tenons fail; tight tenons split wood. Aim for a fit that requires hand pressure to assemble but not forcing. Most woodworkers cut tenons slightly oversized, then trim them to fit the specific mortise.
Cutting the Tenon Shoulders
Mark tenon dimensions on all four sides of your workpiece. Use a tenon saw or backsaw to cut the shoulder lines—these are the most visible surfaces. Make these cuts carefully and straight. The shoulders define the joint’s appearance and bearing surface.
- Mark shoulder lines with a marking gauge set to mortise depth.
- Cut shoulders with a sharp tenon saw held vertically.
- Keep the saw kerf on the waste side of your line.
- Make smooth, straight cuts without forcing the saw.
Refining the Tenon Fit
After cutting, test-fit the tenon in your mortise. It should slide in with moderate hand pressure. If too tight, use a sharp chisel to pare the tenon sides gradually. Remove thin shavings—you can always remove more but can’t add wood back. Work both sides equally to keep the tenon centered and square.
Key Takeaway: Cut tenons slightly oversized, then use a sharp chisel to pare them gradually until they fit your mortise with firm hand pressure.
What Are Common Mistakes to Avoid When Chiseling Mortises?
Even experienced woodworkers make mortise mistakes. Understanding common errors helps you work faster and produce better joints. Most mistakes result from rushing, dull tools, or poor technique rather than lack of skill.
Dull Chisels and Tool Maintenance
Dull chisels are the number-one mortise problem. They require excessive force, slip unpredictably, and produce rough walls. Keep your chisels sharp by honing regularly—before and after each project. A sharp chisel cuts cleanly with minimal pressure and produces walls that need almost no fitting adjustment.
- Hone chisels before starting mortise work.
- Test sharpness by shaving arm hair or cutting paper cleanly.
- Dull chisels require 3-5 times more effort and produce poor results.
- Store chisels with blade guards to maintain edges.
Geometry and Layout Errors
Inaccurate mortise placement ruins an otherwise perfect joint. Double-check measurements before cutting. Mark mortises on both sides of the wood to ensure they align perfectly. Use a sharp marking knife, not a pencil—pencil marks are too thick and imprecise.
Rushing and Impatience
Mortise chiseling rewards patience. Forcing the chisel or taking oversized cuts produces walls that aren’t square or flat. Work methodically, taking thin shavings, and checking progress frequently. A mortise that takes an hour beats one that takes 30 minutes but requires extensive fitting work.
Key Takeaway: Sharp tools, accurate marking, and patient technique prevent most mortise problems and produce joints that fit perfectly.
How Do You Achieve Professional Results in Mortise and Tenon Joints?
Professional-quality joints require attention to detail beyond basic technique. The difference between adequate and excellent mortises comes from understanding wood movement, grain direction, and final fitting strategies. These refinements separate amateur work from furniture-maker quality.
Reading Wood Grain Direction
Wood grain direction affects how chisels cut. Chiseling with the grain produces clean shavings. Chiseling against the grain causes tearout and rough surfaces. Observe your wood’s grain direction and adjust your approach accordingly. When possible, work from the edges toward the center to minimize tearout.
- Look for grain direction before starting any mortise.
- Work with the grain when possible for cleaner cuts.
- Use lighter pressure when working against the grain.
- Make multiple light passes instead of heavy cuts.
Fitting Strategies for Tight Joints
Professional woodworkers often cut mortises slightly loose, then fit tenons precisely. This approach gives you more control and produces better-looking joints. Alternatively, cut tenons slightly oversized and pare them to fit. Test-fit frequently during paring—small adjustments make the difference between sloppy and perfect.
Finishing and Assembly
Sand mortise interiors lightly with 120-grit paper to remove fuzz and dust. This allows tenons to seat fully without resistance from debris. Apply glue sparingly—excess glue is harder to clean than insufficient glue. Clamp joints gently; excessive pressure can split wood or distort the joint.
Key Takeaway: Professional results come from reading grain direction, fitting tenons precisely through gradual paring, and careful final assembly.
Recommended Products
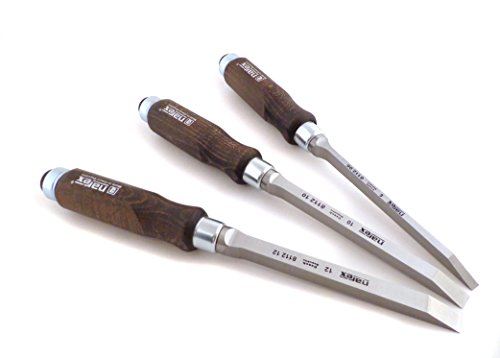
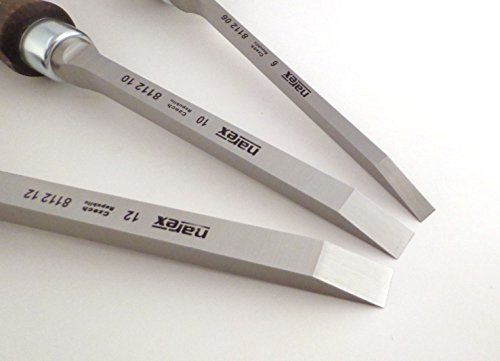
Narex Czech Steel 3 piece set 6 mm, 10 mm, and 12 mm Mortise Chisels by Narex
- Made by a small tool manufacturer in the Czech Republic
- Blades are made from fine-grained, nicely tempered chrome-manganese steel and hardened to Rc 59
- Contains the following sizes: 6 mm 10 mm and 12 mm
- Bevel ground at a 25 degree bevel.
- In 2008 FWW earned Author's Choice for Best Value in the western style bench chisel category
As an Amazon Associate we earn from qualifying purchases. Product prices and availability are accurate as of the date/time indicated.

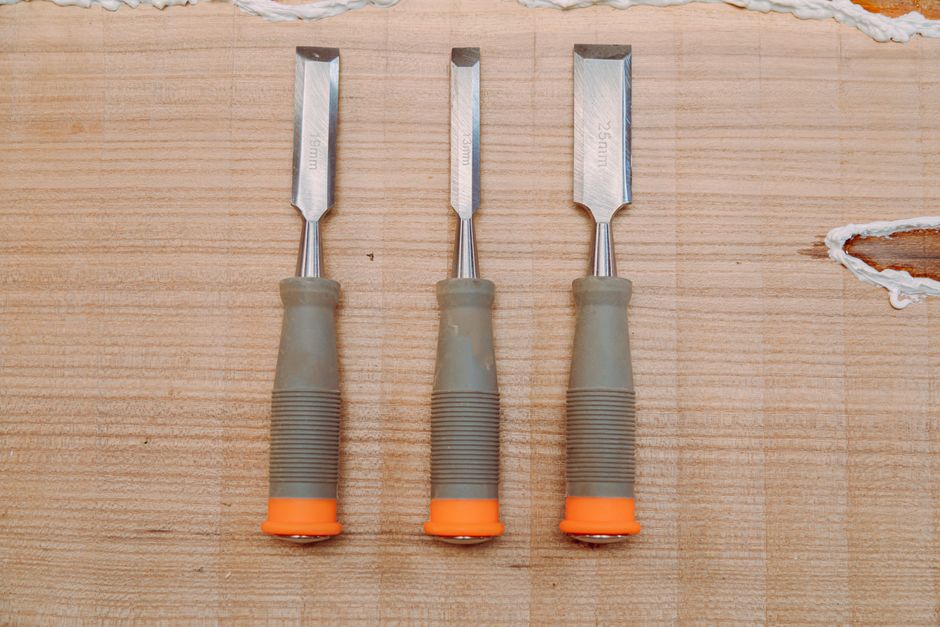
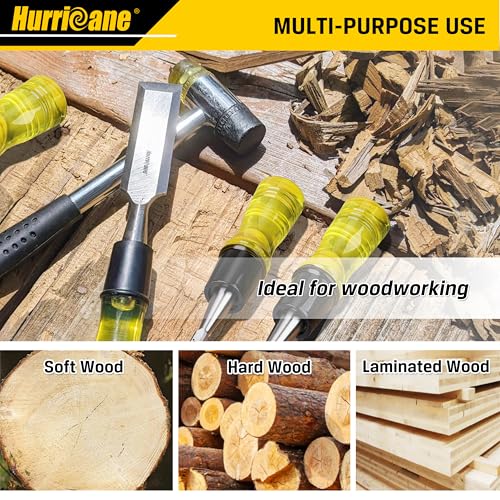
HURRICANE 4-Piece Wood Chisel Set - CR-V Steel Beveled Edge
- Premium Blades: Drop forged CR-V steel with heat-treated edges ensures sharp precision and long-lasting durability, can be used to make finish or paring cuts on wood surfaces, as well as cut mortises
- Beveled Edge for Versatility: 25° Bevel edge for woodworking multi-purpose use, ideal for soft wood, hard wood, and laminated wood products
- Ergonomic PVC Handle: HURRICANE wood chisel set with Lightweight yet durable regular size impact PVC Handle, feels natural in your hand for everyday fixes, yet tough enough for mallet strikes—great for door locks or DIY use
- Safety & Portability: This four sizes (1/4"; 1/2"; 3/4"; and 1") chisel set with blade guards protects edges during storage
- Widely Function: this HURRICANE wood chisel set empowers beginners to tackle DIY projects while meeting the demands of hobbyists & Home use



As an Amazon Associate we earn from qualifying purchases. Product prices and availability are accurate as of the date/time indicated.
Frequently Asked Questions
What size chisel should I use for a 1/2-inch mortise?
Use a chisel slightly smaller than your mortise width, typically 3/8-inch or 1/2-inch. Starting with a smaller chisel ensures you don’t undercut the walls. You can always pare slightly wider if needed, but you can’t reduce a mortise that’s too wide. Make final wall adjustments with a chisel exactly matching the mortise width.
Can I use a power drill to remove mortise material faster?
Drills remove bulk material efficiently, but chisels provide superior final results. Many woodworkers use drills to remove 80 percent of material, then finish with chisels for perfect walls. Drill holes should be slightly smaller than mortise width to leave material for chiseling. This hybrid approach saves time while maintaining quality.
How tight should a tenon fit in a mortise?
A properly fitted tenon requires firm hand pressure to assemble but shouldn’t need forcing. If you can slide it in easily, it’s too loose. If you need a mallet, it’s too tight. The sweet spot involves hand pressure that makes you slightly nervous about forcing it—that’s perfect. Glue will swell the wood slightly, tightening the fit further.
What’s the best wood for practicing mortise and tenon joints?
Softwoods like pine and poplar are forgiving for practice because they’re easier to chisel and mistakes are less visible. Hardwoods like oak and cherry are more challenging but produce beautiful final results. Start with softwood to develop technique, then advance to hardwoods once you’re confident. Avoid very hard woods until you’ve practiced extensively.
Should I use a mallet or hand pressure for chiseling mortises?
Use a mallet for the initial outline cuts and bulk material removal. Switch to hand pressure only for the final cuts that shape the walls. Hand pressure gives you feedback and control that mallet strikes can’t match. This two-stage approach combines speed with precision and safety.
How do I fix a mortise that’s too wide?
If a mortise is slightly too wide, you can shim the tenon with veneer glued to its sides. For mortises that are significantly oversized, you’ll need to cut a new tenon or modify the mortise layout. Prevention through careful chiseling is easier than fixing mistakes, so work slowly and check dimensions frequently during cutting.
What’s the Best Way to Master Mortise and Tenon Joinery in 2026?
Mortise and tenon joints represent woodworking’s highest skill level. Mastering them requires sharp tools, accurate marking, patient technique, and lots of practice. Start with softwood projects that aren’t visible, then progress to hardwoods and fine furniture. Each joint you cut teaches you something about wood movement, grain direction, and fitting strategy.
The investment in learning this skill pays dividends throughout your woodworking career. Furniture built with mortise and tenon joints lasts generations. Your ability to cut them cleanly separates you from builders who rely on screws and modern fasteners. In 2026, these ancient techniques remain unmatched for strength, beauty, and durability.
Start your practice today. Choose a simple project, gather quality tools, and commit to the process. Your first mortises won’t be perfect—nobody’s are. But with each joint, your technique improves and your confidence grows. Within a few projects, you’ll produce joints that rival furniture-maker quality. That’s when you’ll truly understand why craftspeople have used this joinery method for thousands of years.
Key Takeaway: Master mortise and tenon joints through sharp tools, careful marking, patient chiseling, and consistent practice on progressively challenging projects.







Write Your Review
No reviews yet. Be the first to share your experience!