

What Is the Best Way to Cut Crown Molding Angles on a Miter Saw?
Cutting crown molding angles on a miter saw requires understanding compound angles and proper saw setup. Crown molding sits at a 45-degree angle against walls and ceilings, creating cuts that differ from standard miter cuts. The key is tilting both the saw blade and the molding simultaneously to achieve the correct angle. Most crown molding uses a 38-degree miter angle combined with a 33.5-degree bevel angle. This guide walks you through the exact steps, calculations, and techniques needed to cut perfect crown molding every time. Whether you’re installing molding in a bedroom or commercial space, mastering these angles saves time and material waste.
Crown molding installation is a common home improvement project that intimidates many DIYers. The challenge stems from the molding’s unique position—it bridges two perpendicular surfaces at an angle. Understanding the math behind the cuts removes confusion and builds confidence. Professional carpenters rely on established formulas and miter saw settings to produce consistent results. With the right knowledge and practice, you’ll cut crown molding like an experienced contractor.
How Do Compound Angles Work for Crown Molding?
Compound angles combine two simultaneous cuts: a miter angle and a bevel angle. The miter angle rotates the blade left or right, while the bevel angle tilts it forward or backward. Crown molding requires both cuts at once because of its angled mounting position. The molding sits at roughly 45 degrees between the wall and ceiling, forcing the saw to make an angled cut in two planes simultaneously.
For standard 45-degree crown molding, the compound angle formula involves a 38-degree miter and a 33.5-degree bevel. However, crown molding comes in different angles—38-degree, 45-degree, and 52-degree crowns use different settings. Always verify your molding’s angle before cutting. Most residential installations use 45-degree crown molding, making the 38/33.5 setting the most common.
Understanding Miter and Bevel Angles
The miter angle cuts across the face of the molding, creating the visible joint line. The bevel angle tilts the blade to match the molding’s mounting angle. Together, these angles create the proper fit when two pieces meet at an outside or inside corner.
- Miter angle: rotates the blade left or right (typically 38 degrees for 45-degree crown).
- Bevel angle: tilts the blade forward or backward (typically 33.5 degrees).
- Outside corner: requires one piece cut at 38 miter/33.5 bevel, the other at the opposite angle.
- Inside corner: uses the same angles but positioned differently on the molding.
Key Takeaway: Compound angles combine miter and bevel cuts to match crown molding’s angled mounting position.
What Are the Exact Miter Saw Settings for 45-Degree Crown Molding?
Setting your miter saw correctly is essential for accurate cuts. For 45-degree crown molding, set the miter angle to 38 degrees and the bevel angle to 33.5 degrees. These settings apply to outside corners. Inside corners use the same angles but with the molding flipped or positioned differently. Always test your first cut on a scrap piece before cutting expensive molding.
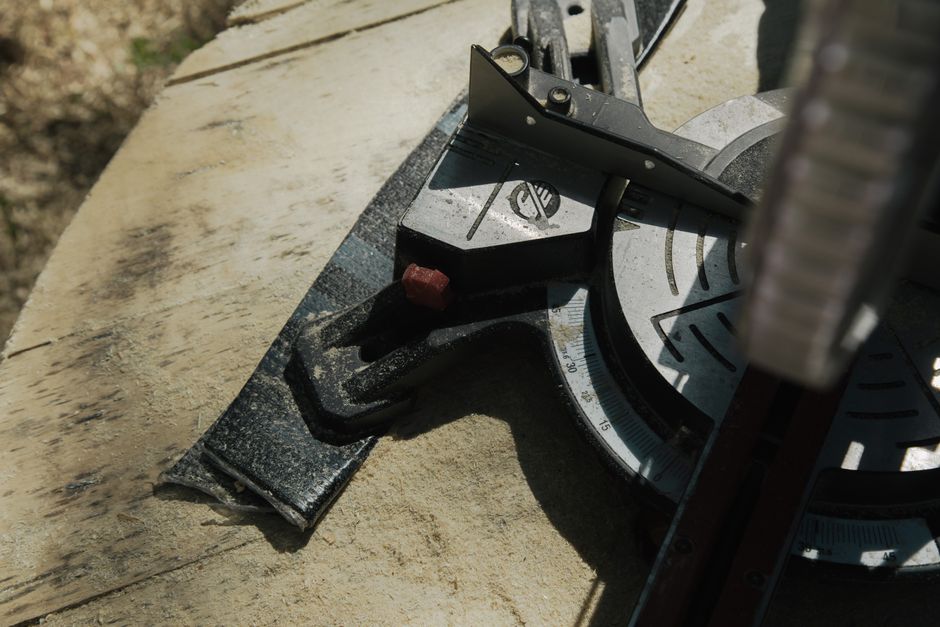
Most modern miter saws have clearly marked angle scales. Locate the miter adjustment knob and rotate it until the pointer aligns with 38 degrees. Then locate the bevel adjustment and tilt the blade head to 33.5 degrees. Some saws have detents or stop positions at common angles, making setup faster. Double-check both angles before powering on the saw.
Step-by-Step Setup Process
- Unplug the miter saw before making any angle adjustments.
- Loosen the miter lock knob and rotate the blade to 38 degrees.
- Tighten the miter lock securely to prevent drift during cuts.
- Loosen the bevel lock and tilt the blade head to 33.5 degrees.
- Tighten the bevel lock firmly.
- Plug in the saw and test on scrap wood before cutting actual molding.
Key Takeaway: Proper miter saw setup with 38-degree miter and 33.5-degree bevel ensures accurate crown molding cuts.
How Do You Position Crown Molding on the Miter Saw Correctly?
Positioning the molding correctly is just as important as the angle settings. Crown molding must sit flat against the saw’s fence and base to cut properly. The molding’s back should contact the fence, and its bottom edge should rest on the saw’s base. This positioning simulates how the molding will sit on the wall and ceiling. Never stand the molding upright or at odd angles—always lay it flat on the saw table.
Many beginners make the mistake of holding molding vertically, thinking it matches the installed position. This actually produces incorrect cuts. The saw’s base and fence are designed to work with the molding lying flat. Gravity and proper support ensure the blade cuts at the exact angles needed for perfect joints.
Proper Molding Placement Techniques
- Place the molding’s back edge firmly against the rear fence of the saw.
- Keep the molding’s bottom edge flat on the saw’s base plate.
- Ensure the molding doesn’t rock or shift during cutting.
- Use your hands or clamps to hold the molding steady.
- Never force the molding—let the blade do the work.
- Support long pieces with a stand or helper to prevent binding.
Key Takeaway: Laying crown molding flat against the fence and base ensures cuts match the installed mounting position.
What Are the Best Techniques for Outside and Inside Corners?
Outside corners and inside corners require slightly different approaches, though the angle settings remain the same. An outside corner is where two walls meet going outward, like the corner of a room’s exterior wall. An inside corner is where two walls meet going inward, like a typical room corner. Each corner type requires specific molding piece orientations to create seamless joints.
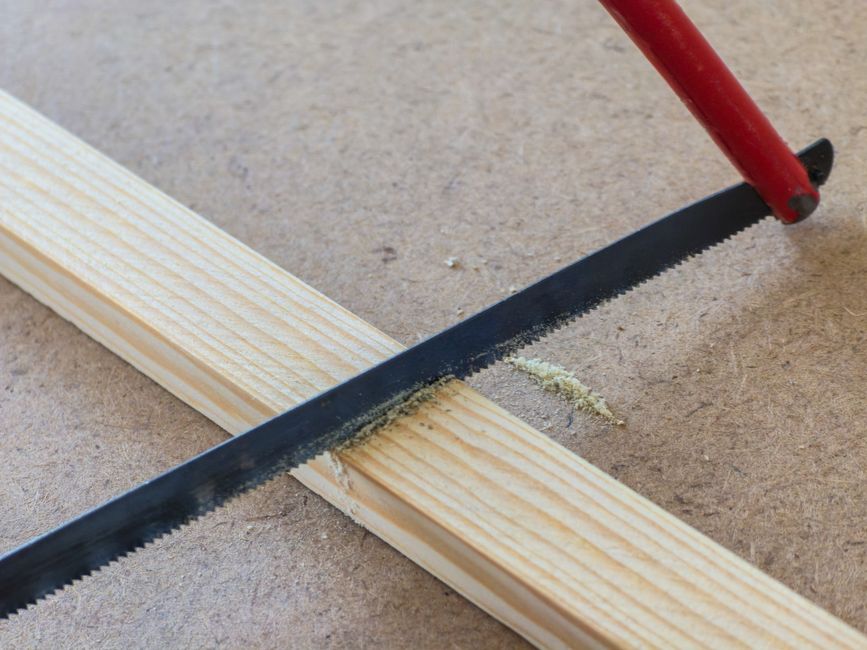
For outside corners, cut one piece at 38-degree miter and 33.5-degree bevel with the molding oriented normally. Cut the adjoining piece at the same angles but with the molding flipped. This creates a joint where the two pieces interlock perfectly. Inside corners follow similar logic but with different molding positioning. Practice on scrap pieces until you understand the pattern.
Outside Corner Cutting Process
- Set miter to 38 degrees and bevel to 33.5 degrees.
- Cut the first piece with molding flat against fence and base.
- Flip the molding end-for-end for the second piece.
- Cut the second piece at the same angle settings.
- Test fit the pieces before installing—they should meet seamlessly.
Inside Corner Cutting Process
- Use the same 38-degree miter and 33.5-degree bevel settings.
- Position the molding with its inside edge toward the fence.
- Cut one piece, then flip the molding for the adjoining piece.
- Verify the joint fits tightly before fastening.
- Caulk any gaps after installation for a professional appearance.
Key Takeaway: Outside and inside corners use identical angle settings but require different molding orientations for proper joints.
How Can You Ensure Accuracy and Avoid Common Mistakes?
Accuracy in crown molding cuts comes from attention to detail and consistent technique. Common mistakes include incorrect angle settings, improper molding positioning, and rushing through cuts. Always verify your miter saw’s angle settings before each cut. Invest a few minutes testing on scrap wood—this prevents expensive mistakes on actual molding. Measure twice and cut once, a carpenter’s golden rule that applies perfectly to crown molding work.
Blade condition affects cut quality significantly. A dull or damaged blade produces rough edges and poor joints. Use a fine-toothed blade designed for crosscutting molding. Replace blades regularly, especially after cutting dense hardwoods. Keep the saw clean and free of sawdust, which can interfere with accurate angle settings.
Accuracy Checklist
- Verify angle settings match your crown molding type (38-degree miter, 33.5-degree bevel for 45-degree crown).
- Use a quality fine-toothed crosscut blade in good condition.
- Test cuts on scrap pieces matching your molding’s profile.
- Measure and mark cutting lines clearly with a sharp pencil.
- Support long pieces properly to prevent binding or vibration.
- Make cuts slowly and smoothly without forcing the blade.
- Check joint fit before fastening to walls or ceilings.
Common Mistakes to Avoid
- Holding molding vertically instead of flat against the saw base.
- Using incorrect angle settings for your molding type.
- Cutting with a dull or inappropriate blade.
- Rushing cuts without proper support or measurement.
- Forgetting to test cuts on scrap wood first.
- Misaligning the fence or base during setup.
Key Takeaway: Accuracy depends on proper setup, quality tools, and careful technique rather than speed.
What Tools and Materials Do You Need for Crown Molding Installation?
Successful crown molding installation requires specific tools beyond just the miter saw. A quality miter saw with accurate angle scales is essential—look for models with digital readouts or laser guides for enhanced precision. You’ll also need crown molding in your chosen profile and material, a stud finder to locate wall framing, and finish nails or a pneumatic nailer for fastening. Caulk and paint complete the installation for a professional appearance.
Safety equipment matters too. Wear eye protection when cutting and operating power tools. Hearing protection reduces noise exposure during extended cutting sessions. Work gloves protect your hands when handling molding edges. A dust mask or shop vacuum prevents inhalation of fine sawdust, especially when working with hardwoods that produce fine particles.
Essential Tools and Materials
- Miter saw with accurate miter and bevel adjustments.
- Fine-toothed crosscut blade (80-100 teeth recommended).
- Crown molding in your chosen profile and material.
- Stud finder for locating wall framing.
- Finish nails (2.5-inch for typical installations).
- Pneumatic nailer or hammer for fastening.
- Caulk and paintable caulk gun.
- Paint matching your molding finish.
- Safety glasses, hearing protection, and dust mask.
- Measuring tape and sharp pencil for marking.
Key Takeaway: Proper tools and safety equipment ensure accurate cuts, safe operation, and professional-looking results.
How Do Different Crown Molding Angles Affect Saw Settings?
Not all crown molding uses 45-degree angles. Some installations feature 38-degree, 45-degree, or 52-degree crown molding, each requiring different saw settings. Understanding your molding’s angle is critical before making any cuts. Check the manufacturer’s specifications or measure the angle with a protractor if the information isn’t available. Using incorrect settings for your molding type produces joints that don’t fit properly.
The most common residential crown molding is 45-degree, which uses the 38-degree miter and 33.5-degree bevel settings discussed throughout this guide. However, commercial installations or specialty designs may use different angles. Research your specific molding type and consult the manufacturer’s cutting guide if available. Many molding suppliers provide angle charts showing the correct miter saw settings for their products.
Common Crown Molding Angle Settings
- 38-degree crown molding: 25.5-degree miter, 35-degree bevel.
- 45-degree crown molding: 38-degree miter, 33.5-degree bevel (most common).
- 52-degree crown molding: 38-degree miter, 27-degree bevel.
- Always verify your molding’s angle before setting the saw.
- Test cuts on scrap pieces to confirm the settings work correctly.
Key Takeaway: Different crown molding angles require different miter saw settings; always verify your molding type before cutting.
What Practical Steps Should You Follow for a Complete Installation?
Installing crown molding involves planning, cutting, and fastening in a logical sequence. Start by measuring your room and planning corner locations. Calculate how many linear feet of molding you need, adding extra for mistakes and waste. Buy molding slightly longer than calculated to ensure you have material for testing and practice cuts. Locate wall studs using a stud finder—crown molding should be fastened into studs for secure installation.
Prepare your work area before making cuts. Set up the miter saw on a stable surface with adequate space for supporting long pieces. Ensure good lighting so you can see angle markings clearly. Have scrap wood available for testing angle settings. Organize your molding pieces by length and location, making installation faster and more efficient.
Crown Molding Installation Checklist
- Measure the room and calculate total linear feet needed.
- Purchase molding, adding 10-15% for waste and practice cuts.
- Locate and mark wall studs with a pencil.
- Set up the miter saw with proper angle settings (38/33.5 for 45-degree crown).
- Test cuts on scrap wood to verify accuracy.
- Cut all pieces, labeling them by location and orientation.
- Apply caulk to the back of molding for a tight seal.
- Fasten molding to studs with finish nails or pneumatic nailer.
- Fill nail holes with caulk or wood filler.
- Paint or stain molding to match your décor.
- Caulk seams and corners for a seamless appearance.
- Touch up paint as needed for a professional finish.
Key Takeaway: A systematic approach from planning through finishing ensures professional-quality crown molding installation.
How Do You Troubleshoot Gaps and Fit Issues?
Even with careful cutting, gaps sometimes appear in crown molding joints. Small gaps under 1/16 inch are normal and easily filled with caulk. Larger gaps indicate incorrect angle settings or improper molding positioning. If gaps appear consistently, stop and recheck your miter saw’s angle settings. A gap on one side of a joint suggests the bevel angle needs adjustment. Gaps on the other side indicate a miter angle problem.
Tight-fitting joints are the goal, but slight adjustments may be needed during installation. Some carpenters shave a small amount from the back of molding with a block plane to achieve perfect fits. This technique works well for fine-tuning joints without re-cutting. However, most gaps are best addressed with quality caulk, which is faster and forgiving.
Gap Solutions
- Gaps under 1/16 inch: fill with paintable caulk and sand smooth.
- Gaps 1/16 to 1/8 inch: use caulk or shim with thin wood shims.
- Consistent gaps on all cuts: recheck miter and bevel angle settings.
- One-sided gaps: adjust the problematic angle and test on scrap.
- Tight joints not fitting: use a block plane to shave the molding back.
Key Takeaway: Small gaps are normal and easily fixed with caulk; large gaps indicate setup problems requiring angle adjustment.
What Is the Importance of Safety When Using a Miter Saw for Crown Molding?
Safety is paramount when operating any power tool, especially a miter saw. Always wear safety glasses to protect your eyes from flying debris. Use hearing protection, as miter saws produce noise exceeding 85 decibels. Wear a dust mask or use a shop vacuum to avoid inhaling sawdust. Never reach under the blade or near the cutting area while the saw is running. Keep hands at least six inches away from the blade path at all times.
Proper work habits prevent injuries and improve results. Unplug the saw before making any adjustments to angle settings. Allow the blade to reach full speed before making contact with the molding. Use clamps or your hands to hold molding firmly, never relying on fingers alone to position pieces. Support long pieces to prevent binding, which can cause the saw to kick back. Keep the work area clean and free of tripping hazards.
Essential Safety Practices
- Wear safety glasses, hearing protection, and dust mask during all operations.
- Unplug the saw before adjusting angles or making setup changes.
- Allow the blade to reach full speed before cutting.
- Keep hands at least six inches away from the blade path.
- Use clamps to secure molding whenever possible.
- Never reach under the blade or near the cutting area.
- Support long pieces to prevent binding and kickback.
- Keep the work area clean and organized.
- Read the manufacturer’s safety instructions before operating.
- Never operate the saw when tired or distracted.
Key Takeaway: Consistent safety practices protect you from injury and create a productive work environment.
Can You Master Crown Molding Cuts With Practice and Patience?
Mastering crown molding cuts takes practice, but the skill is absolutely achievable for any motivated DIYer. Start with small projects in a single room to build confidence. Practice on scrap pieces extensively before cutting expensive molding. Each cut teaches you something about how the angles work and how the molding behaves. After completing your first room, you’ll understand the process well enough to tackle larger projects.
The investment in learning this skill pays dividends on future projects. Crown molding adds significant value and visual appeal to any home. Professional installations cost hundreds or thousands of dollars, while DIY projects cost only material and time. With the knowledge from this guide and some practice, you’ll produce results indistinguishable from professional work. Your next home improvement project becomes an opportunity to showcase your new skill.
Remember that small imperfections are normal and easily hidden with caulk and paint. Perfectionism is the enemy of progress—focus on learning the fundamentals and improving with each cut. Join online woodworking communities to see how others approach crown molding installation. Share your results and learn from experienced craftspeople. The combination of knowledge, practice, and community support ensures your success with crown molding projects.
Key Takeaway: Crown molding mastery develops through consistent practice, proper technique, and willingness to learn from each project.
Frequently Asked Questions
What is the standard angle for crown molding?
The most common residential crown molding uses a 45-degree angle, which requires a 38-degree miter angle and a 33.5-degree bevel angle on the miter saw. However, 38-degree and 52-degree crown molding exist for specialty applications. Always verify your molding’s angle before cutting by checking manufacturer specifications or measuring with a protractor. Using the wrong angles produces joints that don’t fit properly.
Do I need a special miter saw for crown molding?
Any quality miter saw with accurate miter and bevel adjustments can cut crown molding. Compound miter saws with digital angle displays make setup easier and more precise. Look for saws with clear angle markings and smooth adjustment mechanisms. A 10-inch or 12-inch blade provides adequate cutting capacity for most crown molding profiles. The saw doesn’t need to be expensive—accuracy and reliability matter more than brand name.
Why do my crown molding joints have gaps?
Gaps typically result from incorrect angle settings or improper molding positioning on the saw. Verify your miter and bevel angles match your molding type. Ensure the molding sits flat against the fence and base during cutting. Small gaps under 1/16 inch are normal and easily filled with caulk. Larger gaps indicate setup problems requiring angle adjustment and testing on scrap pieces.
Can I cut crown molding on a table saw instead?
A table saw can cut crown molding, but a miter saw is significantly easier and safer. Miter saws are designed for crosscutting molding at precise angles. Table saws require complex jigs and setups to achieve compound angles safely. Most woodworkers prefer miter saws for crown molding work due to speed, accuracy, and ease of use. If you only have a table saw, research specialized jigs designed for crown molding cutting.
How do I know if my miter saw angles are accurate?
Test your angle settings by cutting scrap wood matching your molding’s profile. Make cuts at your planned angles and test fit the pieces together. If the joint is tight and seamless, your angles are correct. If gaps appear, adjust the problematic angle slightly and test again. Use a digital angle finder or protractor to verify your saw’s angle scales. Some newer miter saws include digital displays that eliminate guesswork in angle setting.
What type of blade is best for crown molding?
Use a fine-toothed crosscut blade with 80-100 teeth designed for clean crosscutting. Avoid general-purpose blades, which produce rough edges unsuitable for visible molding joints. Carbide-tipped blades last longer and maintain sharpness through many cuts. Replace blades regularly—a dull blade produces poor-quality cuts and requires more force, increasing kickback risk and reducing accuracy.







Write Your Review
No reviews yet. Be the first to share your experience!