

How to Drain Moisture from an Air Compressor Tank: Quick Answer
Draining moisture from your air compressor tank is essential for equipment longevity and performance. Moisture accumulation corrodes internal tank walls, damages pneumatic tools, and reduces air quality. The process involves locating the drain valve at the tank’s lowest point, attaching a container, opening the valve fully, and allowing compressed air and water to escape until only dry air remains. Most users should drain their tanks weekly or monthly depending on humidity levels and usage frequency. This 5-10 minute maintenance task prevents rust, extends tool life, and ensures consistent air pressure delivery for all your pneumatic applications.

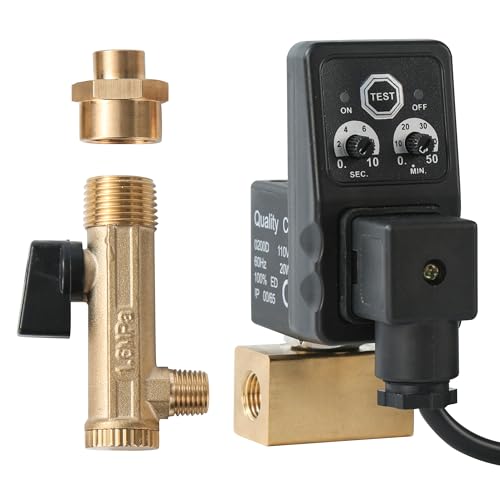
Automatic Electronic Tank Drain Kit, 1/4" NPT Timer Operated Compressor Air Drain Valves with 1/4" flexible Braided Steel Tube and Ball Valve Strainer 1/2" x 1/4" MNPT
- 2-way direct-acting valve. Air compressor tank drain valve. Time interval ( OFF ): 0.5--50 minutes (adjustable). Discharge time ( ON ): 0.5--10 seconds (adjustable).
- This timer-operated compresssor air drain valve designed for use with all air compressors,easy to install and maintain
- Set the electronic timer on these drain valves to open automatically at your specified time interval. They’re excellent for compressed air systems with oil content because they resist clogging when water, oil, and sediment combine to form sludge
- Wide Temperature Range: With an ambient temperature range of 32°F to 140°F, meet IP65 standard, making it suitable for various industrial applications. Power supply voltage is AC 110V-120V/60Hz Three Prong Plugs
- Strainer/ball valve combination prevents valve from clogging and allows for isolation when servicing.it is ideal solutions to extend solenoid valve life and increase the reliability of downstream apparatus.
- Including:Flexible drain tube with elbow,Electronic tank drain timer,Strainer/ball valve,Female Adapter 1/4NPT to 1/2NPT,Barb fitting 1/4MNPT x 3/8 Barb,2Pc. Hose clamp,Bushing Adapter 3/8 Male x 1/4 Female,Thread Seal Tape. 30-day return with no reason.



As an Amazon Associate we earn from qualifying purchases. Product prices and availability are accurate as of the date/time indicated.
Air compressor tanks naturally collect moisture because compressed air cannot hold as much water vapor as uncompressed air. When you compress ambient air into your tank, the temperature drops during expansion, causing water to condense into liquid form. This moisture settles at the tank bottom and creates an ideal environment for rust and corrosion. Without regular drainage, internal tank deterioration accelerates, leading to tank failure, contaminated air output, and costly repairs or replacement.
Why Is Moisture Buildup a Critical Problem in Air Compressor Tanks?
Moisture in your compressor tank causes multiple serious problems affecting both equipment and output quality. Water promotes rust formation on internal tank surfaces, weakening structural integrity over time. Contaminated air damages pneumatic tools, clogs air lines, and reduces tool efficiency and lifespan. Moisture also interferes with paint application, making it essential for anyone using spray equipment like HVLP guns.
The damage accelerates in humid environments and with frequent compressor use. If you operate tools in wet conditions or live in high-humidity regions, moisture buildup happens faster. Neglecting drainage can lead to tank failure within months rather than years, creating safety hazards and expensive replacement costs.
- Rust and corrosion weaken tank walls and reduce structural integrity.
- Contaminated air damages seals, bearings, and internal tool components.
- Water clogs air lines, filters, and regulators, reducing system pressure.
- Moisture ruins paint finishes and spray applications on projects.
- Unchecked buildup can cause catastrophic tank failure and safety risks.
Key Takeaway: Regular moisture drainage prevents rust, extends equipment life, and ensures clean air output for all pneumatic applications.
What Tools and Materials Do You Need to Drain Your Compressor Tank?
Draining your air compressor tank requires minimal tools and supplies. Most items are inexpensive and readily available at hardware stores or online retailers. Having everything prepared before starting ensures a smooth, efficient drainage process without interruptions.
Essential Tools and Supplies
- Bucket or container (5-gallon minimum capacity for larger tanks).
- Adjustable wrench or socket set for drain valve removal if needed.
- Dry cloth or rags to wipe surrounding areas and catch spills.
- Safety glasses to protect eyes from pressurized air release.
- Work gloves to protect hands from sharp edges and cold metal.
- Drain pan or drip tray to contain water and prevent floor damage.
Some compressor models have a simple push-button drain valve requiring no tools. Others feature a twist-open design or threaded valve needing a wrench. Check your compressor’s manual to identify your specific drain valve type before starting. Having a drain pan underneath prevents water from spreading across your workshop floor and creates a cleaner work environment.
Key Takeaway: Basic household tools and a container are sufficient for safe, effective compressor tank drainage.
How Do You Safely Drain an Air Compressor Tank Step by Step?
The drainage process is straightforward but requires attention to safety and proper technique. Following these steps ensures complete moisture removal and prevents accidents or damage to your equipment. Always prioritize safety by wearing protective gear and depressurizing your system before beginning.
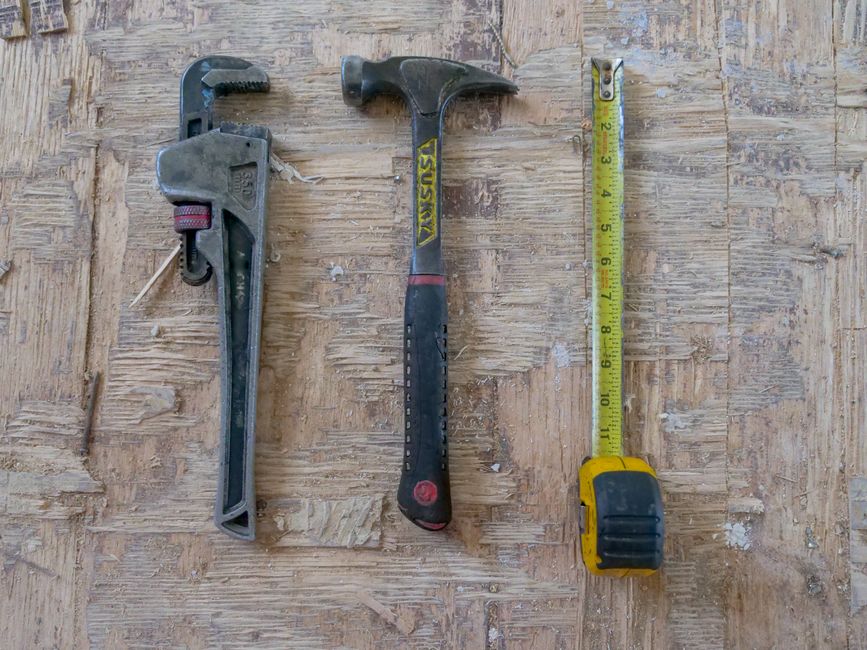
Step-by-Step Drainage Instructions
- Disconnect power: Unplug your compressor from the electrical outlet completely. Never work on a powered-on compressor.
- Release pressure: Open the pressure relief valve or release button to depressurize the tank fully. Listen for the hissing sound to stop.
- Locate the drain valve: Find the drain valve at the tank’s lowest point, usually at the bottom or near the base. Consult your manual if unsure.
- Position your container: Place your bucket or drain pan directly under the drain valve to catch water and compressed air.
- Open the drain valve: Turn the valve counterclockwise or press the button, depending on your model. Open it fully to allow maximum flow.
- Wait for drainage: Allow air and water to escape for 30-60 seconds. You may hear compressed air rushing out initially.
- Close the valve: Turn the valve clockwise or release the button to stop drainage. Ensure it’s fully closed to prevent leaks.
- Inspect the container: Check if water collected in your bucket. Repeat if significant moisture remains.
Most tanks drain completely in one cycle. However, tanks with heavy moisture accumulation may require a second drainage session after a few minutes. Allow the compressor to rest between draining cycles to allow any remaining moisture to settle at the tank bottom. This ensures thorough removal of all condensed water.
Key Takeaway: Depressurize, open the bottom drain valve fully, and allow 30-60 seconds for complete moisture release.
How Often Should You Drain Your Air Compressor Tank?
Drainage frequency depends on your climate, humidity levels, and compressor usage patterns. In dry climates with light use, monthly drainage is typically sufficient. High-humidity areas or heavy daily usage may require weekly or even twice-weekly draining. Check your compressor’s manual for manufacturer recommendations specific to your model.

A practical approach is to drain your tank every time you finish a major project or at the end of each workday. This habit ensures moisture never accumulates to dangerous levels. Some professional users drain their tanks daily, especially in humid regions or when running compressors continuously throughout the day.
- Dry climate with light use: drain monthly or every 4 weeks.
- Moderate climate with regular use: drain weekly or every 7 days.
- Humid climate or heavy daily use: drain twice weekly or every 3-4 days.
- High-humidity environments: drain daily or after each work session.
- Professional/continuous use: drain daily without exception.
Keeping a simple maintenance log helps track drainage schedules and ensures consistency. Mark dates on a calendar or use your phone’s reminder app to establish a routine. Consistent drainage prevents moisture-related problems before they develop and extends your compressor’s operational life significantly.
Key Takeaway: Drain weekly in moderate climates, daily in humid areas, and always after heavy use sessions.
What Additional Maintenance Practices Complement Tank Drainage?
Draining moisture is one component of comprehensive compressor maintenance. Combining drainage with other routine practices maximizes equipment reliability and performance. These complementary tasks work together to keep your compressor operating at peak efficiency for years.
Complementary Maintenance Tasks
- Check and replace air filters regularly to prevent dust contamination and airflow restriction.
- Inspect drain valves for leaks, corrosion, or damage during each drainage session.
- Oil your compressor pump according to manufacturer specifications for smooth operation.
- Examine hose fittings and connections for leaks that could indicate pressure loss.
- Test pressure relief valves monthly to ensure they function correctly under load.
- Inspect the tank exterior for rust spots or physical damage requiring attention.
If you use pneumatic tools like air nailers or spray equipment, maintaining clean air quality is particularly important. Moisture contamination can damage tool seals and reduce performance. For detailed guidance on connecting tools and managing air systems, review our guide on how to connect an air nailer to a compressor. Proper tool setup combined with regular tank drainage ensures consistent, reliable performance.
Air filtration systems and water separators offer additional protection against moisture damage. Some advanced compressors include integrated moisture removal systems. Even with these features, regular manual drainage remains essential for complete moisture control and system longevity.
Key Takeaway: Combine tank drainage with filter replacement, pump oiling, and hose inspection for complete maintenance.
How Can You Prevent Excessive Moisture Accumulation?
Beyond regular drainage, several strategies reduce moisture accumulation rates and minimize system contamination. Environmental controls and equipment upgrades create drier operating conditions and reduce drainage frequency requirements. Implementing these preventive measures is more cost-effective than managing damage from moisture buildup.
Moisture Prevention Strategies
- Store your compressor in a cool, dry location away from direct humidity sources.
- Use an air dryer or desiccant system for professional-grade moisture control.
- Install a water separator filter in your air line for additional contamination removal.
- Insulate your compressor intake to reduce ambient air humidity entering the system.
- Maintain consistent room temperature to minimize condensation on tank surfaces.
- Keep the compressor away from spray painting areas where humidity increases dramatically.
For users working with spray equipment, moisture control becomes critical for paint quality. Our guides on how to set up an HVLP spray gun for painting and how to thin paint for an HVLP gun emphasize the importance of clean, dry compressed air. Poor air quality directly impacts finish quality and tool performance.
Seasonal adjustments help manage moisture variations throughout the year. Summer humidity increases moisture production, requiring more frequent drainage. Winter’s drier air reduces accumulation rates but doesn’t eliminate the need for regular maintenance. Adapting your drainage schedule to seasonal conditions keeps your system in optimal condition year-round.
Key Takeaway: Environmental controls, air dryers, and strategic placement reduce moisture accumulation and minimize drainage frequency.
What Signs Indicate Your Compressor Tank Needs Immediate Drainage?
Certain warning signs suggest your tank has accumulated dangerous levels of moisture requiring immediate attention. Recognizing these indicators helps prevent equipment damage and safety hazards. Don’t ignore these red flags—address them promptly to protect your investment.
- Visible rust spots or discoloration on the tank exterior or interior surfaces.
- Sputtering or irregular air output from connected tools during operation.
- Water droplets or mist visible in the air discharge stream.
- Reduced pressure readings on your gauge despite normal compressor operation.
- Unusual grinding or squeaking sounds from the compressor pump.
- Difficulty starting the compressor or pressure buildup taking longer than normal.
Water discharge from your tools indicates severe moisture contamination requiring immediate drainage. If you notice water in your air output, stop using tools immediately and drain your tank completely. Continued operation with contaminated air accelerates tool damage and creates safety risks.
Rust formation on tank surfaces suggests moisture has been accumulating for extended periods. Surface rust can be cleaned with a wire brush, but deep corrosion indicates structural compromise. If rust penetrates deeply, professional inspection or tank replacement may become necessary. Prevention through regular drainage is far more cost-effective than addressing advanced corrosion damage.
Key Takeaway: Water discharge, rust formation, and pressure loss require immediate tank drainage and potential professional inspection.
How Does Moisture Affect Different Types of Pneumatic Tools?
Different tools suffer varying degrees of damage from moisture contamination. Understanding tool-specific vulnerabilities helps prioritize moisture control in your workshop. Certain applications demand exceptionally clean, dry air for proper function and finish quality.
Spray equipment like HVLP guns is extremely sensitive to moisture. Water in the air stream causes paint sputtering, uneven coverage, and finish defects. For professionals applying coatings, moisture control is non-negotiable. Our comprehensive guide on how to clean an air spray gun after use emphasizes maintaining clean air systems throughout your workflow.
- Spray guns: moisture causes paint sputtering, orange peel texture, and finish defects.
- Die grinders and rotary tools: water damages bearings and reduces precision.
- Air nailers and staplers: moisture causes rust in firing mechanisms and misfires.
- Sanders and buffers: water reduces abrasive effectiveness and causes clogging.
- Impact wrenches: moisture accelerates internal corrosion and reduces torque output.
Pneumatic tools with tight tolerances suffer most from moisture contamination. Bearings, seals, and firing mechanisms corrode quickly when exposed to water. Regular tank drainage protects your tool investment and ensures reliable performance. For users working with specialized tools like air die grinders, maintaining clean air systems is essential for precision work. Learn more in our guide on how to use an air die grinder for porting.
Key Takeaway: Spray equipment requires exceptionally dry air, while all pneumatic tools benefit from regular tank drainage.
Recommended Products

QWORK Automatic Timed Condensate Drain Valve 1/2" NPT Inlet 1/4" Outlet – Programmable Electric Air Drain for Compressor Tanks, Dryers & Filters
- PRECISE TIMER CONTROL: Adjustable ON 0.5–10s and OFF 0.5–45min, easy setup for any drainage cycle
- COMPATIBLE PORT SIZE: Inlet 1/2" NPT Male, Outlet 1/4" NPT Female, fits most air compressor systems
- EASY INSTALLATION: Includes hose, elbow, and sealing tape; connect and adjust knobs to start draining
- BUILT-IN TEST BUTTON: Quickly check operation and ensure secure connection before running
- WIDE USE CASES: Ideal for air tanks, separators, dryers, and other condensate drainage points


As an Amazon Associate we earn from qualifying purchases. Product prices and availability are accurate as of the date/time indicated.

1/2" NPT Air Compressor Water Separator, Industrial Grade 3 Stage Air Drying System with 0-240 PSI Air Regulator, Particulate Filter, Coalescing Filter, Desiccant Dryer, Metal Bowl, Auto Drain
- [All-in-one Air Drying System]: Constructed with a high-strength metal bowl and visible sight glasses for safety monitoring. This air compressor filter dryer is built for industrial environments, includes everything for immediate setup: 2 x 5 Micron Filter Element(One of Them is Installed in the Product), 3 x 0.01 Micron Filter Element (Same as Above), 5 pack Desiccant Beads Bag, 1x Nickel-plated Iron Air Plug, 1x Nickel-plated Iron Air Coupler, 2 Male Pipe, and 1 Thread Seal Tape, providing a complete air compressor dryer system solution
- Filter & Regulator Combo: The first line of defense features a compressed air water trap with a 5-micron filter element, removing over 95% of water and large particles. The integrated air compressor pressure regulator stabilizes your air line, and the safety lock knob prevents accidental changes. This acts as a powerful water trap for air compressor and inline air regulator in one
- Coalescing Filter: Our coalescing filter is equipped with an ultra-fine 0.01-micron element, capturing 99.98% of remaining moisture, oil aerosols, and microscopic impurities. A clear red indicator pops up to provide a visual alert when the compressed air filter element requires replacement, ensuring your air quality never drops
- Desiccant Air Dryer: The final stage forces air through a metal bowl filled with desiccant beads, providing the deepest level of drying for moisture-sensitive applications. The color-changing beads (blue to pink) offer a clear, visual signal for maintenance. This desiccant air dryer is essential for achieving dry air for airbrush, painting, and sandblasting
- Industrial Performance: This 3-stage industrial air drying system combines an air compressor regulator, water separator, and desiccant air dryer into one robust unit. Featuring durable 1/2” NPT ports, ensuring consistent power for your demanding tools. The precise air pressure regulator with gauge (0-240 PSI) allows for easy and accurate adjustment, protecting your equipment from pressure fluctuations. Auto drain only works properly when the filter is vertically mounted, and water drainage shall be deployed beneath the water discharge for the outlet of water into the proper area


As an Amazon Associate we earn from qualifying purchases. Product prices and availability are accurate as of the date/time indicated.
Frequently Asked Questions
Can I drain my compressor tank while it’s still pressurized?
Never drain a pressurized tank. Always disconnect power and fully release air pressure using the pressure relief valve before opening the drain. Operating on a pressurized tank creates serious safety hazards including sudden air release, injury from flying debris, and equipment damage. Take 30 seconds to depressurize properly before proceeding.
What should I do if water doesn’t come out when I open the drain valve?
If no water appears, your tank may be relatively dry or the drain valve may be clogged. Try opening the valve more fully or tapping gently on the tank bottom to dislodge settled sediment. If still nothing emerges, the valve itself might be blocked by rust or mineral deposits. Consult your manual or contact the manufacturer for valve cleaning or replacement instructions.
How do I know if my drain valve is broken or leaking?
A leaking drain valve will show water dripping continuously, even when closed. Corrosion, mineral buildup, or debris prevents the valve from sealing completely. If leaking occurs, the valve needs cleaning or replacement. Order a replacement valve from your compressor manufacturer and install it following provided instructions or seek professional service.
Is it safe to drain my compressor indoors?
Draining indoors is safe if you use a drain pan to catch water and prevent floor damage. Place the pan directly under the drain valve to contain all moisture. Ensure adequate ventilation since compressed air release creates noise. For large tanks, consider draining outdoors to avoid water spillage on finished floors.
What’s the difference between draining and using a water separator?
Manual draining removes accumulated water from the tank bottom. Water separators filter moisture from the air as it travels through your lines. Both serve different purposes—draining addresses tank accumulation while separators protect downstream equipment. Using both methods provides comprehensive moisture control for maximum equipment protection.
Can moisture in my compressor tank cause the tank to explode?
Moisture itself doesn’t cause explosions, but severe corrosion weakens tank walls and reduces structural integrity. A corroded tank under pressure may develop cracks or rupture, creating dangerous conditions. Regular drainage prevents corrosion and maintains tank safety. If rust penetrates deeply, professional inspection or replacement becomes necessary.
Conclusion: Why Regular Compressor Tank Drainage Matters in 2026
Draining moisture from your air compressor tank is one of the most important maintenance tasks you can perform. This simple 5-10 minute process prevents rust, extends equipment life, protects pneumatic tools, and ensures consistent air quality for all applications. In 2026, with advanced tools and equipment becoming increasingly expensive, preventive maintenance through regular drainage is a smart investment in equipment longevity.
Establishing a consistent drainage routine—weekly for most users, more frequently in humid climates—keeps your compressor operating reliably for years. Combine drainage with complementary maintenance practices like filter replacement and pump oiling for comprehensive system care. Whether you’re using spray equipment, nailers, sanders, or specialized tools, clean dry air delivered through a well-maintained compressor ensures professional results and maximum tool performance.
Don’t overlook this fundamental maintenance task. The few minutes spent draining your tank regularly prevents costly repairs, extends equipment life, and keeps your workshop running smoothly. Make tank drainage part of your standard operating procedure, and you’ll enjoy reliable compressor performance and tool operation for years to come.







Write Your Review
No reviews yet. Be the first to share your experience!