

How to Thin Paint for an HVLP Gun: Quick Answer
Thinning paint for an HVLP gun requires reducing viscosity to 18-22 seconds using a Ford Cup viscosity meter. Mix paint with the manufacturer’s recommended thinner at a 4:1 or 3:1 ratio, depending on paint type and gun specifications. Stir thoroughly for 2-3 minutes to ensure uniform consistency. Test spray on cardboard before applying to your project. Proper thinning prevents clogs, reduces overspray, and delivers professional-quality finishes with even coverage.

HomeRight Super Finish Max HVLP Paint and Stain Sprayer, 3 Brass Tips
- Life changing paint sprayer: this paint sprayer requires less thinning compared to finish max or other hand-held paint sprayers
- Easy to use for eager Painters: fast and easy setup, multiple spray settings and quick cleaning make this sprayer a top pick for do-it-yourselfers
- Lightweight: despite having more power than the finish max, this paint sprayer is still lightweight in the user’s hand
- Spray everything with less thinning: ideal for spraying a smooth finish on fences, decks, furniture, cabinets, crafts, dressers or anything you want
- Best purchase you will ever make: save money by using this paint sprayer to tackle all of your household painting and staining projects


As an Amazon Associate we earn from qualifying purchases. Product prices and availability are accurate as of the date/time indicated.
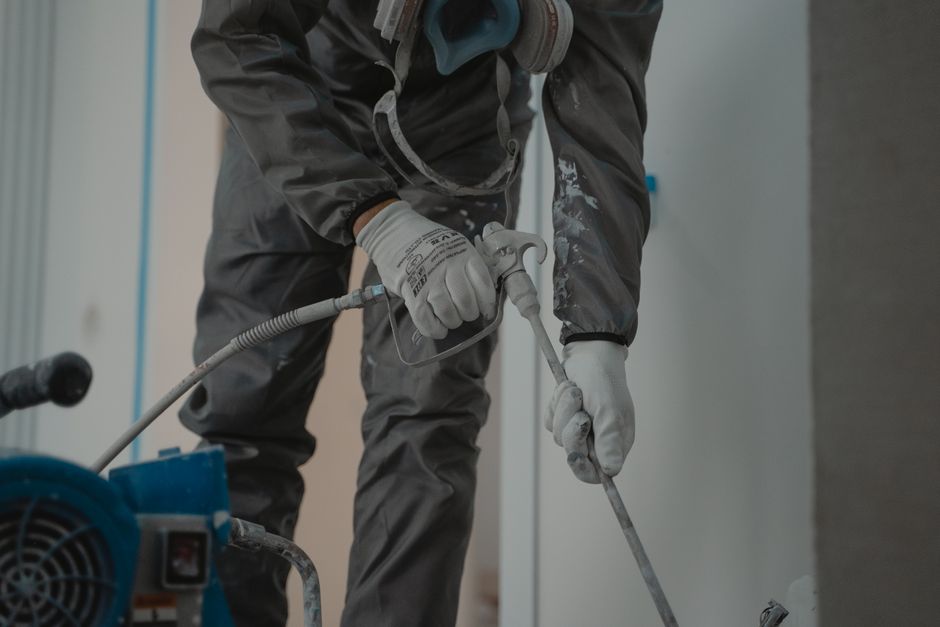
HVLP (High Volume Low Pressure) guns revolutionized spray painting by delivering superior control and minimal waste compared to conventional spray equipment. These tools operate at lower pressures, which means they require properly thinned paint to function effectively. Incorrect viscosity causes application problems ranging from orange peel texture to excessive overspray and wasted material. Understanding the science behind paint thinning ensures consistent results whether you’re refinishing furniture, painting cabinets, or applying automotive topcoats.
What Is Paint Viscosity and Why Does It Matter for HVLP Guns?
Paint viscosity measures how thick or thin a liquid flows. HVLP guns require lower viscosity than conventional spray equipment because they operate at reduced air pressure. When paint is too thick, the gun cannot atomize it properly, resulting in uneven coverage and excessive buildup. When paint is too thin, you lose opacity and may experience runs or sagging on vertical surfaces.
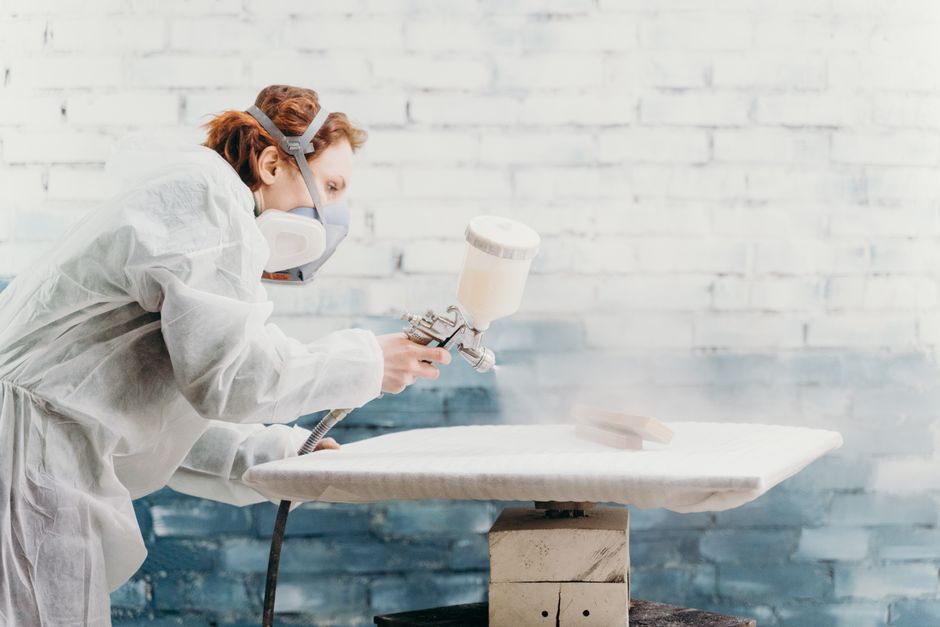
The ideal viscosity for HVLP application ranges from 18 to 22 seconds using a Ford Cup viscosity meter. This measurement represents the time required for paint to flow through a standardized cup orifice. Different paint types—acrylics, lacquers, enamels, and polyurethanes—have different starting viscosities, so thinning requirements vary significantly.
- Acrylic paints typically need 15-20% thinner added.
- Lacquers usually require 25-35% thinner for proper atomization.
- Enamels often need 10-15% thinner depending on brand.
- Polyurethanes may require 20-30% thinner for HVLP application.
Key Takeaway: Proper viscosity is essential for HVLP gun performance, and a Ford Cup meter is your most reliable tool for measuring it accurately.
Understanding Ford Cup Measurement
A Ford Cup is a small metal or plastic cup with a standardized orifice at the bottom. You fill it with paint and measure how many seconds it takes to empty. This simple tool provides consistent viscosity readings across different paint types and brands. Most HVLP manufacturers recommend 18-22 seconds, though some premium guns perform better at 20-24 seconds.
How Do You Choose the Right Thinner for Your Paint?
Selecting the correct thinner is critical because incompatible thinners can damage paint chemistry, cause separation, or create surface defects. Always check the paint manufacturer’s technical data sheet for recommended thinning products. Using the wrong thinner voids warranties and produces unpredictable results. Different paint types require specific solvent formulations.
Water-based paints use water or specialized water-reducible thinners. Oil-based and lacquer paints require mineral spirits, lacquer thinner, or enamel reducers. Polyurethane paints often need specific reducers formulated to control drying time and flow characteristics. Never substitute one thinner type for another without consulting the paint manufacturer.
- Water-based acrylics: Use distilled water or water-reducible paint thinner.
- Lacquers: Use lacquer thinner or enamel reducer for HVLP application.
- Oil-based enamels: Use mineral spirits or enamel reducer.
- Polyurethanes: Use manufacturer-specific polyurethane reducer.
- Stains: Use appropriate wood stain thinner matching the stain base.
Key Takeaway: Always use the paint manufacturer’s recommended thinner to maintain paint integrity and achieve optimal spray results.
Reading Technical Data Sheets
Paint manufacturers provide detailed technical data sheets specifying recommended thinning ratios, flash-off times, and application temperatures. These documents are your reference guide for achieving professional results. Most sheets list multiple thinner options with specific dilution percentages. Download and reference the data sheet before starting your project to avoid costly mistakes.
What Are the Step-by-Step Instructions for Thinning Paint?
Proper technique ensures uniform consistency and prevents contamination or separation issues. Follow these steps carefully to achieve optimal paint viscosity for your HVLP gun application. Rushing this process compromises spray quality and wastes materials. Taking time to thin correctly saves money and produces professional finishes.
Preparation and Measurement
Start by preparing a clean container and measuring both paint and thinner accurately. Use graduated measuring cups or syringes for precise ratios. A typical starting point is a 4:1 paint-to-thinner ratio, meaning four parts paint to one part thinner. Adjust based on your Ford Cup readings and paint type. Never estimate measurements by eye.
- Pour paint into a clean container and measure the volume.
- Calculate thinner quantity using your target ratio.
- Measure thinner into a separate cup before adding.
- Add thinner slowly while stirring constantly.
- Stir for 2-3 minutes using a paint stirrer or drill mixer.
- Let mixture settle for 5 minutes before testing.
- Use Ford Cup to measure viscosity at 70-75°F.
- Adjust with additional thinner if needed.
Testing and Adjustment
After thinning, test your paint mixture before applying it to your actual project. Spray a small amount on cardboard to observe atomization, coverage, and flow characteristics. Look for consistent mist pattern without dripping or excessive overspray. If the pattern is uneven or paint drips, adjust viscosity slightly and retest.
Temperature affects viscosity significantly—warm paint flows more easily than cold paint. If your workspace is below 65°F, warm the paint slightly or add slightly less thinner. Record your successful ratio for future reference. This documentation saves time on similar projects and ensures consistency across multiple applications.
Key Takeaway: Always test thinned paint on cardboard before applying to finished surfaces to verify proper atomization and coverage.
What Common Mistakes Should You Avoid When Thinning Paint?
Many painters make preventable errors that compromise spray quality and waste materials. Understanding these mistakes helps you achieve professional results consistently. Learning from others’ experiences accelerates your skill development and reduces project failures. Awareness is your first defense against poor outcomes.
- Using incompatible thinners that damage paint chemistry or cause separation.
- Over-thinning paint, resulting in poor opacity and excessive overspray.
- Under-thinning paint, causing clogs and uneven spray patterns.
- Failing to stir thoroughly, leaving unmixed thinner in the bottom.
- Ignoring temperature effects on viscosity and spray behavior.
- Not cleaning the Ford Cup between measurements, affecting accuracy.
- Mixing paint and thinner in dirty containers with residue.
Temperature and Environmental Factors
Paint viscosity changes dramatically with temperature fluctuations. A mixture that sprays perfectly at 75°F may be too thick at 55°F or too thin at 85°F. Ideal spraying conditions occur between 65-75°F with 40-60% humidity. Cold paint requires slightly less thinner, while warm paint may need additional thinner. Check your Ford Cup readings in actual working conditions, not in a climate-controlled office.
How Can You Maintain Proper Consistency During Application?
Paint consistency changes as you spray due to solvent evaporation and temperature variations. Monitoring viscosity throughout your project ensures consistent results from the first coat to the last. Professional painters regularly recheck viscosity during extended spraying sessions. This attention to detail separates amateur results from professional-quality finishes.
Keep your paint container covered between applications to minimize evaporation. If you’re spraying for more than 30 minutes, recheck viscosity every 20-30 minutes. Add small amounts of thinner if viscosity creeps above your target range. Stir paint thoroughly before each application to redistribute any settled pigments or additives.
- Check viscosity every 20-30 minutes during extended spraying sessions.
- Keep paint covered to prevent solvent evaporation.
- Stir thoroughly before each application cycle.
- Add thinner in small increments, not large amounts.
- Maintain workspace temperature between 65-75°F if possible.
Key Takeaway: Monitor paint viscosity throughout your project to maintain consistent spray quality and professional finishes.
What Equipment Do You Need for Proper Paint Thinning?
Having the right tools makes paint thinning efficient and accurate. Investing in quality equipment pays dividends through improved results and reduced material waste. Professional painters prioritize these tools as essential investments. Proper equipment separates successful projects from frustrating failures.
- Ford Cup viscosity meter ($15-30) for accurate measurement.
- Graduated measuring cups or syringes for precise ratios.
- Clean containers free of residue or contaminants.
- Paint stirrer or electric drill mixer for thorough blending.
- Thermometer to monitor paint and workspace temperature.
- Strainer or paint filter to remove particles before application.
- Spray gun cup or pot for your HVLP equipment.
Choosing the Right Measuring Tools
Accuracy in measuring paint and thinner directly impacts final results. Graduated measuring cups designed for paint provide clear markings and chemical resistance. Syringes offer excellent precision for small quantities. Avoid using kitchen measuring cups, which lack accuracy and may absorb solvents. Quality measuring tools cost little but prevent expensive material waste.
How Does Paint Type Affect Thinning Requirements?
Different paint formulations have unique thinning requirements based on their chemical composition and intended application. Understanding these differences prevents mistakes and optimizes results for each paint type. Each category requires specific techniques and thinner products. Knowledge of these distinctions marks experienced painters.
Water-Based Acrylic Paints
Acrylic paints thin with water or water-reducible paint thinner. These eco-friendly options produce minimal odor and clean up easily with water. Typical thinning ratios range from 10-20% by volume. Add water gradually while stirring to achieve your target viscosity. Over-thinning acrylics reduces opacity, so be conservative with additions.
Lacquer-Based Finishes
Lacquers require lacquer thinner or specialized enamel reducers for HVLP application. These fast-drying finishes need aggressive thinning, typically 25-35% thinner by volume. Lacquers demand careful temperature control—apply only between 60-85°F. Flash-off times are critical with lacquers, so follow the manufacturer’s specifications precisely.
Oil-Based Enamels
Enamel paints thin with mineral spirits or enamel reducer. These durable finishes typically need 10-15% thinner for HVLP application. Enamels dry slowly, allowing time for self-leveling and bubble elimination. Maintain consistent temperature and humidity during application and curing. Oil-based enamels require excellent ventilation due to solvent fumes.
Polyurethane Finishes
Polyurethane paints demand manufacturer-specific reducers formulated to control drying time and flow characteristics. Thinning ratios typically range from 15-30% depending on the specific product. These two-component systems require precise mixing protocols before thinning. Never substitute generic thinners for polyurethane reducers, as this compromises hardness and durability.
Key Takeaway: Each paint type requires specific thinners and ratios; always consult the manufacturer’s technical data sheet for your exact product.
What Are Professional Tips for Achieving Perfect HVLP Spray Results?
Professional painters use proven techniques to achieve consistent, flawless finishes across diverse projects. These strategies combine proper thinning with application expertise and environmental control. Implementing these practices elevates your spray painting skills significantly. Success comes from combining knowledge with disciplined technique.
- Thin paint in a climate-controlled environment between 65-75°F.
- Use a Ford Cup meter consistently—don’t estimate viscosity by observation.
- Test spray patterns on cardboard before each new paint batch.
- Strain paint through a fine filter before pouring into the gun cup.
- Apply thin coats rather than thick coats to minimize runs and overspray.
- Maintain consistent spray distance and speed for uniform coverage.
- Allow proper flash-off time between coats per manufacturer specifications.
- Document successful thinning ratios for future reference and consistency.
Professional painters maintain detailed spray logs recording paint type, thinner used, ratio, temperature, humidity, and results. This documentation eliminates guesswork on future projects and accelerates your learning curve. Over time, you’ll develop intuition about viscosity, but data-driven decisions always outperform guessing.
Key Takeaway: Professional results come from combining proper thinning technique with meticulous application practices and detailed record-keeping.
How Does HVLP Gun Setup Relate to Paint Thinning?
Proper paint thinning works synergistically with correct HVLP gun setup and adjustment. Even perfectly thinned paint produces poor results if your gun is improperly configured. For detailed guidance on setting up your HVLP equipment, refer to our comprehensive How to Set Up an HVLP Spray Gun for Painting in 2026: Complete Guide. Gun pressure, fan width, fluid delivery, and paint cup positioning all affect spray quality.
HVLP guns typically operate at 0.8-1.3 bar (12-19 PSI) at the cap. Lower pressures require thinner paint for proper atomization. Higher pressures allow slightly thicker paint but increase overspray and waste. Consult your gun’s manual for optimal pressure settings with your specific paint type. Balancing gun pressure with paint viscosity optimizes performance and minimizes material waste.
What Should You Do After Thinning Paint?
Proper post-thinning procedures ensure your paint remains usable and your equipment stays in excellent condition. These final steps prevent waste and maintain spray gun functionality. Taking time for these details extends equipment life and ensures consistent results. Professional painters prioritize these finishing touches.
- Filter thinned paint through a fine mesh strainer before use.
- Pour paint into your spray gun cup slowly to avoid air bubbles.
- Keep unused thinned paint in sealed containers away from heat.
- Label containers with paint type, thinner ratio, and date prepared.
- Clean your spray gun thoroughly after each use following manufacturer instructions.
- Store thinned paint in cool, dark locations for up to 30 days.
For comprehensive guidance on cleaning your spray equipment, see our detailed How to Clean an Air Spray Gun After Use in 2026: Complete Guide. Proper maintenance prevents dried paint buildup that clogs nozzles and degrades spray quality. Establish a cleaning routine immediately after finishing each spraying session.
Key Takeaway: Filtering thinned paint and proper storage extend usability while maintaining spray gun performance and longevity.
Recommended Products

VONFORN Paint Sprayer, 700W Spray Paint Gun with 4 Nozzles & 3 Patterns
- 【4 Nozzles & 3 Spray Patterns】VONFORN 700W paint sprayer includes 4 nozzle sizes (1.0mm, 1.5mm, 2.0mm, 3.0mm) to accommodate various DIY projects on surfaces such as furniture, fences, walls, doors, and garden sets. It supports 3 adjustable spray patterns: horizontal, vertical, and circular, making it suitable for a wide variety of application scenarios
- 【Dust Blowing & Convenient Cleaning】Before spraying, use the matching dust blowing joint to clear dust and debris from the surface for a smoother finish. After use, simply connect the cleaning connector to a faucet to flush out residual paint inside the tube, enabling quick and efficient cleaning
- 【Easy to Use & Clean】This paint sprayer features tool-free assembly, allowing even beginners to get started quickly with the included manual. To maintain optimal performance, we include a cleaning brush and a nozzle needle to remove residue, enabling thorough cleaning after every project
- 【Adjustable Flow Control】This paint sprayer features a flow control knob that allows you to fine-tune the paint output to fit various project needs. Regulating the flow helps achieve a consistent finish while supporting efficient paint usage during operation
- 【What You Will Get】Package includes: 1 × Paint Sprayer, 4 × Nozzle Sizes, 5 × Paint Filters, 1 × Viscosity Cup, 1 × Nozzle Cleaning Needle, 1 × Cleaning Brush, 1 × Dust Blowing Joint, 1 × Cleaning Connector, 1 × Pot Lid, and 1 × User Manual. If you have any problems with our paint sprayer, please don't hesitate to reach out to us, and we will answer it within 24 hours


As an Amazon Associate we earn from qualifying purchases. Product prices and availability are accurate as of the date/time indicated.

2-Pack Paint Viscosity Cup for Paint Sprayer, Plastic Flow Viscosity Cup Set with Handle, Liquid Consistency Tester for Paint, Coatings, Resin, Oil & DIY Projects
- Check paint consistency before spraying: Use this paint viscosity cup to dip, fill, and time the liquid flow so you can compare it with your sprayer’s recommended range before loading paint
- Helps reduce thinning guesswork: The flow viscosity cup gives a simple visual way to see whether paint, stain, resin, oil, or other liquids are running too thick or too thin for your project
- Made for paint sprayer prep: A practical viscosity cup for paint sprayer users, DIY painters, automotive touch-ups, wood staining, resin work, inks, varnish, and small coating batches
- 2-pack plastic cup set with handles: Keep one cup for paint and one for another material, or use both across multi-batch jobs; sturdy reusable plastic is easy to rinse after use
- Clear limits for better expectations: This is a simple gravity-style liquid consistency cup for general paint and coating prep, not a lab-grade viscometer or micro-detail cup


As an Amazon Associate we earn from qualifying purchases. Product prices and availability are accurate as of the date/time indicated.
Frequently Asked Questions
Can You Use Water to Thin Oil-Based Paint for HVLP Guns?
No, water will not mix with oil-based paint and will ruin the finish. Oil-based paints require mineral spirits, enamel reducer, or manufacturer-specific thinners. Water causes separation, poor atomization, and surface defects. Always use the correct solvent type for your paint base to maintain chemical compatibility.
What Happens If You Thin Paint Too Much?
Over-thinned paint loses opacity, requiring multiple coats to achieve coverage. Excessive thinning increases overspray and waste while producing thin, watery finishes that sag on vertical surfaces. Your Ford Cup reading will fall below 18 seconds if over-thinned. Add small amounts of paint to restore proper viscosity rather than starting over.
How Often Should You Check Paint Viscosity During Spraying?
Check viscosity every 20-30 minutes during extended spraying sessions to account for solvent evaporation and temperature changes. Quick spot-checks prevent viscosity drift that degrades spray quality. Professional painters make this a routine habit. Consistency throughout your project ensures uniform finishes across all surfaces.
Can You Thin Spray Paint Designed for Aerosol Cans in HVLP Guns?
No, aerosol spray paint formulations differ significantly from HVLP-compatible paints and contain propellants that damage spray equipment. Never attempt to thin aerosol paint for use in HVLP guns. Always use paints specifically formulated for your spray equipment type. Using incompatible products voids warranties and damages equipment.
What Temperature Range Is Ideal for Thinning and Spraying Paint?
Ideal conditions fall between 65-75°F with 40-60% humidity. Temperatures below 60°F make paint too thick and slow drying excessively. Temperatures above 80°F cause paint to thin naturally and dry too quickly, creating orange peel texture. Check both ambient temperature and paint temperature before spraying for accurate results.
Does Humidity Affect Paint Thinning Requirements?
High humidity (above 70%) slows solvent evaporation, potentially requiring slightly less thinner. Low humidity (below 30%) accelerates evaporation, sometimes requiring additional thinner during application. Humidity also affects drying time and surface finish quality. Maintain 40-60% humidity when possible for optimal results. Monitor conditions throughout your project and adjust as needed.
How Can You Master Paint Thinning for Professional HVLP Results?
Mastering paint thinning combines understanding paint chemistry, precise measurement, and consistent technique. Start with your paint manufacturer’s technical data sheet and recommended thinning ratios. Invest in a Ford Cup viscosity meter—this single tool transforms your spray results more than any other investment. Practice on scrap materials before applying thinned paint to finished projects.
Keep detailed records of successful thinning ratios, environmental conditions, and results for each paint type you use. Over time, this documentation becomes invaluable reference material that eliminates guesswork. Professional painters recognize that thinning is as important as spray technique—both require equal attention and discipline. Combining proper thinning with the techniques in our HVLP gun setup guide creates a foundation for consistently excellent results.
Remember that environmental factors constantly influence paint behavior. Temperature, humidity, and air circulation all affect viscosity and drying characteristics. Successful painters adapt their thinning ratios based on actual conditions rather than theoretical recommendations. This flexibility, combined with disciplined measurement and testing, separates professional results from amateur attempts. Commit to these practices, and your HVLP spray painting will achieve professional quality consistently.
Key Takeaway: Master paint thinning by combining manufacturer specifications, precise Ford Cup measurements, detailed record-keeping, and adaptation to environmental conditions for professional results every time.







Write Your Review
No reviews yet. Be the first to share your experience!