

What Wood Is Easiest to Carve for Beginners in 2026?
Basswood is the gold standard for beginner carvers because it’s soft, fine-grained, and forgiving. It cuts cleanly with minimal tool pressure and resists splintering better than other soft woods. Butternut, aspen, and white pine are equally accessible alternatives that produce excellent results without frustration. Beginners should avoid hardwoods like oak and maple until they develop proper technique—these dense woods require sharp tools, steady hands, and significant experience. September 2026 marks an ideal time to start your carving journey, as fall weather provides perfect conditions for working with wood indoors or in covered spaces.

Wood carving offers incredible creative satisfaction and requires minimal startup investment. A quality carving knife, a sharpening stone, and the right wood are all you need to begin. Understanding wood grain direction and selecting forgiving materials prevents the frustration that stops many beginners. This guide reveals which woods work best, why they matter, and how to choose the perfect starter projects for your skill level.
Which Soft Woods Are Best for Beginning Carvers?
Soft woods are essential for beginners because they require less force and provide immediate feedback. They forgive minor mistakes and allow you to focus on learning proper carving techniques. Soft woods also sharpen your tools less frequently, reducing maintenance demands during your learning phase.
Basswood: The Carver’s Favorite
Basswood dominates beginner carving projects for excellent reasons. Its uniform, fine grain structure makes it predictable and easy to work with. The wood cuts smoothly in all directions, even against the grain, which is rare among carving woods. Basswood is lightweight, affordable, and widely available at craft stores and online retailers.
- Fine, uniform grain prevents splintering and tearout.
- Cuts cleanly with minimal tool pressure required.
- Works equally well with knives, gouges, and power tools.
- Readily available in hobby-sized blanks and blocks.
- Affordable compared to specialty hardwoods.
Key Takeaway: Basswood’s forgiving nature and consistent grain make it the ideal wood for learning fundamental carving techniques.
Butternut and Aspen Alternatives
Butternut offers slightly more character than basswood while remaining beginner-friendly. Its warm brown color adds visual interest to finished pieces. Aspen provides another excellent option with very soft, workable wood that’s nearly as forgiving as basswood.
Both woods carve beautifully and accept finishes well. Butternut develops a rich patina over time, making it ideal for decorative pieces. Aspen is lighter in color and slightly more delicate, so it suits detailed relief carving better than sculptural work.
Why Should Beginners Avoid Hard Woods Initially?
Hardwoods like oak, maple, and walnut demand significantly more experience and skill. They require extremely sharp tools, steady hand control, and proper technique to avoid tearout. Beginners often become frustrated with hardwoods because they require excessive force and produce disappointing results. Starting with soft woods builds confidence and proper habits before tackling challenging materials.
The Tearout Problem
Tearout occurs when carving against the grain in dense wood. Large splinters rip away from the surface, ruining your work. Soft woods like basswood resist tearout because their grain structure is less pronounced. This forgiving quality lets beginners practice without constant frustration.
- Hard woods split and splinter when cut against the grain.
- Dull tools become dangerous when carving dense materials.
- Excessive force increases injury risk for inexperienced carvers.
- Mistakes in hard wood are often irreversible.
Key Takeaway: Hard woods punish poor technique, making them unsuitable for beginners still developing their carving skills.
Tool Sharpness Requirements
Hard woods require razor-sharp tools to cut cleanly. Dull blades slip and catch, creating dangerous situations for beginners. Soft woods tolerate slightly duller tools, giving you more flexibility during the learning phase. This allows you to focus on technique rather than constant tool maintenance.
How Do You Choose the Right Wood Blank for Your Project?
Selecting appropriate wood blanks depends on your project type and carving experience level. Smaller blanks teach fundamentals without overwhelming commitment. Larger pieces develop advanced skills once you’ve mastered basic techniques. Wood grain direction, moisture content, and blank quality all influence carving success.
Blank Size and Project Complexity
Start with small blanks measuring two to four inches. These manageable sizes let you complete projects quickly and build confidence rapidly. Spoon blanks, simple animal forms, and geometric designs suit beginners perfectly. Progress to larger pieces only after completing five to ten successful small projects.
- Two-inch blanks: Perfect for learning basic cuts and strokes.
- Four-inch blanks: Ideal for simple animal or geometric designs.
- Six-inch blanks: Suitable for detailed relief carving after basic mastery.
- Eight-inch-plus blanks: Reserve for experienced carvers with established techniques.
Key Takeaway: Begin with two to four-inch blanks to build skills without overwhelming yourself with large projects.
Moisture Content and Grain Direction
Wood moisture content dramatically affects carving difficulty. Properly dried wood (eight to twelve percent moisture) carves smoothly and predictably. Overly dry wood becomes brittle and splinters easily. Freshly cut wood is too soft and tears unpredictably. Purchase pre-dried blanks from reputable suppliers to ensure consistent results.
Grain direction determines carving ease significantly. Vertical grain (running along the blank’s length) carves more smoothly than horizontal grain. Always examine your blank before starting. Run your hand along the surface to feel grain direction, then plan your carving strokes accordingly.
What Carving Tools Work Best for Soft Woods?
Quality tools make carving enjoyable and successful. Beginners don’t need expensive professional sets—a few essential tools suffice. A sharp carving knife, a basic gouge set, and a sharpening stone cover most beginner projects. Invest in quality over quantity to avoid frustration with dull, poorly-made tools.
Essential Tool Kit for Beginners
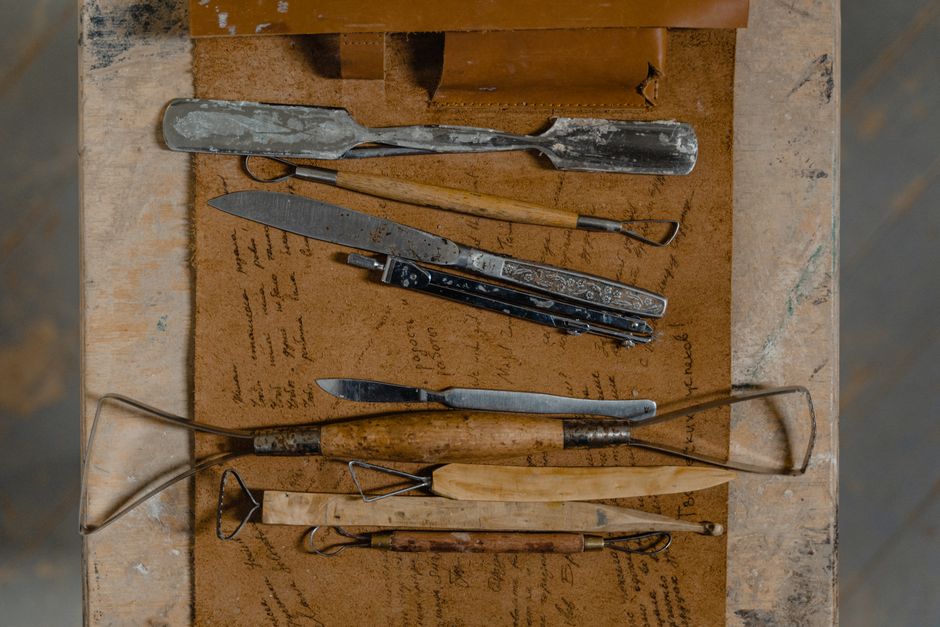
A minimal beginner kit includes three to five tools. A straight carving knife handles most work. A medium gouge (approximately one-quarter inch) removes larger areas. A small detail knife adds fine detail capability. This combination handles ninety percent of beginner projects effectively.
- Carving knife: For general shaping and detail work.
- Medium gouge: For removing larger wood areas efficiently.
- Detail knife: For fine lines and intricate features.
- Sharpening stone: Essential for maintaining sharp edges.
- Cutting board: Protects your work surface and hands.
Key Takeaway: Three to five quality tools and a sharpening stone provide everything needed for successful beginner carving projects.
Tool Maintenance and Safety
Sharp tools are safer than dull ones because they require less force and provide better control. Dull blades slip and catch, causing injuries. Maintain your tools by stropping them regularly on leather and using a sharpening stone weekly. Store tools safely in a dedicated block or case to prevent accidents.
What Practical Steps Should You Follow to Start Carving?
Success requires a structured approach. Gather materials, learn basic techniques, and practice consistently. Start with simple projects before attempting complex designs. This methodical progression builds skills and confidence simultaneously.
Your Beginner Carving Roadmap
Follow these steps to begin your carving journey successfully:
- Step 1: Purchase basswood blanks (two to four inches) from craft suppliers.
- Step 2: Invest in a quality carving knife and basic gouge set.
- Step 3: Buy a sharpening stone and learn proper stropping technique.
- Step 4: Start with simple geometric shapes or spoon projects.
- Step 5: Practice basic cuts: stop cuts, push cuts, and pull cuts.
- Step 6: Complete five small projects before attempting larger pieces.
- Step 7: Join carving communities online for feedback and inspiration.
Developing Proper Technique
Technique matters more than materials. Always carve away from your body and keep your hands behind the blade. Use controlled, deliberate strokes rather than aggressive chopping. Let the sharp tool do the work—excessive force indicates dull tools or poor technique. Practice these fundamentals on basswood before moving to harder woods.
Watch instructional videos from experienced carvers. Many excellent resources are available free on video platforms. Study how professionals hold tools, position their hands, and control grain direction. Beginner-specific instruction accelerates your learning dramatically.
How Do You Finish and Protect Your Carved Pieces?
Finishing enhances your carving’s appearance and protects the wood. Soft woods accept finishes beautifully. Light sanding with fine-grit paper (220 and above) smooths surfaces without removing detail. Apply appropriate finishes based on your piece’s purpose and desired appearance.
- Oil finishes: Enhance wood grain and provide moderate protection.
- Wax finishes: Create smooth, natural appearance with easy maintenance.
- Lacquer or polyurethane: Provide durable protection for display pieces.
- Natural finish: Showcase wood color without additional coatings.
Key Takeaway: Simple finishes like oil or wax enhance your carved pieces while protecting them from moisture and handling damage.
What Are Common Beginner Carving Mistakes to Avoid?
Learning from others’ mistakes accelerates your progress. Most beginners make predictable errors that compromise results. Understanding these pitfalls helps you avoid frustration and produce better work immediately.
Tool and Material Mistakes
Using dull tools is the most common beginner mistake. Dull blades slip, catch, and produce ragged cuts. Beginners often blame the wood when the real problem is tool sharpness. Invest in a quality sharpening stone and maintain your tools religiously. This single habit transforms your carving experience.
Choosing wrong wood is another frequent error. Beginners often grab whatever wood is available without considering grain and density. Always select soft woods with fine grain for your first projects. Basswood specifically prevents frustration and teaches proper technique.
- Using dull tools: Causes slipping, poor control, and dangerous situations.
- Wrong wood selection: Hard woods punish beginner mistakes severely.
- Carving toward yourself: Creates dangerous situations and injuries.
- Ignoring grain direction: Results in tearout and ruined projects.
- Rushing projects: Leads to mistakes and poor quality results.
Key Takeaway: Sharp tools, proper wood selection, and safe technique prevent the frustration that stops most beginners.
Where Can You Find Quality Carving Supplies and Community?
September 2026 offers excellent resources for beginning carvers. Online retailers provide worldwide access to quality materials. Local woodworking shops offer personalized advice and community connections. Carving groups and online forums provide feedback and inspiration.
Specialty carving suppliers like Carving is Woodworking offer curated beginner kits and premium materials. Craft stores like Michaels and Joann carry basswood blanks and basic tools. Online communities on Reddit and specialized forums connect you with experienced carvers who remember being beginners.
Frequently Asked Questions
Can you carve basswood with just a pocket knife?
Yes, basswood’s softness allows carving with quality pocket knives, though dedicated carving knives work better. Pocket knives have shorter blades and less control than carving tools. Invest in proper carving knives for better results and safer handling. The small cost difference pays dividends in quality and enjoyment.
How long does it take to learn basic wood carving?
Most people develop basic competence within ten to twenty hours of practice. Consistent practice accelerates learning significantly. Completing five to ten small projects teaches fundamental techniques thoroughly. Advanced skills develop over months and years, but satisfying results appear quickly with proper materials and instruction.
Is white pine good for beginners?
White pine works for beginners but isn’t ideal compared to basswood. Pine grain is less uniform and more prone to splintering. It carves adequately when properly dried and with sharp tools. Basswood remains superior, but white pine serves as an acceptable alternative when basswood isn’t available.
Do you need special wood stain for carved pieces?
No special stain is required, though wood stain enhances appearance. Soft woods like basswood accept stain beautifully. Use quality wood stain designed for hand-applied finishing. Test stain on scrap wood first to ensure desired color. Many carvers prefer natural finishes that showcase wood color without staining.
What’s the difference between chip carving and relief carving?
Chip carving removes small chips from flat surfaces, creating geometric patterns. Relief carving creates three-dimensional images by removing background wood. Both techniques suit soft woods perfectly. Chip carving is simpler for absolute beginners. Relief carving develops more advanced skills but produces impressive results quickly.
Can you carve wet wood?
Wet wood is difficult and unpredictable for carving. It’s too soft and tears easily. Properly dried wood (eight to twelve percent moisture) carves smoothly. Always purchase pre-dried blanks from reputable suppliers. Never attempt carving freshly cut or green wood as a beginner.
What Should You Know Before Starting Your Carving Journey?
Beginning wood carving in September 2026 offers perfect timing for developing a rewarding new skill. Basswood’s forgiving nature, combined with proper tools and technique, ensures success for beginners. Avoid the frustration that stops many learners by selecting appropriate materials and following a structured progression. Start small, maintain sharp tools, and practice consistently. Within weeks, you’ll produce pieces worthy of display or gifting. The carving community welcomes beginners warmly and provides abundant support through online forums and local groups. Your journey from novice to confident carver begins with a single block of basswood and a sharp knife. Embrace the learning process, celebrate small victories, and watch your skills develop naturally through patient, consistent practice.
Key Takeaway: Basswood, sharp tools, and proper technique transform beginners into confident carvers within weeks of consistent practice.



Write Your Review
No reviews yet. Be the first to share your experience!