

How Many Clamps Do I Need for Woodworking Projects in 2026?
The quick answer: most woodworkers need 12 to 24 clamps to handle typical projects comfortably. However, the exact number depends on your project complexity, workshop size, and budget. Beginners should start with 6 to 8 clamps of mixed types, then expand as their skills grow. Professional woodworkers often maintain 30 to 50 clamps across various styles and sizes. The key is having enough clamps to apply pressure simultaneously without repositioning, which ensures even glue distribution and strong joints.

Clamps are the unsung heroes of woodworking. They hold pieces in perfect alignment while glue cures, apply consistent pressure across joints, and enable complex assemblies that would otherwise be impossible. Unlike other tools, clamps don’t wear out quickly—they’re investments that last decades. Building a smart clamp collection means understanding your typical projects and purchasing strategically rather than hoarding every clamp you see.
What Types of Clamps Should You Have in Your Woodworking Shop?
Different clamp types serve distinct purposes, and a balanced collection includes several styles. Bar clamps excel at holding large assemblies and edge-gluing boards. C-clamps provide quick pressure for small repairs and temporary holds. Spring clamps offer one-handed operation for light pressure tasks. Pipe clamps are budget-friendly and infinitely adjustable. Quick-release clamps speed up clamping sequences on production runs.
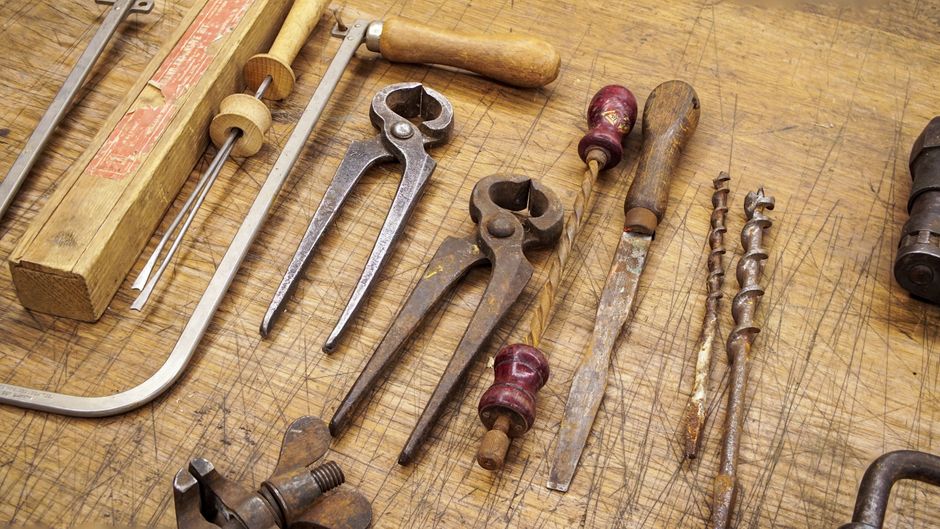
Each clamp type has unique strengths. Understanding these differences helps you choose wisely and avoid buying redundant tools. A well-rounded shop typically contains at least three to four different clamp styles working in harmony.
- Bar clamps: Heavy-duty pressure for large panels and assemblies.
- C-clamps: Compact, affordable, excellent for small glue-ups and repairs.
- Spring clamps: Lightweight, one-handed operation, ideal for quick holds.
- Pipe clamps: Adjustable length, economical, perfect for budget-conscious builders.
- Quick-release clamps: Fast operation, consistent pressure, great for repetitive work.
- Hand screw clamps: Wooden jaws protect workpieces, excellent for delicate items.
Bar Clamps and Their Role in Large Projects
Bar clamps are workhorses in serious woodworking shops. They feature a long steel bar with a fixed head and sliding jaw, delivering powerful pressure across extended distances. Sizes range from 12 inches to 6 feet or longer. Most woodworkers use bar clamps for edge-gluing boards into wide panels, assembling cabinet sides, and holding large assemblies during construction.
A typical shop needs 4 to 6 bar clamps in various lengths. For edge-gluing a 24-inch-wide tabletop, you’d position clamps every 6 to 8 inches—requiring 4 to 5 clamps minimum. Larger panels demand more. Quality bar clamps cost $15 to $40 each, making them affordable for gradual collection building.
C-Clamps for Quick Fixes and Small Work
C-clamps are the Swiss Army knife of the clamping world. Their compact C-shaped frame fits into tight spaces, and their screw mechanism delivers precise pressure control. Sizes range from 1 inch to 12 inches throat depth. They’re perfect for holding guides on table saws, securing jigs, and applying localized pressure during glue-ups.
Every woodworker should own at least 4 to 6 C-clamps in mixed sizes. They cost $5 to $15 each, making them budget-friendly starter clamps. Many pros keep 8 to 12 C-clamps because their versatility and low cost justify the investment.
Key Takeaway: A balanced clamp collection includes bar clamps for large projects, C-clamps for versatility, and specialized styles for specific tasks.
How Many Clamps Do You Need by Project Type?
Project complexity directly determines clamp quantity. Simple projects like small boxes need fewer clamps than complex furniture assemblies. Understanding typical project requirements helps you calculate your minimum collection size and identify gaps in your current inventory.

Small Projects: Boxes, Cutting Boards, and Decorative Items
Small projects typically require 4 to 8 clamps total. A wooden box with four sides needs 4 to 6 clamps—one per corner, plus extras for safety. A cutting board made from edge-glued strips needs 3 to 4 clamps positioned every 6 to 8 inches. Small decorative items often require just 2 to 4 clamps for structural integrity.
These projects are ideal for beginners because they don’t demand huge clamp collections. Spring clamps and small C-clamps work perfectly here. You can complete several small projects with just 6 to 8 clamps total.
- Wooden boxes: 4 to 6 clamps for corner assembly.
- Cutting boards: 3 to 4 clamps per 24-inch width.
- Small decorative boxes: 2 to 4 clamps sufficient.
- Picture frames: 2 to 3 clamps per frame.
- Small shelves: 4 to 6 clamps for assembly.
Medium Projects: Furniture, Cabinets, and Doors
Medium projects demand 12 to 20 clamps depending on complexity. A basic cabinet with four sides, shelves, and a back panel needs 8 to 12 clamps for assembly. A table base with four legs and rails requires 6 to 10 clamps. Cabinet doors need 3 to 4 clamps each. These projects justify investing in quality bar clamps and quick-release models.
Most serious hobbyists and semi-professional woodworkers operate in this range. Having 12 to 16 clamps enables you to complete one medium project while another glue-up cures. This workflow prevents bottlenecks and keeps your productivity high.
Large Projects: Tables, Desks, and Complex Assemblies
Large furniture projects easily consume 20 to 40 clamps. A dining table with a large top, base, and legs requires 8 to 12 clamps just for the top glue-up, plus 8 to 10 for the base assembly. A complex desk with multiple drawers and shelves might need 30 to 40 clamps across all assembly stages. Professional woodworkers often run multiple large projects simultaneously, requiring massive clamp inventories.
If you regularly tackle large projects, investing in 20 to 30 clamps makes financial sense. You’ll recoup the investment through faster work and fewer project delays. Consider a mix of bar clamps, quick-release models, and specialty clamps for specific challenges.
Key Takeaway: Small projects need 4 to 8 clamps, medium projects 12 to 20, and large projects 20 to 40 depending on complexity.
What’s the Best Strategy for Building Your Clamp Collection?
Building a clamp collection strategically saves money and ensures you have the right tools when needed. Rather than buying randomly, assess your current projects and future goals. Start with versatile clamps, then add specialized types as your skills develop. This measured approach prevents waste and builds a collection perfectly suited to your woodworking style.

The Beginner’s Starting Kit
New woodworkers should begin with 6 to 8 clamps covering basic needs. Two 24-inch bar clamps provide large-panel capability. Four 6-inch C-clamps offer versatility for small work and jig setup. Two spring clamps handle quick holds and light pressure. This $60 to $100 investment covers most beginner projects and establishes a foundation for future expansion.
Avoid buying expensive specialty clamps initially. Focus on proven performers like bar clamps and C-clamps. As you complete projects, you’ll identify specific needs and purchase accordingly. This prevents expensive mistakes and ensures every clamp you buy gets regular use.
The Expanding Collection Strategy
After completing several projects, expand strategically. If you frequently edge-glue boards, add two more 24-inch bar clamps and consider longer 36-inch models. If you build lots of small items, add 4 to 6 more C-clamps in various sizes. If you work with delicate woods, invest in hand screw clamps with wooden jaws that won’t mar surfaces.
This incremental approach costs less than buying everything at once and ensures each purchase addresses actual needs. Track which clamps you use most and which sit idle. This data guides future purchases and prevents collecting unnecessary duplicates.
- Buy based on completed projects, not theoretical needs.
- Add clamps in sets of 2 to 4 to maintain balanced inventory.
- Invest in quality for frequently-used styles like bar clamps.
- Budget $50 to $100 quarterly for collection growth.
- Track usage to identify gaps and redundancies.
The Professional Workshop Approach
Professional woodworkers typically maintain 30 to 50 clamps across multiple styles and sizes. This inventory enables running multiple large projects simultaneously without waiting for glue to cure. Professionals invest $1,500 to $3,000 in clamps because they directly impact productivity and profit margins. A professional shop might include 8 to 12 bar clamps in various lengths, 12 to 16 C-clamps, 6 to 8 quick-release clamps, and 4 to 6 specialty clamps for specific techniques.
Professionals also prioritize quality. They buy premium bar clamps with superior jaw alignment, quick-release models with consistent pressure, and specialty clamps for their signature techniques. This investment pays dividends through faster work and fewer project delays caused by inadequate clamping.
Key Takeaway: Build your collection strategically: start with 6 to 8 versatile clamps, expand based on actual project needs, and invest in quality for frequently-used styles.
How Do You Calculate the Exact Number of Clamps Needed for Specific Projects?
Calculating required clamps prevents over-clamping and ensures adequate pressure distribution. The basic formula considers joint length, clamp spacing, and pressure requirements. Most woodworkers space clamps every 6 to 8 inches along a joint to maintain even pressure and prevent cupping or warping. For an edge-glued panel, divide the total width by 6 or 8 inches, then add one clamp for safety.

The Edge-Gluing Formula
Edge-gluing boards into wide panels is one of the most common clamping scenarios. To calculate clamps needed: measure the panel width, divide by 6 inches (standard spacing), then round up. For example, a 24-inch-wide panel requires 24 ÷ 6 = 4 clamps minimum. Add one extra for safety, bringing the total to 5 clamps. Position them alternately above and below the panel to prevent cupping.
This spacing ensures even pressure across the entire joint. Wider spacing (8 to 10 inches) works for narrower panels or lighter woods. Tighter spacing (4 to 6 inches) suits wider panels or dense hardwoods that resist pressure distribution. Adjust based on your specific materials and experience.
The Four-Square Assembly Formula
Four-square assemblies (like cabinet boxes) need one clamp per corner minimum, plus extras for diagonal bracing. A simple four-sided box needs 4 clamps—one per corner. Add 2 to 4 more clamps for diagonal pressure to ensure square corners and prevent racking. Most builders use 6 to 8 clamps for four-square assemblies to guarantee perfect results.
Position corner clamps at 45-degree angles across the assembly to apply diagonal pressure. This prevents the box from twisting during glue cure. Use cauls (wooden blocks) under clamp jaws to distribute pressure and prevent marring the workpiece.
- Edge-gluing: One clamp per 6 inches of width plus one extra.
- Four-square boxes: One clamp per corner plus 2 to 4 diagonal clamps.
- Frame assemblies: One clamp per joint plus one extra.
- Mortise-and-tenon joints: One clamp per joint, positioned perpendicular to joint.
- Spline and biscuit joints: One clamp per joint, light pressure sufficient.
Key Takeaway: Calculate clamps by dividing joint length by 6-inch spacing and adding one extra for safety and diagonal bracing.
What Practical Tips Help You Use Your Clamps More Efficiently?
Efficient clamping techniques maximize your clamp collection’s effectiveness. Proper technique prevents damage, ensures strong joints, and speeds up assembly work. These practical strategies help you accomplish more with fewer clamps and improve overall project quality.
Use Cauls to Protect Surfaces and Distribute Pressure
Cauls are wooden blocks placed between clamp jaws and your workpiece. They protect finished surfaces from marring, distribute pressure across wider areas, and prevent clamp jaws from denting soft woods. Use hardwood cauls at least 1 inch thick for best results. Position them perpendicular to the clamped joint to maximize pressure distribution.
Quality cauls prevent costly mistakes. A single marred tabletop might require hours of sanding or refinishing to hide clamp marks. Spending two minutes preparing cauls saves significant rework. Many woodworkers keep a collection of pre-made cauls in various sizes for quick setup.
Position Clamps Alternately to Prevent Cupping
When edge-gluing panels, alternate clamp positions above and below the boards. This prevents the panel from cupping (bowing upward) as glue cures. Position the first clamp above the panel, the second below, the third above, and so on. This alternating pattern distributes pressure evenly and maintains flatness throughout the cure process.
Many beginners stack all clamps on top, causing the panel to bow upward. Alternating clamp positions is a simple technique that dramatically improves results. It requires no extra clamps, just better planning and execution.
Apply Moderate Pressure—More Isn’t Always Better
Excessive clamping pressure doesn’t create stronger joints and often causes problems. Moderate pressure (enough to close the joint completely) is ideal. Over-tightening can crush wood fibers, squeeze out excessive glue, and even break brittle joints. Most woodworkers achieve optimal results by tightening clamps until joints close, then backing off slightly.
Listen for the sound of glue squeezing out evenly along the joint. If glue streams from one spot while other areas remain dry, loosen and reposition your clamps. This feedback-based approach prevents mistakes and ensures even glue distribution.
Use Quick-Release Clamps for Repetitive Work
Quick-release clamps speed up production significantly. Their lever mechanism tightens and releases much faster than screw-type clamps. If you frequently build multiple similar items, quick-release clamps reduce assembly time by 30 to 50 percent. They’re particularly valuable for production runs and high-volume projects.
The trade-off is slightly higher cost—quick-release clamps typically cost $25 to $50 each compared to $15 to $40 for bar clamps. However, the time savings justify the investment if you use them regularly. Consider adding 4 to 6 quick-release clamps to your collection if you build production runs.
- Always use cauls to protect surfaces and distribute pressure evenly.
- Alternate clamp positions above and below panels to prevent cupping.
- Apply moderate pressure—tighten until joints close, then back off slightly.
- Check glue squeeze-out along the entire joint for even pressure distribution.
- Use quick-release clamps for repetitive assembly work.
- Label clamps with their size and type for quick identification.
- Store clamps vertically on a pegboard to save space and prevent rust.
How Do You Maintain and Store Your Clamp Collection?
Proper maintenance and storage extend clamp life and keep your collection organized. Clamps are durable tools, but neglect leads to rust, stripped threads, and misalignment. A simple maintenance routine ensures your clamps perform reliably for decades.
Cleaning and Rust Prevention
After each use, wipe clamps with a dry cloth to remove glue residue and sawdust. For stubborn dried glue, use a plastic scraper or old chisel—never steel wool, which damages protective finishes. Once monthly, apply a light coat of machine oil to all metal surfaces to prevent rust. Pay special attention to screw mechanisms and sliding surfaces where moisture accumulates.
Store clamps in a dry location away from direct humidity. Workshop humidity causes rust even on quality clamps. Consider storing expensive clamps in a climate-controlled area or covering them with silicone-treated cloth. This minimal maintenance keeps your collection in perfect working order for 20+ years.
Organizing for Quick Access
Organize clamps by type and size for quick identification during setup. Mount bar clamps horizontally on wall-mounted racks or pegboards. Stack C-clamps vertically in labeled bins or drawers. Keep quick-release clamps in a dedicated caddy for easy transport between projects. Label everything clearly—you’ll appreciate this organization when working under deadline pressure.
A well-organized clamp collection saves time during project setup. Rather than hunting through piles to find the right clamp, you grab exactly what you need in seconds. This efficiency compounds across hundreds of projects, saving significant cumulative time.
Key Takeaway: Maintain clamps through regular cleaning and light oiling, store them organized by type, and keep them in dry conditions to ensure decades of reliable service.
What Related Woodworking Tools Complement Your Clamp Collection?
Clamps work best alongside complementary tools that enhance clamping effectiveness. Understanding these relationships helps you build a cohesive toolkit that multiplies your capability. Several tools directly support clamping work and deserve investment alongside your clamp collection.
For edge-gluing work, consider investing in water-resistant wood glue for outdoor projects to ensure your glued assemblies withstand moisture exposure. For complex assemblies, spline jigs for miter joints create stronger joints that require less clamping pressure. If you work with delicate woods, quality router bits for edge profiling enable you to create finished edges without additional glue-ups.
For precise joinery, tools like scroll saw blades for tight curves help you create joints that fit perfectly, reducing clamping pressure needed. If you’re interested in expanding your skills, tools for wood turning open entirely new project possibilities. For precision work, proper band saw blade tension ensures accurate cuts that require minimal fitting and clamping during assembly.
Frequently Asked Questions
Is 12 clamps enough for most woodworking projects?
Twelve clamps handle most small to medium projects comfortably. For edge-gluing panels up to 24 inches wide, 12-inch boxes, and simple furniture, 12 clamps provide sufficient capacity. However, if you frequently work on large projects or run multiple assemblies simultaneously, you’ll benefit from additional clamps. Assess your typical project size and complexity to determine if 12 meets your needs.
What’s the difference between bar clamps and pipe clamps?
Bar clamps feature a rigid steel bar with fixed and sliding jaws, offering better alignment and precision. Pipe clamps use threaded pipes as the bar, making them infinitely adjustable and more affordable. Bar clamps are superior for fine furniture, while pipe clamps excel for rough work and budget-conscious builders. Most shops benefit from owning both types for different applications.
Can you reuse clamps while glue cures on another project?
Yes, you can remove clamps once glue reaches initial set (typically 30 minutes to 1 hour depending on glue type). Check your glue manufacturer’s recommendations for safe removal timing. Using clamps across multiple projects requires either more clamps or scheduling projects strategically. Many professionals stagger project timelines to maximize clamp utilization throughout the day.
How do you prevent clamp marks on finished wood?
Always use cauls—wooden blocks between clamp jaws and your workpiece. Hardwood cauls at least 1 inch thick distribute pressure and protect surfaces. Position cauls perpendicular to joints for maximum effectiveness. Apply moderate pressure only—excessive force dents even protected surfaces. This simple technique completely eliminates clamp marks on finished work.
Should you buy expensive premium clamps or budget models?
Buy quality for frequently-used clamps like bar models, and budget options for specialty clamps you use occasionally. Premium bar clamps offer better jaw alignment, smoother operation, and longer lifespan. Budget C-clamps work fine for occasional use. This balanced approach maximizes value—you get quality where it matters most while controlling overall costs.
What’s the ideal clamp capacity (maximum opening) for general woodworking?
For general woodworking, bar clamps with 24 to 36-inch capacity handle most situations. C-clamps with 6 to 8-inch throat depth work for small assemblies and jig setup. Quick-release clamps typically offer 12 to 24-inch capacity. Consider your typical project sizes—larger furniture requires deeper clamp capacity, while detailed work often needs shallow throat depth. A mixed collection covering 6 to 36-inch capacities addresses virtually all scenarios.
How Do You Choose Between Different Clamp Brands and Quality Levels in 2026?
Clamp quality varies significantly, affecting performance, durability, and long-term value. Understanding quality differences helps you make informed purchasing decisions and build a collection that serves you well for decades. In 2026, several manufacturers offer excellent options across multiple price points, each with distinct advantages and trade-offs.
Premium brands like Bessey and Jorgensen offer superior jaw alignment, smoother operation, and better materials. Their clamps cost 40 to 60 percent more than budget alternatives but deliver noticeably better performance. Mid-range brands offer good balance between cost and quality. Budget brands work fine for occasional use but may have alignment issues or sticky screws. Consider your usage frequency and project importance when selecting quality levels.
Read reviews from actual woodworkers rather than relying on marketing claims. Look for feedback about jaw alignment, screw smoothness, and durability after years of use. Many experienced woodworkers report that quality clamps from premium manufacturers save frustration and deliver superior results on important projects. Budget approximately 25 to 35 percent more for premium clamps, which typically prove worthwhile for frequently-used models.
Key Takeaway: Invest in premium quality for frequently-used clamps, choose mid-range options for regular use, and consider budget models only for specialty applications.
Conclusion: Building Your Ideal Clamp Collection for Success
Determining how many clamps you need requires honest assessment of your typical projects, available budget, and workshop space. Most woodworkers thrive with 12 to 24 clamps covering multiple types and sizes. Beginners should start with 6 to 8 versatile clamps, then expand strategically based on actual project needs. Professionals maintaining large workshops often keep 30 to 50 clamps to enable multiple simultaneous projects and maximize productivity.
The key to building an effective collection is purchasing strategically rather than randomly. Start with proven performers like bar clamps and C-clamps, master their use, then add specialized types addressing your specific projects. Maintain your clamps through regular cleaning and proper storage, and they’ll serve reliably for decades. Remember that clamps don’t wear out quickly—they’re investments that appreciate in value as your woodworking skills develop and project complexity increases.
Your clamp collection directly impacts your woodworking success. Strong, well-aligned joints come from proper clamping technique and adequate clamp inventory. As you complete projects and refine your skills, your clamp needs will evolve. Use this guide as a foundation, track your usage patterns, and adjust your collection accordingly. A thoughtfully built clamp collection becomes an indispensable partner in your woodworking journey, enabling projects you never thought possible.




Write Your Review
No reviews yet. Be the first to share your experience!