

What Type of Hand Plane to Use for Smoothing? Quick Answer
A smoothing plane is the best choice for final surface smoothing in woodworking. Smoothing planes have short soles (7–9 inches), tight blade angles (45–50 degrees), and fine blade settings that produce gossamer-thin shavings. They excel at removing mill marks, cross-grain tearout, and surface irregularities left by sanders or rougher planes. For initial flattening before smoothing, use a jack plane or jointer plane first. Smoothing planes work best on hardwoods and figured grain when properly tuned, sharpened, and set with a slight curve or cambered blade.
Hand planing has experienced a renaissance among fine woodworkers since 2020, with renewed interest in traditional techniques. Modern smoothing planes combine vintage designs with improved manufacturing tolerances. Understanding sole flatness, blade sharpness, and grain direction transforms smoothing from frustrating to meditative. Whether you restore vintage planes or purchase new models, selecting the right plane type dramatically impacts your finish quality and woodworking enjoyment.
How Do Smoothing Planes Differ From Other Hand Plane Types?
Smoothing planes are purpose-built for final surface preparation, not material removal. Their short, rigid soles flatten minor surface irregularities without creating new ones. The sole length—typically 7 to 9 inches—allows precise control over small areas and edges. This compact design contrasts sharply with longer planes used earlier in the milling sequence.
The blade angle in smoothing planes typically ranges from 45 to 50 degrees, which is steeper than jack planes. This higher angle reduces tearout on figured and cross-grain wood. The blade sits closer to perpendicular, severing difficult grain fibers cleanly. Blade projection is minimal—often just 0.001 to 0.005 inches—enabling ultra-fine shavings that leave surfaces glass-smooth.
- Smoothing planes: 7–9 inch sole, 45–50° blade angle, minimal blade projection.
- Jack planes: 14–17 inch sole, 45° blade angle, high blade projection for rough work.
- Jointer planes: 22–24 inch sole, 45° blade angle, designed to flatten and straighten edges.
- Fore planes: 18 inch sole, 45° blade angle, intermediate between jack and jointer planes.
Key Takeaway: Smoothing planes’ short soles and steep blade angles make them uniquely suited for final surface finishing, not heavy stock removal.
Why Sole Flatness Matters for Smoothing
A flat sole is non-negotiable for smoothing planes. Even 0.001 inches of sole deviation creates visible plane tracks on your workpiece. The sole must bridge minor surface irregularities while maintaining contact with high points. Vintage planes often require sole flattening on diamond plates or sandpaper to achieve this precision. Modern manufacturers like Veritas and Lie-Nielsen hold soles to 0.001-inch tolerances.
Checking sole flatness takes minutes but saves hours of sanding frustration. Use a straightedge or precision ruler across the sole’s length and width. Look for light gaps between the straightedge and sole. Any rocking motion indicates high or low spots. Many woodworkers flatten vintage plane soles using 400-grit sandpaper on a dead-flat surface, then progress to 1000-grit for a polished finish.
Blade Sharpness and Cambered Edges
Blade sharpness separates satisfying smoothing from frustrating chatter and tearout. A dull blade requires excessive downward pressure, causing the plane to chatter and dig into grain. A sharp blade glides effortlessly, producing continuous ribbon-like shavings. Stropping your blade on leather before each session maintains edge keenness between full sharpenings.
Many experienced smoothers use a cambered blade—slightly curved across its width. This curve prevents corner dig-in and creates a feathered edge on your workpiece. The center of the blade does most cutting work while the corners ride lightly. Cambered blades are especially effective on figured grain and cross-grain surfaces where tearout threatens.
Which Hand Plane Should You Choose for Your Smoothing Workflow?
Your choice depends on your milling sequence and the wood you’re planing. Most woodworkers follow a progression: jack plane for rough flattening, jointer plane for straightening edges and faces, then smoothing plane for final finishing. However, if your stock arrives relatively flat from a planer, you may skip directly to smoothing. Understanding when each plane enters your workflow ensures efficient, high-quality results.
Wood species and grain direction also influence your choice. Figured hardwoods like curly maple and walnut demand a high-angle smoothing plane or a toothed plane before smoothing. Straight-grained softwoods like pine cooperate well with standard smoothing planes. Cross-grain sections always benefit from planing with the grain direction, using a cambered blade, or reducing blade projection to 0.001 inches.
- Use a jack plane first for rough, flat-sawn stock with significant irregularities.
- Follow with a jointer plane to straighten edges and achieve overall flatness.
- Finish with a smoothing plane for pristine, hand-planed surfaces.
- For already-flat stock, skip to smoothing plane to save time and effort.
- On figured grain, use a toothed plane or high-angle smoother before final smoothing.
Key Takeaway: Match your plane choice to your stock condition and grain characteristics for optimal efficiency and surface quality.
Standard vs. High-Angle Smoothing Planes
Standard smoothing planes feature 45-degree blade angles, which work excellently on straight-grained hardwoods. High-angle smoothers—typically 55 to 62 degrees—excel on figured, reversing, and difficult grain. The steeper angle acts like a scraper, severing grain fibers cleanly without lifting them. High-angle planes require slightly more physical effort but dramatically reduce tearout on temperamental woods.
Veritas and Lie-Nielsen both manufacture high-angle smoothing planes with interchangeable sole plates. This versatility allows you to adjust blade angle based on your current project. Many woodworkers keep both standard and high-angle smoothers in their tool kits, switching between them as grain direction demands. The investment in a high-angle plane pays dividends on figured walnut, curly maple, and bird’s-eye surfaces.
Toothed Planes and Their Role
Toothed planes—also called scraper planes or toothing planes—occupy a niche between roughing and smoothing. Their blades feature parallel grooves that create tiny teeth. These teeth bite aggressively into difficult grain without causing tearout. Toothed planes excel as a preparatory step before final smoothing on figured woods. They remove surface irregularities and reverse-grain sections that would otherwise resist smoothing planes.
Use a toothed plane at 45-degree angles to the grain direction, making light passes. This technique systematically removes problem areas. Follow toothing with your smoothing plane for a flawless finish. Toothed planes require more setup time and produce a distinctive texture, but they’re invaluable for challenging species. Many fine furniture makers consider toothed planes essential for high-end work.
How Do You Tune and Maintain a Hand Plane for Smoothing?
Proper tuning transforms mediocre planes into precision tools. Start by flattening the sole on 400-grit sandpaper, then 1000-grit for a polished surface. Check the sole frequently during flattening—many planes need only 5–10 minutes of work. Next, ensure the sole is perpendicular to the sides using a precision square. Any deviation causes the plane to track sideways across your workpiece.
The chipbreaker deserves equal attention. It must sit perfectly flat against the blade with no gaps. Gaps allow shavings to jam and cause chatter. Clean both surfaces with 1000-grit sandpaper, then test-fit repeatedly until they mate perfectly. The chipbreaker should sit 0.010 to 0.020 inches from the blade edge for smoothing work—close enough to break shavings but far enough to allow fine adjustment.
- Flatten the sole on progressively finer sandpaper (400, 600, 1000 grit).
- Ensure sole is perpendicular to the sides using a machinist’s square.
- Flatten and polish the chipbreaker’s mating surface.
- Set chipbreaker 0.010–0.020 inches from the blade edge for smoothing.
- Sharpen the blade to mirror polish on 8000+ grit whetstones.
- Strop the blade on leather before each planing session.
Key Takeaway: Meticulous tuning—sole flatness, chipbreaker contact, and blade sharpness—determines whether your smoothing plane performs beautifully or frustratingly.
Sharpening and Stropping Techniques
Blade sharpness is non-negotiable for smooth planing. Use waterstones, oilstones, or diamond plates to establish a keen edge. Progress through grits: 1000, 4000, 6000, then 8000+ for a mirror polish. The back of the blade must be flat and polished identically. Many woodworkers spend 10–15 minutes sharpening a smoothing plane blade, achieving a hair-popping edge.
Between full sharpenings, strop your blade on leather charged with stropping compound. A 30-second strop before each session maintains sharpness and removes microscopic debris. Stropping takes seconds but extends the interval between full sharpenings from hours to days. Mount a leather strop in your workshop for quick maintenance. This simple habit transforms your planing experience from frustrating to meditative.
Seasonal Storage and Care
Hand planes thrive with minimal maintenance between uses. Store them sole-up on a wooden rack to prevent blade contact with hard surfaces. Protect blades with blade guards or magnetic strips. Wipe the sole and body with a dry cloth after each session to remove sawdust and moisture. Avoid humid environments where rust develops on iron soles and steel blades.
Occasionally oil the sole with a light machine oil to prevent rust and maintain smooth gliding. Wipe away excess oil to prevent sawdust from sticking. Keep chipbreakers and adjustment mechanisms clean and lightly oiled. With minimal care, hand planes last generations. Many fine woodworkers pass family planes to their children, and these tools perform beautifully after simple restoration.
What Are Practical Tips for Mastering Smoothing Plane Technique?
Technique matters as much as tool quality. Start with proper stance: stand at an angle to your workbench, feet shoulder-width apart. Position the workpiece at a comfortable height—typically waist-high. Secure the wood with bench dogs, clamps, or a vise to prevent movement. Unstable stock causes chatter and creates uneven surfaces. Take time to set up properly; it pays dividends in quality and safety.
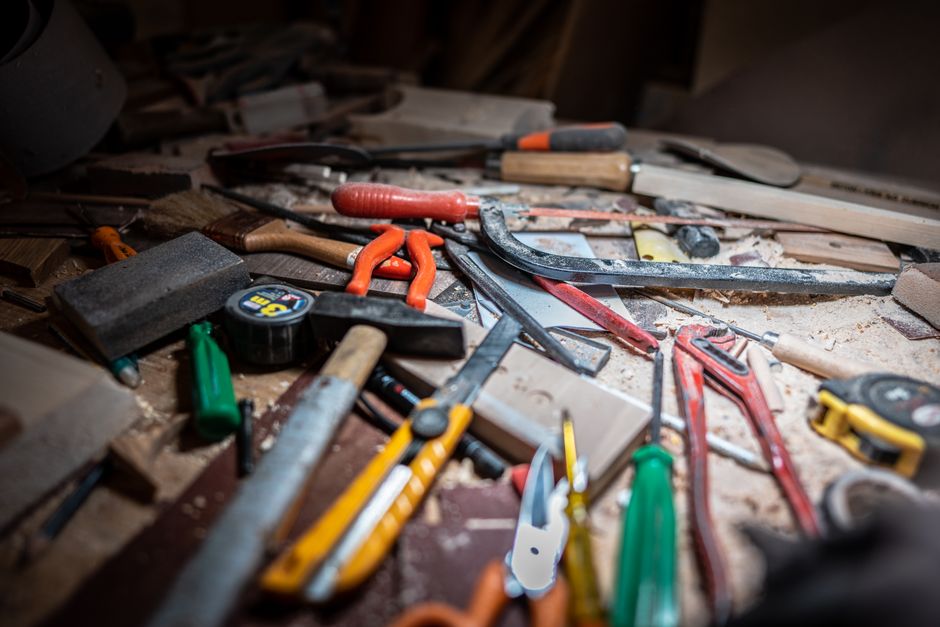
Grain direction is paramount. Examine your workpiece carefully, looking at grain direction under angled light. Plane with the grain whenever possible—the grain should slope downward in the direction you’re planing. On reversing grain, plane from both directions, meeting in the middle. Reduce blade projection and use a high-angle plane or cambered blade on stubborn sections. Patience and technique overcome most grain challenges.
- Stand at an angle to your workbench with feet shoulder-width apart.
- Secure the workpiece firmly to prevent movement and chatter.
- Examine grain direction under angled light before planing.
- Plane with the grain whenever possible for tearout-free surfaces.
- Start each stroke with downward pressure on the tote, then shift to the sole.
- End strokes with upward pressure on the knob to prevent dubbing edges.
- Take multiple light passes rather than one heavy pass.
- Use a cambered blade to prevent corner dig-in on figured wood.
Stroke Technique and Pressure Distribution
Proper pressure distribution prevents dubbing and tearout. Begin each stroke with downward pressure on the tote (rear handle), keeping the knob (front handle) light. This prevents the plane from diving into the wood at the stroke’s start. Midstroke, balance pressure equally between knob and tote. As you near the end, shift pressure to the knob while reducing tote pressure. This prevents the plane from tipping down at the stroke’s finish.
Use smooth, consistent strokes at a moderate pace. Rushing causes chatter and tearout. Conversely, moving too slowly can cause the blade to dig in. Develop a rhythm that feels natural and relaxed. Most woodworkers find that 1–2 strokes per second produces excellent results. Let the sharp blade do the work; excessive downward pressure indicates dullness or improper technique.
Handling Difficult Grain and Figured Wood
Figured grain—curly, quilted, bird’s-eye, or spalted wood—presents unique challenges. These woods contain grain running in multiple directions within small areas. Standard smoothing planes often cause tearout despite proper technique. Use a high-angle smoothing plane set to 62 degrees, or switch to a toothed plane first. Toothed planes systematically remove problem areas before final smoothing.
Another strategy involves reducing blade projection to 0.001 inches and taking extremely light passes. The blade barely cuts, severing grain fibers cleanly without lifting them. This technique takes patience—you may need 5–10 passes where one would suffice on straight-grained wood. However, the resulting surface is worth the effort. Some woodworkers also dampen figured wood slightly before planing, which softens grain and reduces tearout tendency.
Frequently Asked Questions
What is the difference between a smoothing plane and a block plane?
Block planes are smaller (6–7 inches), lighter, and designed for one-handed use on end grain and edges. Smoothing planes are larger (7–9 inches), heavier, and require two-handed operation on face grain. Block planes have lower blade angles (20–25 degrees) suited for end grain, while smoothing planes use 45–50 degree angles for face grain. Block planes excel for chamfering edges; smoothing planes create pristine surfaces on large areas.
Can I use a smoothing plane on softwoods like pine?
Yes, smoothing planes work excellently on softwoods. Pine, fir, and spruce plane beautifully with proper technique. Softwoods are less prone to tearout than hardwoods, so a standard 45-degree smoothing plane suffices. Keep your blade sharp and take light passes. Softwoods benefit from hand planing because sanders often create fuzzy surfaces, while planes produce crisp, clean finishes that accept stain and finish evenly.
How often should I sharpen my smoothing plane blade?
Stropping before each session maintains sharpness for weeks of regular use. Full sharpening is needed when stropping no longer restores a keen edge—typically after 8–20 hours of planing. Planing figured hardwoods dulls blades faster than softwoods. Keep a stropping leather in your workshop and develop the habit of stropping for 30 seconds before planing. This simple maintenance extends blade life and keeps your plane performing optimally.
What sole length is best for smoothing planes?
Most smoothing planes range from 7 to 9 inches in sole length. Seven-inch planes offer maximum maneuverability on edges and tight spaces. Nine-inch planes bridge longer distances, reducing surface irregularities more effectively. For general woodworking, 8–9 inches is ideal. Shorter planes suit small boxes and detailed work, while longer planes excel on tabletops and large panels. Many woodworkers own multiple smoothing planes in different lengths for versatility.
Should I buy a vintage or modern smoothing plane?
Both have merits. Vintage planes (pre-1960s Stanley, Record, Bailey models) are affordable and often perform beautifully after restoration. Modern planes from Veritas and Lie-Nielsen arrive tuned and require minimal setup. Beginners benefit from modern planes’ consistent quality and tight tolerances. Experienced woodworkers often restore vintage planes, enjoying the process and saving money. Start with a quality modern plane, then explore vintage options as your skills develop.
Can a smoothing plane replace a random orbital sander?
Hand planing produces superior finishes to sanding on figured and reversing grain, where sanders often create fuzzy surfaces. However, planing is slower on large, flat areas where sanders excel. Many woodworkers use both: plane figured sections for pristine surfaces, then sand flat areas efficiently. Planing also removes finish-obscuring fuzz that develops during sanding. For fine furniture, combining hand planing with selective sanding produces superior results to sanding alone.
How Do You Choose the Right Smoothing Plane for Your Workshop?
Selecting your first smoothing plane requires balancing budget, quality, and learning curve. Modern planes from Veritas and Lie-Nielsen cost $200–400 but arrive tuned and ready to use. Vintage Stanley or Record planes cost $20–80 but require sole flattening and blade sharpening. Budget-conscious woodworkers often start with vintage planes, learning restoration skills while saving money. As your skills develop, you may invest in premium modern planes for their superior tolerances and ergonomics.
Consider your primary wood types when choosing. Straight-grained hardwoods and softwoods cooperate with standard 45-degree smoothing planes. If you frequently work with figured woods, invest in a high-angle smoother (55–62 degrees) or plan to purchase one after mastering basics. Many woodworkers eventually own two smoothing planes: a standard 45-degree model for everyday work and a high-angle model for challenging grain. This combination handles virtually any smoothing challenge.
- Budget: Vintage planes ($20–80) offer excellent value; modern planes cost $200–400.
- Quality: Modern planes arrive tuned; vintage planes require restoration work.
- Blade angle: Standard 45° suits most work; high-angle 55–62° excels on figured grain.
- Sole length: 8–9 inches balances maneuverability and bridge distance.
- Ergonomics: Heavier planes reduce fatigue; lighter planes suit smaller hands.
- Versatility: Own a standard and high-angle smoother for maximum flexibility.
Key Takeaway: Start with a quality modern plane or well-restored vintage plane, then expand your collection as your skills and project types evolve.
Comparing Popular Smoothing Plane Brands in 2026
Lie-Nielsen Toolworks manufactures premium smoothing planes with tight tolerances and excellent ergonomics. Their No. 4½ and No. 5 smoothers are industry standards, costing $300–350. Veritas offers innovative designs including interchangeable sole plates and high-angle options, priced $250–400. Both brands provide excellent customer support and lifetime warranties. For budget-conscious woodworkers, vintage Stanley and Record planes remain popular; many produce exceptional results after restoration.
Japanese planes like Kanna offer alternative approaches with different blade geometries and sole designs. These planes require different tuning techniques but produce excellent results. Consider your learning preferences: Western planes suit those comfortable with conventional adjustment mechanisms, while Japanese planes appeal to woodworkers interested in traditional techniques. Regardless of brand, prioritize sole flatness, blade sharpness, and proper chipbreaker setup over price.
Building a Complete Milling Kit
A complete hand-planing kit includes planes for each milling stage. Start with a jack plane (No. 5 or No. 5½) for initial flattening. Add a jointer plane (No. 7 or No. 8) for straightening edges and final flattening. Finish with a smoothing plane (No. 4 or No. 4½) for pristine surfaces. Many woodworkers add a toothed plane for figured grain and a high-angle smoother for reversing grain. This progression—jack, jointer, smoother—creates beautiful surfaces efficiently.
Budget-conscious woodworkers can start with just a smoothing plane if their stock arrives relatively flat from a planer. Add jack and jointer planes as your skills develop and projects demand. Building gradually allows you to master each plane’s technique before adding complexity. Many fine furniture makers started with a single smoothing plane and expanded their kits over years of practice. Quality matters more than quantity; one excellent plane outperforms three mediocre ones.
Conclusion: Mastering Hand Planing for Flawless Finishes
Choosing the right smoothing plane transforms your woodworking from frustrating to meditative. Smoothing planes’ short soles, steep blade angles, and fine adjustments make them uniquely suited for final surface preparation. Understanding the differences between smoothing planes, jack planes, and jointer planes helps you build an efficient milling sequence. Whether you restore vintage planes or invest in modern tools, meticulous tuning—sole flatness, chipbreaker contact, and blade sharpness—determines success.
Proper technique matters equally. Secure your workpiece, examine grain direction carefully, and plane with the grain whenever possible. Distribute pressure correctly throughout each stroke, taking light passes rather than heavy ones. On figured grain, use high-angle smoothers or toothed planes to overcome tearout challenges. Stropping your blade before each session maintains sharpness and extends intervals between full sharpenings.
Starting with a quality modern plane or well-restored vintage plane accelerates your learning. As your skills develop, expand your collection with high-angle smoothers and specialized planes for specific challenges. Many fine woodworkers consider hand planing essential for achieving surfaces that sanders simply cannot match. The investment in proper tools, tuning knowledge, and technique practice pays dividends in every project. Begin your hand-planing journey today, and discover why woodworkers have relied on these elegant tools for centuries.




Write Your Review
No reviews yet. Be the first to share your experience!