

What Are the Best Router Bits for Edge Profiling in 2026?
Edge profiling router bits shape and finish wood edges with precision and style. The best choices depend on your project type, wood species, and desired profile. Roundover bits create smooth curves, while ogee bits add decorative detail. Chamfer bits cut angled edges for modern aesthetics. Ball-bearing guided bits ensure consistent results. In 2026, carbide-tipped bits dominate the market due to superior durability and edge retention. Quality matters: invest in bits from trusted manufacturers like Bosch, Whiteside, or Amana for reliable performance and safety. Proper speed, feed rate, and technique prevent tearout and deliver professional finishes every time.

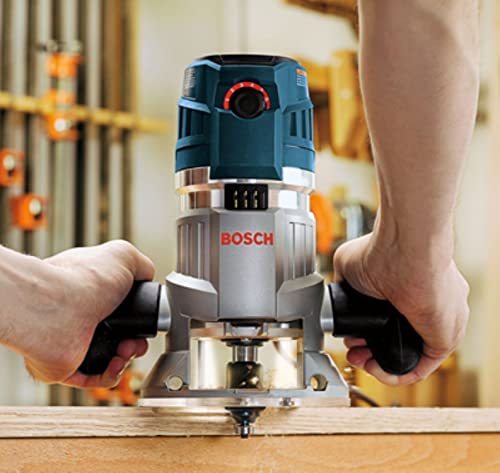
BOSCH RBS006TES 6-Piece (Universally Compatible Accessory) Carbide-Tipped Trim and Edging Router Bit Assorted Set
- TRIM AND EDGING ROUTER BIT SET: Delivers precision and durability
- VARIED SIX-BIT SET: Use for finishing in a wide range of edging applications
- VERSATILE: Bits are designed for processing soft and hard wood as well as wood composites
- MICROGRAIN CARBIDE-TIP ROUTER BIT DESIGN: Ensures consistently smooth finish cuts, with superior wear resistance
- ANTI-FRICTION COATING: Minimizes residue build-up
- CONVENIENT TO CARRY: Includes plastic storage case




As an Amazon Associate we earn from qualifying purchases. Product prices and availability are accurate as of the date/time indicated.
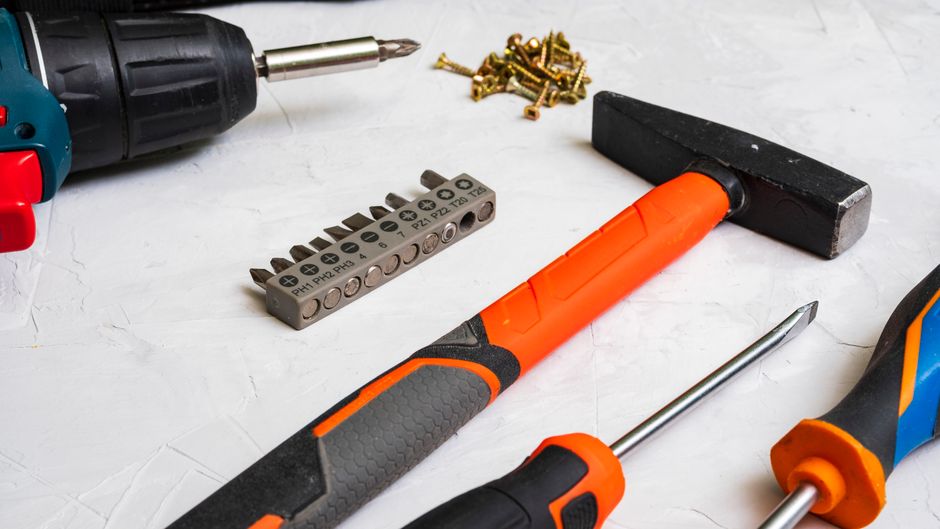
Router bit selection transforms ordinary wood edges into design features. A roundover bit softens sharp edges safely and quickly. An ogee bit creates classic, elegant profiles ideal for furniture. Chamfer bits suit contemporary designs and beveled edges. The right bit choice depends on your specific woodworking goals and the wood you’re working with. Understanding bit types, materials, and proper operation ensures success.
Which Edge Profiling Router Bits Should You Choose?
Edge profiling bits come in numerous styles, each serving specific design purposes. Roundover bits are the most versatile and beginner-friendly option. They create smooth, rounded edges that eliminate sharp corners and enhance safety. Ogee bits produce decorative S-curves perfect for traditional or transitional furniture. Chamfer bits cut 45-degree or custom angles for modern, sleek designs.

Ball-bearing guided bits offer superior control and consistency. The bearing rides against the wood edge, maintaining uniform depth automatically. This design reduces operator error and produces cleaner results. Non-guided bits require a fence or edge guide for accuracy.
- Roundover bits: smooth, curved edges in 1/8″ to 1/2″ radii.
- Ogee bits: decorative S-curves for traditional furniture and trim.
- Chamfer bits: angled edges ranging from 15 to 45 degrees.
- Core box bits: concave grooves for decorative detailing.
- Cove bits: semi-circular grooves along edges or surfaces.
- Beading bits: rounded profiles with decorative lip edges.
Roundover Bits for Versatile Edge Softening
Roundover bits are the workhorse of edge profiling. They soften sharp corners into smooth curves that feel comfortable and look refined. Available in 1/8-inch to 1/2-inch radii, they suit everything from delicate detail work to bold statement edges. A 1/4-inch roundover handles most general woodworking tasks efficiently.
Ball-bearing guided roundover bits eliminate the need for a fence. The bearing follows the wood edge automatically, maintaining consistent depth. This feature is invaluable for shaped or curved edges where a straight fence won’t work. Non-guided versions require careful fence setup but cost less initially.
Ogee Bits for Decorative Detail
Ogee bits create the classic S-curve profile seen on fine furniture and architectural trim. This profile combines concave and convex curves for visual interest. Ogee bits work beautifully on cabinet doors, shelving edges, and decorative moldings. They require steady hands and proper speed control to avoid tearout.
Ogee profiles suit hardwoods like oak, cherry, and maple best. Softer woods like pine may tear or splinter without proper technique. Always feed the bit against the rotation direction for cleaner cuts. Test on scrap wood first to establish ideal speed and feed rate.
Chamfer Bits for Modern Aesthetics
Chamfer bits cut angled edges that suit contemporary and minimalist designs. Standard 45-degree chamfers are most common, though custom angles exist. They’re faster than ogee bits and work well on both straight and curved edges. Chamfer bits reduce wood volume less than roundover bits, preserving edge strength.
Chamfer bits excel on hardwoods and plywood edges. They prevent splinters on veneered surfaces when used correctly. The angled cut creates a beveled appearance that catches light beautifully. Chamfers are ideal for modern kitchen cabinetry and sleek furniture designs.
Key Takeaway: Choose roundover bits for general softening, ogee bits for decorative detail, and chamfer bits for contemporary designs.
What Materials and Specifications Matter Most for Router Bits?
Router bit material directly impacts performance, longevity, and cost. Carbide-tipped bits dominate professional and serious hobbyist work. Carbide stays sharp 10 to 25 times longer than high-speed steel. This durability justifies the higher initial cost, especially for frequent users. High-speed steel (HSS) bits suit occasional users or budget-conscious beginners. They’re affordable but require frequent sharpening.
Bit shank diameter matters for router compatibility. Most routers accept 1/4-inch or 1/2-inch shanks. Larger shanks provide better stability and vibration reduction. Smaller shanks fit compact routers but offer less rigidity. Always match your bit shank to your router’s collet size.
- Carbide tips: stay sharp longest, ideal for production work.
- High-speed steel: affordable, good for occasional use.
- Flute count: two or three flutes most common for edge work.
- 1/4-inch shanks: fit most routers, good for delicate work.
- 1/2-inch shanks: provide stability, suit heavy-duty applications.
- Ball-bearing guides: reduce operator error, ensure consistency.
Carbide vs. High-Speed Steel Comparison
Carbide-tipped bits cost 3 to 5 times more than HSS alternatives. However, they hold their edge through hundreds of linear feet of cutting. For professional woodworkers or those running production jobs, carbide pays for itself quickly. Hobbyists who work occasionally may find HSS sufficient despite more frequent sharpening.
Carbide handles hardwoods, exotic species, and abrasive materials better than steel. It resists heat buildup and maintains sharpness through long sessions. HSS works fine for softwoods and occasional cuts. Neither material is “better”—the right choice depends on your use frequency and budget.
Shank Size and Router Compatibility
Router collets come in 1/4-inch, 1/2-inch, and occasionally 8mm sizes. A 1/4-inch shank fits in any standard collet but offers less rigidity. Vibration increases with smaller shanks, potentially causing chatter and rough cuts. A 1/2-inch shank provides superior stability and control, reducing vibration significantly.
Always verify your router’s collet size before purchasing bits. Forcing a 1/2-inch shank into a 1/4-inch collet damages both components. Many modern routers accept both sizes through interchangeable collets. Investing in a router that accepts 1/2-inch shanks improves overall performance and safety.
Key Takeaway: Carbide bits last longer but cost more; match shank size to your router’s collet for optimal performance.
How Do You Achieve Perfect Results When Edge Profiling?
Technique and setup determine the quality of your edge profiles. Router speed, feed rate, and bit depth all influence the final result. Most edge profiling work happens at 16,000 to 24,000 RPM. Slower speeds reduce tearout on figured or difficult grain. Faster speeds suit straight-grained softwoods and hardwoods. Always consult the bit manufacturer’s recommended speed range.

Feed rate—how quickly you move the wood through the bit—dramatically affects quality. Too fast causes tearout and rough edges. Too slow creates burn marks and can stall the router. Consistent, moderate feed speed produces the smoothest results. Listen to the router sound: a steady hum indicates proper feed rate.
Speed and Feed Rate Guidelines
Recommended speeds vary by bit diameter and material. Smaller bits (under 1 inch) tolerate higher speeds. Larger bits should run slower to reduce vibration. Hardwoods benefit from slightly lower speeds than softwoods. Always check the bit packaging or manufacturer website for specific recommendations.
- Small bits (under 1″): 18,000 to 24,000 RPM.
- Medium bits (1″ to 2″): 16,000 to 20,000 RPM.
- Large bits (over 2″): 12,000 to 16,000 RPM.
- Hardwoods: reduce speed by 10 to 20 percent.
- Softwoods: use higher speeds for cleaner cuts.
- Feed rate: move steadily without forcing the bit.
Setup and Safety Considerations
Secure your workpiece firmly before routing. Use clamps, hold-downs, or a router table for stability. Never free-hand edge profiling on small pieces—use a router table instead. Ensure the bit is fully seated in the collet and tightened securely. Loose bits spin out during operation, creating serious safety hazards.
Always wear safety glasses and a dust mask when routing. Keep hands clear of rotating bits. Feed the wood against the bit rotation direction for cleaner cuts and better control. Stop the router and let the bit fully stop before removing the workpiece. These practices prevent injuries and ensure professional results.
Preventing Tearout and Achieving Smooth Edges
Tearout occurs when grain fibers lift away during cutting. It’s especially problematic on figured woods and end grain. Route with the grain whenever possible—the bit should move in the same direction as the grain fibers. On pieces with conflicting grain, route the difficult direction last with a slower feed rate.
A sharp bit is essential for tearout prevention. Dull bits require more pressure, causing fibers to tear. Replace or sharpen bits regularly. Taking lighter passes reduces tearout compared to heavy single passes. On difficult woods, make two shallow passes rather than one deep cut. Test on scrap wood first to dial in your technique.
Key Takeaway: Match speed to bit size, feed steadily against grain direction, and use sharp bits for flawless edges.
What Practical Tips Help You Master Edge Profiling?
Experience builds proficiency, but following proven techniques accelerates your learning curve. Start with simple roundover bits before attempting complex ogee profiles. Practice on inexpensive softwoods before working with costly hardwoods. Build your confidence gradually with scrap wood tests. Document your settings for future reference—note the bit used, router speed, feed rate, and wood type.

Invest in quality bits from reputable manufacturers. Budget brands often have inconsistent quality and dull edges. A single quality bit outperforms multiple cheap alternatives. Consider buying a bit set that includes the most common profiles for your typical projects.
Step-by-Step Edge Profiling Process
- Select the appropriate bit profile for your design goals.
- Check the bit packaging for recommended speed and feed rate.
- Set your router to the manufacturer’s recommended RPM.
- Secure the workpiece firmly in a clamp or router table.
- Make a test cut on scrap wood matching your project material.
- Adjust speed and feed rate based on the test results.
- Route the actual workpiece, maintaining steady, even pressure.
- Feed the wood against the bit rotation direction.
- Allow the bit to stop completely before removing the piece.
- Inspect the edge and sand lightly if needed for perfection.
Essential Tools and Accessories
- Router table: provides stability for small or difficult pieces.
- Edge guides and fences: ensure straight, consistent profiles.
- Featherboards: hold wood against the fence safely.
- Dust collection: reduces airborne sawdust and improves visibility.
- Hearing protection: routers produce 85 to 95 decibels of noise.
- Bit storage: organize bits and protect cutting edges from damage.
Common Mistakes to Avoid
Feeding too fast causes tearout and rough edges. Slow down if you hear the router struggling or see splintering. Running the router too slowly creates burn marks on the wood. Increase speed slightly if you notice darkening along the cut edge. Loose bits spin out during operation—always verify the bit is fully seated and tightened.
Skipping the test cut wastes expensive materials and time. Always test on scrap wood first. Ignoring grain direction leads to tearout on figured woods. Study the grain pattern and plan your routing direction accordingly. Using dull bits forces excessive pressure, reducing control and increasing injury risk. Replace or sharpen bits regularly for best results.
Key Takeaway: Test on scrap wood, feed steadily, and maintain sharp bits for consistent, professional edge profiles.
Recommended Products
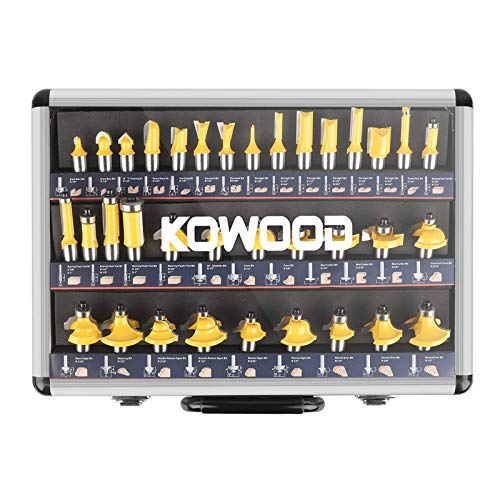
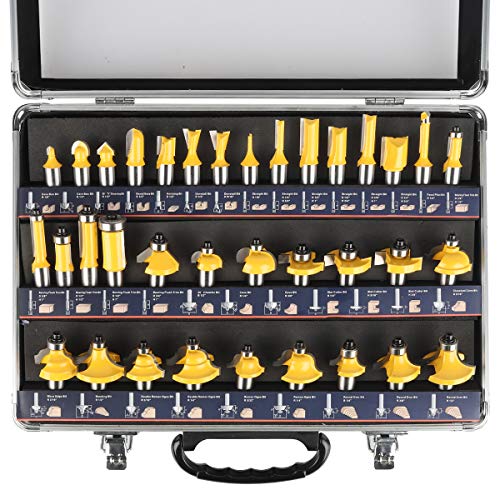
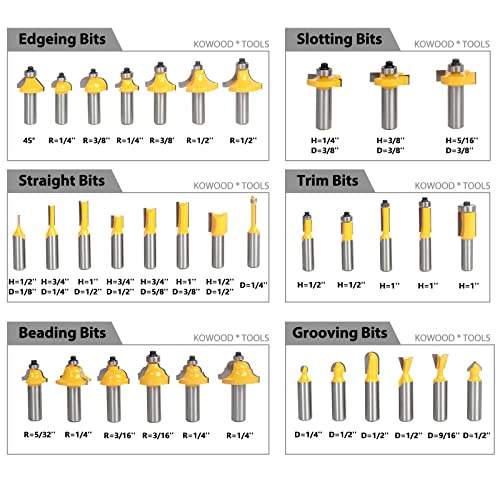
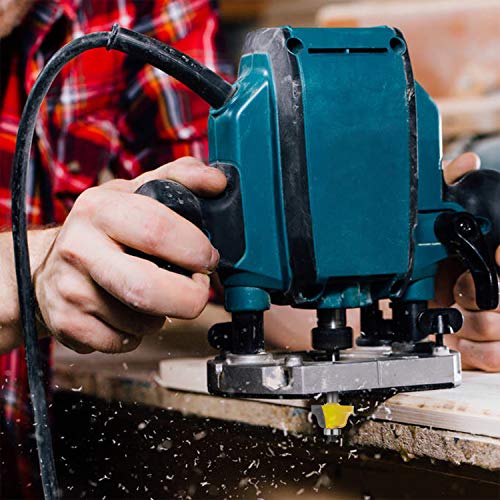
KOWOOD Router Bits Sets 35B Pieces, Tungsten Carbide Router Bits 1/2 Inch Shank with Aluminum Storage Case, T Shape Wood Milling Cutter for Woodworking
- KOWOOD 35 pcs Router Bits Sets is a common variety to cover most woodwork needs
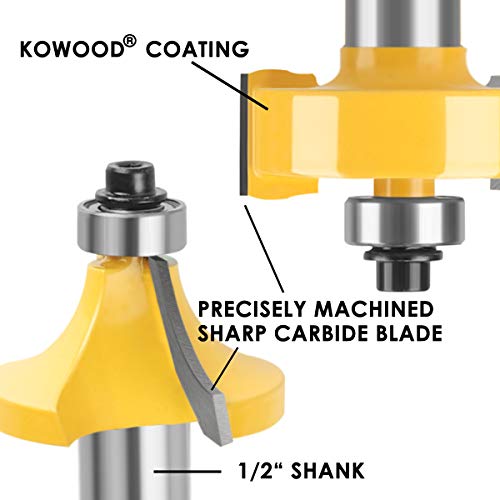
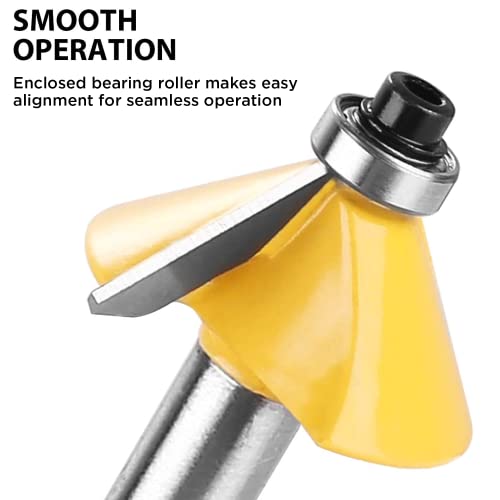
- C2 Carbide for clean and accurate trimming, edging, grooving for all type of wood material
- This 35 pcs Router Bits Sets is the most cost-effective sets. Ideal budget for beginner
- Universal Router Bits Sets 1/2” shank is compatible with all major router instrument (either handheld or benchtop router table) such as KOWOOD, Bosch, DeWalt, Makita, Milwaukee, Porter & Cable, Skil, Ryobi, Black & Decker
- Easy to use. Convenience with Aluminum carry case, If the product falls and causes damage during transportation, please contact us in time, we will have a professional after-sales team to serve you

As an Amazon Associate we earn from qualifying purchases. Product prices and availability are accurate as of the date/time indicated.

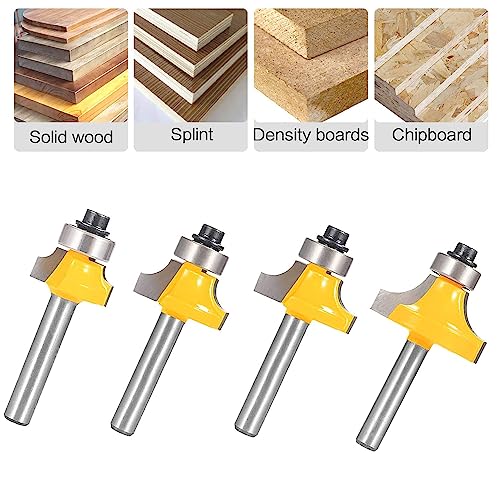
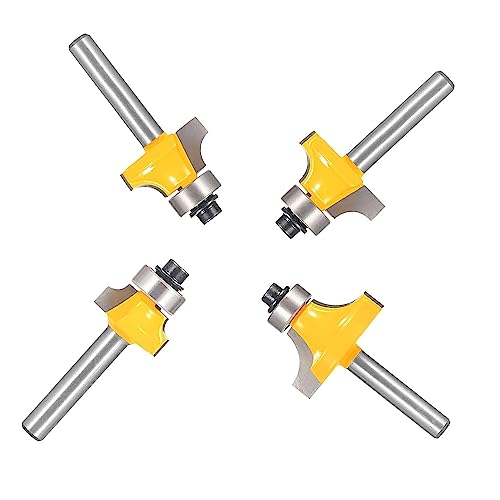
TOTOWOOD Roundover Router Bit Set,4pcs Router bit Set,1/4 inch Shank,Radius in 1/8", 1/4", 3/16", 5/16",Bearing Guide for Rounding Edge bit (4pcs Roundover Router Bit)
- TOTOWOOD Roundover Router Bit Set,4pcs Router bit Set,1/4 inch Shank,Radius 1/8", 1/4", 3/16", 5/16"
- High-quality carbon steel, high-quality tungsten steel alloy, high-tech special grinding process, good blade strength, high hardness, sharp and wear-resistant, higher efficiency, providing clean and sharp cutting.
- The roundover router bit is suitable for cutting a variety of composite materials such as solid wood, hardwood, softwood, MDF, particle board, plywood solid wood and acrylic.
- The roundover router bit set uses premium C2 carbide inserts that are sharper and more durable
- The roundover router bit use on CNC and other automatic routers. Such as woodworking engraving machine, trimming machine, CNC hand-held, table-mounted router, etc.




As an Amazon Associate we earn from qualifying purchases. Product prices and availability are accurate as of the date/time indicated.
Frequently Asked Questions
What router speed should I use for edge profiling?
Most edge profiling work uses 16,000 to 24,000 RPM depending on bit size. Smaller bits tolerate faster speeds; larger bits run slower. Hardwoods benefit from slightly lower speeds than softwoods. Always consult the bit manufacturer’s recommendations on the packaging. Listen to the router sound—a steady hum indicates proper speed and feed rate for your setup.
Can I use edge profiling bits on a handheld router?
Yes, handheld routers work well for edge profiling on accessible edges. Ball-bearing guided bits are ideal for handheld use since they don’t require a fence. Secure your workpiece firmly and maintain steady, even pressure. For small pieces or difficult grain, a router table provides better control and safety than handheld operation.
How often should I replace or sharpen router bits?
Carbide bits stay sharp for hundreds of linear feet of cutting and rarely need sharpening. Replace them when dull—attempting to sharpen carbide requires specialized equipment. High-speed steel bits dull faster and can be sharpened with a file or professional sharpening service. Replace or sharpen any bit showing visible wear or producing rough cuts.
What’s the difference between guided and non-guided edge bits?
Ball-bearing guided bits have a bearing that rides the wood edge, eliminating the need for a fence. Non-guided bits require a fence or edge guide for accuracy. Guided bits are more forgiving for handheld use and shaped edges. Non-guided bits cost less but demand more setup precision and skill for consistent results.
Which wood species are hardest to edge profile?
Figured hardwoods like curly maple and quilted cherry tear easily due to conflicting grain. Tropical hardwoods are very hard and dull bits quickly. Pine and softwoods splinter easily without proper technique. Solve these challenges by using sharp bits, slower speeds, lighter passes, and routing with the grain direction whenever possible.
Should I sand edges after routing?
Light sanding smooths minor imperfections and removes dust residue. Use 120 to 150-grit sandpaper for gentle finishing. Heavy sanding removes the crisp profile you worked to create. A sharp bit and proper technique minimize sanding needs. Sand lightly along the profile direction, not across it, to preserve the shape.
How Can You Select the Perfect Edge Profiling Bits for Your Projects?
Choosing the right bits depends on your project style, wood type, and skill level. Start with versatile roundover bits if you’re new to edge profiling. They’re forgiving, work on most woods, and produce attractive results. Add ogee and chamfer bits as your skills develop. Build a collection gradually rather than buying everything at once.
Consider your typical project types. Furniture makers benefit from ogee and roundover bits. Cabinetmakers use chamfers and roundovers frequently. Decorative woodworkers explore beading and cove bits. Match your bit collection to your actual projects rather than buying based on possibility.
Invest in quality bits from established manufacturers like Bosch, Whiteside, or Amana. These brands offer consistent quality, reliable performance, and good customer support. Budget brands often disappoint with dull edges and inconsistent results. A few quality bits outperform numerous cheap alternatives. Check reviews on woodworking forums before purchasing unfamiliar brands.
Storage and maintenance extend bit life significantly. Keep bits in a protective case or organizer. Clean bits after each use to remove resin and pitch. Store in a dry location to prevent rust on steel components. Sharpen or replace bits promptly when they dull. Proper care keeps your bits performing optimally for years.
Key Takeaway: Start with roundover bits, invest in quality brands, and build your collection based on actual project needs.
What Final Insights Will Improve Your Edge Profiling Success?
Edge profiling transforms ordinary woodworking into professional-quality results. The best bits for 2026 combine carbide durability with ball-bearing guidance for foolproof results. Roundover bits suit most projects, while ogee bits add elegance and chamfer bits provide modern aesthetics. Proper speed, feed rate, and technique matter more than expensive equipment. Sharp bits and consistent practice build mastery quickly.
Start small with simple profiles on softwoods. Progress to hardwoods and complex profiles as your confidence grows. Test every setup on scrap wood before committing to your project. Document your successful settings for future reference. Join woodworking communities online to learn from others’ experiences and troubleshoot challenges.
Edge profiling is one of the most satisfying woodworking techniques. Transforming sharp, utilitarian edges into beautiful, refined profiles elevates your entire project. With the right bits, proper technique, and consistent practice, you’ll create professional results that impress. The investment in quality bits and learning pays dividends through years of rewarding woodworking projects and satisfied clients.
For related guidance on woodworking tools and techniques, explore our comprehensive guides on what tools you need to start wood turning and the best water-resistant wood glue for outdoor projects. These resources complement your edge profiling knowledge and support your overall woodworking development.




Write Your Review
No reviews yet. Be the first to share your experience!